F-104G Belonging to AMI 3rd Wing based in Villafranca, circa 1980- From Italeri kit in 1:32

Ad: This forum contains affiliate links to products on Amazon and eBay. More information in Terms and rules

al49

Tech Sergeant
1,552
338
Dec 16, 2009
Milan, Italy
Hello everybody,
again I started to build a subject not belonging to the WW2 era, I hope you will forgive me for that.
But there are at least two reasons. First this bird was very iconic among Italian post war aviation and, second I wanted to replicate a model I built in the late 80s and do ita at a possibly higher level.
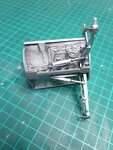
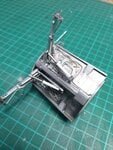
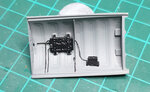
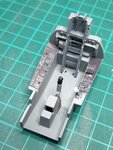
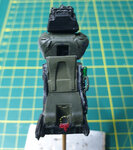
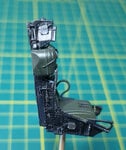
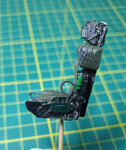
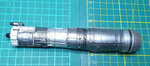
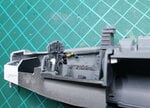
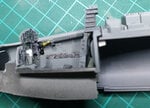
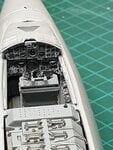
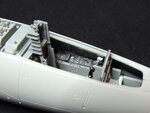
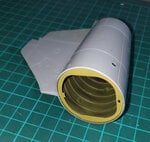
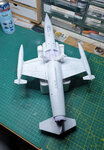
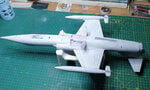
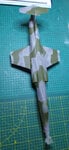
Let me tell you something about that model. It was based on the Hasegawa 1/32 kit with some scratch-building, namely the Orpheus recce pod. Additionally, whilst Italian roundels were available, squadron badges and stencils weren't, so I had to draw them with China ink on coloured decal paper. Here some picture that, at that time, were taken in my kitchen against a very bad background.
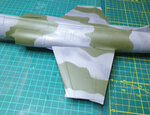
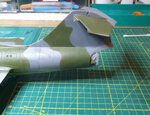
I will be back soon with wip pictures of the new build.
F 104 b.jpgF 104 g.jpgF 104 h.jpgF 104 l.jpg
 
Here some picture of the new F-104G project.
In addition to the Italeri kit, I used Eduard F-104G Interior (33327), Brassin MB.7 Ejection Seat, Brassin Exhaust nozzle early and Profimodeller pitot pipe.
Alberto
 

Attachments

  • 20201213_162830.jpg
    20201213_162830.jpg
    1.3 MB · Views: 85
  • 20201213_162838.jpg
    20201213_162838.jpg
    1.3 MB · Views: 97
  • 20201213_162902.jpg
    20201213_162902.jpg
    552.7 KB · Views: 96
  • 20201213_162914.jpg
    20201213_162914.jpg
    1.2 MB · Views: 98
  • 20201213_163109.jpg
    20201213_163109.jpg
    1,001.8 KB · Views: 104
  • 20201213_163135.jpg
    20201213_163135.jpg
    495.5 KB · Views: 107
  • 20201213_163201.jpg
    20201213_163201.jpg
    522.1 KB · Views: 102
  • 20201215_150630.jpg
    20201215_150630.jpg
    623.8 KB · Views: 101
  • 20201218_231739.jpg
    20201218_231739.jpg
    890.1 KB · Views: 100
  • 20201218_231734.jpg
    20201218_231734.jpg
    687.1 KB · Views: 96
  • 20201219_165909.jpg
    20201219_165909.jpg
    719.1 KB · Views: 103
  • DSCN2932.JPG
    DSCN2932.JPG
    1.1 MB · Views: 107
  • IMG-20201213-WA0024.jpeg
    IMG-20201213-WA0024.jpeg
    569.7 KB · Views: 101
Sorry, I didn't realised that a few photos were quite big!
 
Looking good so far Alberto.
I have the same kit, to do as a Netherlands aircraft - when I find space to put it !!
Get to work man! Jets do not have my main intrest but the Starfighter is a thing of power and beauty (and loudness....very loud brawler. Have a few stories about that). Specially in KLU dress.
 
I was just looking at the kit yesterday, and want to get started on it. But, apart from my hand not working properly at the moment, I still have a number of other projects, including commission builds, which need to be done first.
It will happen though, eventually !!
 
I was just looking at the kit yesterday, and want to get started on it. But, apart from my hand not working properly at the moment, I still have a number of other projects, including commission builds, which need to be done first.
It will happen though, eventually !!
Hmmm.. yeah... kinda ok with that. Your hands need a good talking too. Buggers need to know that delicate work is good for them and they should quite the bs.
Anyway i wil remind you kindly from time to time to build this lawn dart.
 
More pictures from the w.i.p.
The big issue I found with this kit is that Italeri offers three options for the final set-up of the model: engine glued inside of the fuselage with the tail on its trolley, engine and tail each on its trolley and everything glued together. I was pending for the first option with a removable tail, but Italeri didn't provided any mean to keep the tail linked to the fuselage when they are together (i.e. little magnets like in some Tamiya kits) and I was unable myself to find a suitable solution, so I had to decide to glue the tail to the body and the work I've done on the engine will be visible only on photos. Shame!

20201230_174342.jpg20201230_174346.jpgIMG-20201230-WA0030.jpeg
 
I had looked at this too, and thought perhaps that some pins could be fitted, to hold the tail in place, but it's doubtful.
 
Hi everybody, some more steps on this w.i.p.
Model primed and later given the camou.
More to follow
 

Attachments

  • 20210108_001148.jpg
    20210108_001148.jpg
    728.7 KB · Views: 91
  • 20210108_001214.jpg
    20210108_001214.jpg
    436 KB · Views: 84
  • 20210109_170437.jpg
    20210109_170437.jpg
    953.6 KB · Views: 94
  • 20210109_170450.jpg
    20210109_170450.jpg
    811.4 KB · Views: 97
  • 20210109_170517.jpg
    20210109_170517.jpg
    663.8 KB · Views: 89
  • 20210109_170520.jpg
    20210109_170520.jpg
    831.2 KB · Views: 92

Users who are viewing this thread

Back