Fw 190D-9 "Red1" of JV44 Lt. Heino Sachsenberg....

Ad: This forum contains affiliate links to products on Amazon and eBay. More information in Terms and rules

Status
Not open for further replies.
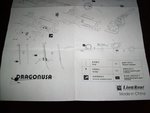
The RED 13 are in a different shape from each side Dan....that's the mistake that they've done before, making the 13 similar on both sides....
 
Found some info out on the Hasegawa dacals and their "incorrectness"...

"I know most modelers hate Hasegawa decals, but I used them and want to report that those included with this kit represent a quantum leap in improvement over previous Hasegawa decals. Several "experten" have stated that they are "wrong" for Sachsenberg's (Red1) aircraft so I did a little research to find out what was "wrong" with them. I identified two "issues" with the kit decals: 1) the bottom striping on the JV44 aircraft was done somewhat haphazardly and they were not of equal width as is found on the Hasegawa decals; and 2) there are two "typos" on the humorous German saying on the fuselage side consisting of a grand total of two letters!

Well, I knew that there was no way the white stripes would cover the red (I have yet to find any white decals that are opaque enough to not turn "pink" atop a red base) plus it is far easier to paint these stripes than rely on decals. So I cut my masking tape strips using the old MK.I eyeball to provide a bit of variety in the tape width. Problem #1 solved quite easily. With regards to the "typo's", aftermarket decals are provided for by Eagle Cals (to name one) to correct the "wrong" German inscription on the side. So I had the choice to spend $15 on decals to correct two letters or buy a 12-pack of Sierra Nevada Pale Ale. Unfortunately, I was quite thirsty when I made the decision so guess which one I decided (yum, yum, yum, the beer was quite cold and very good!). Seriously, the Hasegawa decals are very good and if you are not interested in spending a whole lot of beer money I'd stick with them. But "your mileage may vary" so if you'd rather not drink valuable beer, be my guest and buy aftermarket."
 
Here you see the different shape of the 13's on Eagle's decal sheet....the correct ones...

JV44.jpg
 
U keep saying Red 13 Lucky, and I dont have the instructions or decals for 13... Its either Red 1 or 3, and I like Sachsenbergs Red 1 better...

As far as Dortenmanns crate goes, I like Black 1 the best with the Wavy Gruppe symbol the best....
 
While there is no record of these aircraft ever entering combat against Allied fighters, they - like everything involving JV-44 - have become the subject of enduring interest by modelers around the world. The unit had a sense of humor, since each aircraft had an amusing "dark humor" slogan on it. "Red 1," a Fw-190D-9 carried the slogan "Verkaafts mei Gwand 'I foahr in Himmel" ("Sell my clothes, I'm going to heaven") flown by Staffel Kapitaen Sachsenberg; "Red 3," a Fw-190D-9: "Im Auftrage der Reichsbahn" ("By Order of the State Railway") a reference to the fact a shot-down pilot could travel free on the state railways to rejoin his unit; Red 4, a Fw-190D-11: "Der nachste Herr,deselbe Dame!" ("The next man, the same woman"); and "Red 13," a Fw-190D-9: "Rein muss er wen wir beide weinen" ("In he goes and then we both cry").
 
U keep saying Red 13 Lucky, and I dont have the instructions or decals for 13... Its either Red 1 or 3, and I like Sachsenbergs Red 1 better...

As far as Dortenmanns crate goes, I like Black 1 the best with the Wavy Gruppe symbol the best....

:lol: That's alright then mate....:lol: I only knew the mistakes made with 13, had no idea about the ones made on 1....
I've got Eagle's sheet for the four of them, in 1/48, would look great with the lot of them sitting on a shelf, eh?8)
As with 13, you know my obsession with that # on "my" aircrafts...:lol:
I'd do the 1, for Sachsenberg, if I were you...
 
Ya, I remember ur infatuation with 13 man, and I love ur idea of doin nothing but #13 for models....

Havin all 4 on a shelf would indeed look badass.... But as far as can be recalled, not a single aircraft was confirmed shot down by one of these red bellied Zirkus Platsschutzstaffel of JV-44....

However:

It appears that Jagdverband 44's last victory may have been scored by Hptm. Faber while flying Rote 13, who claimed a P-47 shot down over Bad Abling while on a flight to pick up some whiskey! This victory is purported to have occurred on May 4th, one day after JV 44's Me 262's were blown up in the face of the U.S. 3rd. Armored Division at Salzburg*Maxglan. We so far have been unable to confirm this claim against U.S. 9th Tactical Air Force losses listings, though other sources have yet to be reviewed.
 
Not a single kill for the "Papagei Staffeln" of JV44...!? I'm not halfway through my "JV44 - The Galland Circus" by Forsyth...
I thought that they'd at least have a few kills....I'm surprised. :shock: :lol:


Pilotsofthepapageistaffelnjv44.jpg

The for known members of the real Sachsenberg Squadron..
From left: Lt Karl-Heinz Hofmann, Lt Heinz Sachsenberg,
Hptm Waldemar Wubke, Oblt Klaus Faber....
 
There may be a smattering of victory claims here and there, like the one I posted above, but as the records I could find indicate, Sachsehberg had ZERO kills in his red kite....

On 3 March 1945, he had raised his victory total to 103 victories when he shot down P-51 over Hungary. On 16 April Sachsenberg shot down a P-39 for his 104th and last victory.

Later, Sachsenberg transferred to JG 7 to fly Me 262 jet fighters. Here, he briefly led 9./JG 7 before joining JV 44 in April 1945. Sachsenberg was tasked with setting up a Platzschutzstaffel, flying Fw 190 D-9 fighters, to protect the Me 262s during their most vulnerable phases - take-off and landing. The unit was variously known as the Sachsenberg-Schwarm or the Papagei Staffel. Sachsenberg died of complications from the wounds he received during the war on 17 June 1951.
"Wimmersal" Sachsenberg flew 520 missions in recording 104 aerial victories. All but one of his victories were recorded on the Eastern Front.

Aces of the Luftwaffe - Heinz Sachsenberg

If ur reading the book man, spill some of the details about the Platzschutzstaffel... Hurry up and get to the parts that matter to ME dammit!!!
 
Need to wait two weeks then buddy, the book is in Glasgow and I'm in Sweden....:lol: Any questions just let me know and I'll check the book...

Since you can probably soon buy a D-9 new, maaaaan it would an awesome sight with 4 Papagei Staffel D-9's flying again....:shock:
 
Took some shots of the Photo Etch parts.... Never seen these things, let alone played with them, paint them or install them...

I got some emails out to our resident experts Wayne and Wojtek, but anyone else got some pointers/instructions on how to utilize them???
 

Attachments

  • 005.jpg
    005.jpg
    79 KB · Views: 185
  • 003.jpg
    003.jpg
    85.2 KB · Views: 317
At first good choice to build a Dora, but why in gods name always this Papagaeinbirds. There were 750 in use.

Ok, my personal thoughts :))

For the PE parts i think i would use only the half, e.g. at first you should install the round thing for the Luftansaugstutzen, and of course you should the interior stuff. for the loop antenna you can use - i would do it - aluminumfoil , and for the morane antenna you should take a wooden tooth stick an form it with a knife, cause in original most of this part was wood,too.

greets

Thomas
 
Introduction
Photoetched details are small pieces of steel, brass or copper, etched with various chemicals or burt with a laser (the latter can provide 3D parts, and are very realistic). Because plastic is fragile, it can not be made thin enough to represent chains, gun sights, etc. Photoetched details are used by just about all long-time modellers to ive a very realistis finish. The details themselve are no wonder, and proper use is required to give a good look.

Seperating
The photoetched details are attached to a fret, the same way the plastic is attached to the sprue. The best way to cut them lose is to use a rounded knife blade (I use a no. 10 blade). They must be cut on a hard surface, such as a steel or glass plate, or a cheramic tile, or else they will bend. First, cut about 0.5 mm. from the part, and the remove the remaining fret with a pin file or knife.

Bending

Drawing explaining how to get sharp edges while bending photo etched parts Photoetched details often need to be bended, in order to give the appearence of crates, fastening clips, etc. Because the metal is so thin, repeated bending will cause the metal to break. Especially steel will easily break. Heating the piece with a flame first will make the part softer, thus making it possible to bend the part more, but will also make it more likely to bend in the wrong place. Obviously, the heating should be done carefully, so as to not melt the metal.

To bend a part correctly is probably the hardest thing about photoetched details. The best way to do it is to place the part on the edge of your steel plate/glass plate/cheramic tile, place one straight (no. 11) scalpel blade or the blade from a stanley knife on top of one side of the photoetched part (with the sharp edge of the blade along the line that need to be bended), and another no. 11 or stanley knife blade under the other side in the same manner. Then, lift the lower blade to the required angle, while holding upper blade steady. This should give you a sharp edge.

Attaching
When attaching the part, it must be completely free of grease and smudge, so whas it in a small dish (preferred over a bowl or cup, as the parts can be handeled better) with some whasing detergent.

As for glue, there are two types of glue you can use: Cyanoacrylate glue (superglue), or epoxy glue (5 minute is best). The cyanoacrylate glue has different thicknesses, from gel to water-like. The epoxy glue is a two component glue, which must be blended (use gloves) before use, and then applied. Only blend as much as you will need at a time. Is has, as opposed to superglue, no 'bite' on plastic, thus giving a weaker bond (the bond will rarely be stressed, though, so this is unimportant). I find it hard to apply a small amount of this glue, but for very smal and complex parts, it is good, as it is sticky enough to hold the part in place, but it will not glue your fingers to the model. For a thinner consistense you can thin the epoxy glue with water.

The superglue is used directly from the container (although it is better to take a little out on a piece of scrap plastic), and applyed with a toothpick, a piece of this copper wire or (the moethod I prefer) a piece of streched sprue. Only aply the amount of a needle head at a time, or you will not be able to control the part. I prefer the thin type, as it can be applyed while the two parts are held together, after which the glue will run into all the small cracks.

Painting
Painting the photoetched details is done as painting the rest of your model. It might be a good idea to use a primer, but it is not essential.

To find out which methods you like the best, buy an inexpensive photoetched kit, and try it on an old model. After a model or two, you will wonder how you could ever do without photo etch.
 
but why in gods name always this Papagaeinbirds.
Cause it seems from what I can see on the internet that the Dortenmann crates are waaaaaaay more publicized and popular for builds.... The Sachsenberg Staffle crates seem to be the less popular....

And besides, I dont have to spend 15 more bucks to get new decals...

And I want to impress Wuger and Wayne....

And myself...

Piss on all u other turds....
 
Status
Not open for further replies.

Users who are viewing this thread

Back