GB-47 (ABANDONED) 1:72 Spitfire Mk IXc - WW2 D-Day and After - Western Front

Ad: This forum contains affiliate links to products on Amazon and eBay. More information in Terms and rules

For Alan...

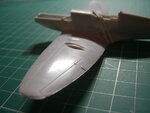
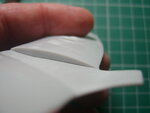
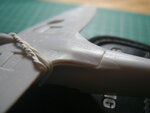
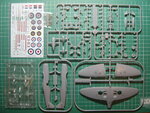
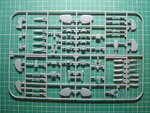
Pics 1-3: Eduard (Aero Team) 1:72 Spitfire Mk.XXI issues (bloated wing thickness, lumpy wing to rear fuse join)
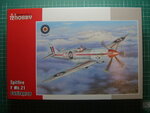
Pics 4-6: Special Hobby 1:72 Spitfire F Mk. 21 kit
 

Attachments

  • STA57063.JPG
    STA57063.JPG
    69 KB · Views: 47
  • STA57064.JPG
    STA57064.JPG
    44 KB · Views: 47
  • STA57065.JPG
    STA57065.JPG
    49.8 KB · Views: 48
  • STA57066.JPG
    STA57066.JPG
    89.3 KB · Views: 50
  • STA57067.JPG
    STA57067.JPG
    173.2 KB · Views: 47
  • STA57068.JPG
    STA57068.JPG
    166.5 KB · Views: 47
I need some advice; I have two options to do the control panel. One is a raised detail panel, the other is flat. I have one decal and I'd like to know if anyone has been able to place a decal over raised detail and have it work. Painting the detail on that panel is way past my skill level.
insturment1.jpg
 
I my opinion, the best but most fiddly option is to cut the decal instrument faces out individually and apply them exactly into the hollows provided on the raised panel. That said, the raised details on your kit seem to be quite exaggerated and so the flat panel might be acceptable. I think the likelihood of the one-piece decal fitting properly onto all that raised detail is slim.
 
the best but most fiddly option
=
a pain in the A$$
Cut out each one; they are 2mm at best; 15-20 times; not mess up once; yea, I think I saw a youtube about dry brushing.
insturment2.jpg

I'll finish details and wash and see which one is better. This kit has the option of open canopy and open door, so can't just hide it in the dark. Still both are viable choices.
 
Hope your choice works out, I probably would cut the decal into sections to fit the raised detail, the retaining the rectangular middle section as one piece then sides and top separate to fit.....however decal straight onto flat surface option is simple and still effective for 1/72....
 
Don't post after this, I posted a problem that I think I can fix. Update very soon..... and now fixed!!!
Sorry for the drama, I had forgotten the armor plate between the seat and frame. After posting my tail of woe, I thought, might as well try to fix it. So I got the seat apart, put in the armor, a touch of paint and got it back together. The instrument panel I chose was the raised detail one on the left.
cockpit3.jpg

This is the cockpit done except for some out of sight bulkheads.
cockpit5.jpg
 
Last edited:

Users who are viewing this thread

Back