Looks good so far!
Navigation
Install the app
How to install the app on iOS
Follow along with the video below to see how to install our site as a web app on your home screen.
Note: This feature may not be available in some browsers.
More options
You are using an out of date browser. It may not display this or other websites correctly.
You should upgrade or use an alternative browser.
You should upgrade or use an alternative browser.
GB-56 1/48 P-38 F/G - Thunderbolts and Lightnings
- Thread starter dneid
- Start date
Ad: This forum contains affiliate links to products on Amazon and eBay. More information in Terms and rules
More options
Who Replied?T Bolt
Colonel
Good to see you back Dale
- Thread starter
- #23
dneid
Staff Sergeant
No updates the last couple of days. Work has me busy. Also, I have been trying out new ideas with chipping and weathering on a piece of card stock. I am very happy I did this. My confidence in chipping has gone way up and my dry brushing skills have returned in spades.
Last edited:
- Thread starter
- #24
dneid
Staff Sergeant
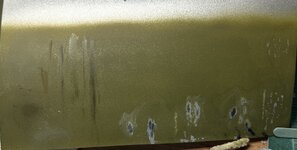
I have spent the last couple of days using a sheet of card to experiment with chipping and weathering with dry brushing. For chipping I did the following:
1) Laid down a coat of black primer
2) Laid down a coat of model metals aluminum
3) Applied a coat of metal varnish
4) Applied chipping fluid
5) Lastly, I laid down a coat of interior green in varying "thickness" across the card stock. Heavier towards the bottom and getting lighter going up.
I waited for each coat to dry before moving on to more coats. After the Interior green was thoroughly dry (waited overnight), I started testing my chipping skills and techniques with NO thinner applied. This is in the second grouping from the right. As you can see, it is heavy handed and clumsy at best.
I then moved on to applying some acrylic thinner (just a drop or 3). I waited for a about 5 minutes then started chipping with different brushes. Far right groupings, upper and lower sections on the card stock. This looked MUCH better IMHO. I was able to control how deep and to what extent I removed Interior Green.
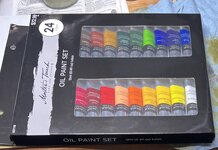
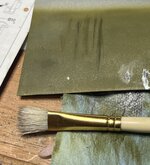
I then moved on to dry brushing with the oil paints from the Master's Touch set and a few tubes I already owned. These are all on the far left of the card stock. The effect can be a bit hard to see in the picture. But, I really liked the effect I am seeing. The second picture shows a tiny dollop of Unfiltered White and the brush I used to smear it around.
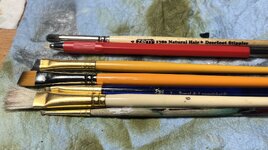
Lastly, here is picture of the weathering brushes I used.
All in all, this was time well spent in learning and improving my skills.
So, between all the experimentation and the airbrushing on my homemade washes I think I am in much better shape with getting ready to dirty this bird up.
Back to more on the build this weekend.
Attachments
Last edited:
Nice work so far!
N4521U
Plastic Pirate
First steps are looking good.
Keep attit!
Keep attit!
F-104nut
Staff Sergeant
Great start on the Lightning 
- Thread starter
- #30
dneid
Staff Sergeant
Vic Balshaw
Major General
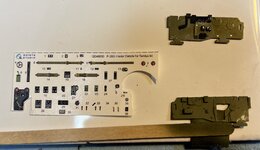
Oh what fun you will have and such a good days work.I am finishing up the cockpit details now. This will be a long day of tiny details decals. I do like the Quinta set though. Here is the parts ready to install.
View attachment 694565
Donivanp
Lieutenant Colonel
Worth the work
N4521U
Plastic Pirate
3D decals? How good are they!
Vic Balshaw
Major General
I like what I have used and would use them again whenever I find them available. 
- Thread starter
- #36
dneid
Staff Sergeant
- Thread starter
- #37
dneid
Staff Sergeant
I sure like what I am seeing. BUT, the decals adhesive takes great liberty with the word adhesive. I have learned to simply wipe it all off and use either medium CA or PVA cement to hold them in place. Now, let's wait and see how things go with all those damned throttle levers tomorrow.3D decals? How good are they!
- Thread starter
- #38
dneid
Staff Sergeant
I sure like what I am seeing. BUT, the decal's adhesive takes great liberty with the word adhesive. I have learned to simply wipe it all off and use either medium CA or PVA cement to hold them in place. Now, let's wait and see how things go with all those damned throttle levers tomorrow.
Donivanp
Lieutenant Colonel
They are freging awesome3D decals? How good are they!
coming along nicely man...
Users who are viewing this thread
Total: 1 (members: 0, guests: 1)

