GB-62 1/48 Spitfire Mk IX - Spitfires (1 Viewer)

Ad: This forum contains affiliate links to products on Amazon and eBay. More information in Terms and rules

pbehn

Colonel
13,138
10,238
Oct 30, 2013
Username: pbehn
First name: Peter
Category: Beginner
Manufacturer: ICM
Model: Supermarine Spitfire Mk.IX
Scale: 1:48
Add-ons: None.


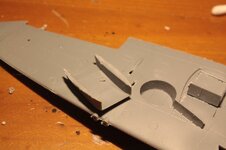
This is the kit. Advertised as a Mk IX and a Mk VII with additional figures and airfield equipment, the two kits are actually identical, with two sets of different instructions and decals.
1720821838833.png
 
So, a little history first. I used to make models aircraft tanks and guns as a kid, also collected all the Airfix Napoleonic era figures. More recently I have made a model a year as a Christmas / birthday present from my wife. The last two Airfic Defiant and Spitfire Mk V had me pulling my hair out, so I thought this kit(s) being cheap considering they have the engines. I built one, not as part of the GB just to mess about with and learn. It was always going to be a dogs dinner because I was playing about with finishes and varnishes etc, which don't really show in the phots. So I had several issues along with others here. 1 the wing fit and gaps. 2 The undercarriage doesn't seem right, just too long. 3 the rear wheel wouldn't go in as per instructions. 4, I think I have terminal cockpit alignment issues, the top of the pilots head rest was offset, meaning to get the canopy on I had to cut some away, even doing that it was still a little offset and couldnt be lined up with the front canopy, since the main canopy was fixed before I noticed, I usd extra paint to fill the gap. I finishd it in PR type colours and US markings just because I had the decals and its a change. Ralph Haus Ralph Haus started.

1720822981880.jpeg
 
Any pic of the real kite you are going to replicate?
Sure, but I felt the abov was necessary to explain why I have two engines and engine bays (thank God I did) for the real kite. I am a sod for making things and then thinking "I wish I had done that or this or something else". The bit about the cockpit is important, I think I learned something which may help others.
 
Well, as a beginner you've chosen a pretty tough kit to tackle in the ICM. The Eduard one will be a much more pleasurable experience, albeit somewhat fiddly in places. Don't hestitate to reach out for help if you need it.
I knew the reputation but figured I would be better off screwing up a bad cheap kit twice before I tackled a nice kit, if that makes sense?
 
Sure, but I felt the abov was necessary to explain why I have two engines and engine bays (thank God I did) for the real kite. I am a sod for making things and then thinking "I wish I had done that or this or something else". The bit about the cockpit is important, I think I learned something which may help others.

OK. Grasped. :)
 
So, I did the main assemblies as per instructions. I use Humbrol enamel paints and was messing about with things. The instrument panel I played with for a week. In the end I put white paint in the dial centres covered with black paint, and used a pin to try to highlight dial features then did the outsides and buttons in a variety of not particularly historically accurate colours. For the cockpit interior I was messing about with various finishes, cockpit green over silver. Humbrol matt black is the blackest mattest matt black since matty black started making paint, everything just looks like a piece of matt black painted plastic so I used some greys and silver to give highlights. The engine bay is a whole story so I will cover that in another post. The one in the picture is the first attempt, started off as per the instructions.
1720825379833.jpeg
 
First issue noted on the first go was a massive step either side of the radiator housings, so I cut away anywhere that may have been touching including most of the matrix in the pix,
First is
1720826617647.jpeg
 

Attachments

  • 1720826623542.jpeg
    1720826623542.jpeg
    595.6 KB · Views: 1
So, being an enthusiastic beginner, learning from my mistakes I took great care to ensure that the top of the pilots headrest was low enough and centred enough allow the rear of the canopy to fit (this will be finished with the cockpit open). I then fastened it with a touch of glue out of sight. While assembling the fuselage with the wings everything was tight, when one part was flush somewhere else wasn't, and then trying to make something fit I heard a "click" it was the glue breaking where I had fastened the cockpit assembly to the fuselage. Drastic action was taken. I removed every bit of plastic that could make the fit "tight". With a view to posting here I marked the areas with red paint and then took off more. Such that only the outside surfaces were untouched. The whole thing then went together MUCH better. The wing gap is still there but not so pronounced and more even and the front and rear edges lined up better AND the top of the headrest is now still below where the canopy will be.


1720827191100.jpeg
 
Any pic of the real kite you are going to replicate?

Maybe I misunderstood your post or didnt explain correctly. My aim is to do the ICM and Eduard kits with the same paints, varnish etc just for me to see the difference in the kits. The Eduard kit will be out of the box in the colours of F/O Irvine F. Kennedy 249 squadron Qrendi Malta 1943. I will do the ICM kit the same colours but either marked as another plane from the same squadron at that time, or even he same plane. Maybe fubar57 fubar57 or others can help?

While I am posting, this is how my first kit turned out, to me it looks far too "leggy", it seems to sit too high and the wheel spindle is below the level of the cover, the cover position on the leg is fixed by two notches in the leg and matching raised slats on the cover.
1720900986385.jpeg
 
And so, on to the engine, what a tale to tell. For the first kit I had no intention of putting the engine in, so took no notice of the instructions which are on thee first page. Obviously, to fix the prop, you have to fix it to the part that goes behind it. That isnt a problem when you arent fitting the engine, just glue the back plate to the end of the two fuselage halves and the cover underneath, you dont need the engine to anchor the exhausts just push them through the gap.

Then on the second kit which I intended to build with engine installed and I looked at the instructions and couldnt figure out how it is supposed to work. You build everything out from the engine bulkhead. how do you ensure the front of the engine and the plate that mounts the prop finish in the correct position?

So, as per post #10 top right I started off as per instructions. However I assembled the fuselage halves and then the bottom cover. With the bottom cover fixed and in good contact all along with the of the two fuselage halves I glued the prop back plate to the bottom engine cover using the front of the two fuselage halves to make sure it was in the correct position. Once that had set, I cut away the sides of the fuselage that represent the side engine covers. Picture below shows what I mean.
1720907614449.jpeg
 

Users who are viewing this thread

  • Back