Hasegawa 1/32 P47D Republic Thunderbolt

Ad: This forum contains affiliate links to products on Amazon and eBay. More information in Terms and rules

No problem Vaughan. If you need the Squadron Signal 'Walk around' book, for cockpit detail etc, let me know and I'll put it on a CD for you.
Isn't Duxford a photographic paradise?!
Thanks for the CD Terry it arrived this morning I've had a quick look and it's going to be very useful with some great reference photos.
Vaughan
 
It sure is, and you're welcome Vaughan. Good to know it arrived in one piece, and hope it proves useful.
Quick question - does the bare metal (presumably with a clear laquer protective coating) also apply to the inside of the 'Razorback' cowlings?
I think I might have seen them in zinc chromate, but later versions in 'metel' finish.
 
Last edited:
It sure is, and you're welcome Vaughan. Good to know it arrived in one piece, and hope it proves useful.
Quick question - does the bare metal (presumably with a clear laquer protective coating) also apply to the inside of the 'Razorback' cowlings?
I think I might have seen them in zinc chromate, but later versions in 'metel' finish.

Thanks Guys

Terry I found this really interesting website Camouflage Markings: Interior Colours of US Aircraft, 1941-45 (Part II)Camouflage Markings: Interior Colours of US Aircraft, 1941-45 (Part II) which covers the interior colours of American planes 41'-45' at the bottom of the page under P47s it states
"Interiors of P47 aircraft cowlings were natural metal. The aluminium in this area was anodised giving a darker and very dull greyish appearance. The engine firewall was left unpainted. Engine mounts were primed in Zinc Chromate Green"
So it looks like I need to dull down the aluminium finish and change the colour of the engine supports. It's nice to get things looking right but then again hey it's just a model so I could leave it.
Vaughan
 
Thanks Vaughan. I'd forgotten about that site, which I'd 'Bookmarked' a couple of years ago!
Overall, it's a good reference, but there are a couple of areas where it's, perhaps not inaccuarate, but provides general information. In some cases, I noticed there are (or were) variations in some of the details provided.
makes sense not to paint those areas, where anodising would be sufficient. And I guess if, on the model, it can never bee seen, then no problem leaving as is.
 
Hi all
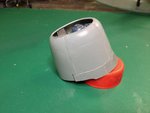
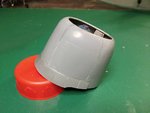
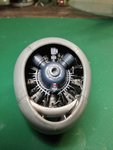
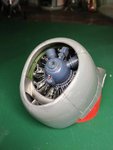
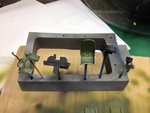
I've been very busy over the last few weeks so very little progress with the P47D. The cowling is no in situ, still some tiding up is required. I'm not a fan of the 4 piece cowling it's a real fiddle to assemble and aline properly. I might have to re-scribe some panel lines.
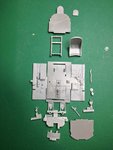
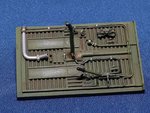
I've now turned my attention to the office, as usual Hasegawa give you plenty of detailed. Don't know if I will get anytime to put it together this side of Christmas but you never know.
Vaughan
 

Attachments

  • 20121221_1054.jpg
    20121221_1054.jpg
    79.9 KB · Views: 163
  • 20121221_1055.jpg
    20121221_1055.jpg
    87 KB · Views: 167
  • 20121221_1056.jpg
    20121221_1056.jpg
    80.9 KB · Views: 157
  • 20121221_1057.jpg
    20121221_1057.jpg
    58.8 KB · Views: 165
  • 20121221_1058.jpg
    20121221_1058.jpg
    52.7 KB · Views: 165
Good stuff Vaughan. The cowling sections look like they were a real pain to sort out, but it certainly looks the biz! The cockpit parts look good too, although I seem to remember some review comments about plain - v - corrugated floor, depending on Block number? Easily sorted if it turns out yours needs the corrugated floor though - bit of plastic strip here, rod there etc.
 
The cowl looks to be a bit of a PITA but you've done a good job of it. Some spark plug wires missing maybe?
 
Your correct Terry the floor pan should look like this(MDC resin kit). I will have a go at converting mine. Andy I think your right there are some wires missing well spotted.
Vaughan
 

Attachments

  • Screen shot 2012-12-21 at 17.21.50.jpg
    Screen shot 2012-12-21 at 17.21.50.jpg
    84.6 KB · Views: 157
Last edited:
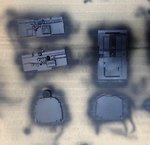
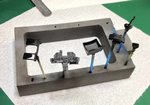
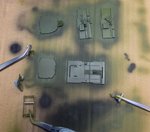
Well Christmas is all but over so I have had the chance to make some progress. I did a bit of research to establish if the floor pan should be smooth or corrugated and I think I can safely say it should be smooth. So the office has had a coat of black followed by interior green. Next step is to paint the detail by hand and then assemble.
Vaughan
 

Attachments

  • 20121229_1059.jpg
    20121229_1059.jpg
    110.6 KB · Views: 152
  • 20121229_1060.jpg
    20121229_1060.jpg
    114.1 KB · Views: 152
  • 20121229_1062.jpg
    20121229_1062.jpg
    106.7 KB · Views: 158
  • 20121229_1063.jpg
    20121229_1063.jpg
    99.7 KB · Views: 148
Last edited:

Users who are viewing this thread

Back