SaparotRob
Unter Gemeine Geschwader Murmeltier XIII
It's coming along beautifully. It will be a superlative build for sure!
Follow along with the video below to see how to install our site as a web app on your home screen.
Note: This feature may not be available in some browsers.
Ad: This forum contains affiliate links to products on Amazon and eBay. More information in Terms and rules
Thank you. It's much appreciated.I have edited that post. I hope it looks like you want.
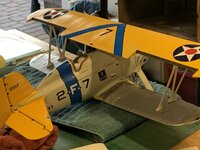
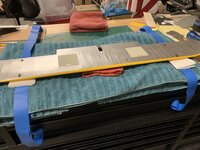
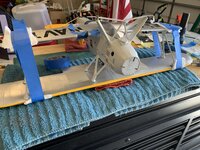
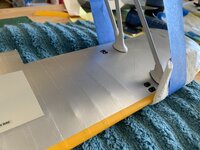
Thank you, sir. Trying out new skills. This scratch build has been more difficult than previous ones. Seems like I take one step back for two steps forward…It's coming along beautifully. It will be a superlative build for sure!
Thank you for your words of encouragement.I can't even sort laundry properly. I am most impressed by your work. It's wonderful watching a masterpiece being created.
Thank you sirExcellent work so far!
Thank youSuperb!
Special:Another magnificent model approaching completion.
Keep the photos coming.