Suggestions For Repairing My Dreadful Rookie Mistake

Ad: This forum contains affiliate links to products on Amazon and eBay. More information in Terms and rules

Now THAT is funny!

Sorry to have missed the exchange and some really interesting ideas. Likely I'll get the opportunity to try all of them, often.

Thanks again, fellas. For a first effort my resultsis not quite reaching mediocrity, but it was fun to do and I'll only get better. If you see in these pics results that screams Novice I am wide open to criticism

I would say not bad. Let's see the close up pics of the final effect.
 
I wondered about that, slaterat. I have a heat gun in the shop that will be used instead of an alcohol lamp - amazing how quickly polystyrene reacts to the flame ... Also a hair dryer but that is for pain control. What type of glue reacted so well? If it was CA, all I can say is TIMING!

I will post the 'after' pics once the adhesive is solid. I used GO2 Gel from Loctite. It gives a very strong bond and is nicely gap filling (so much for my ability to cut a perfectly horizontal cut), but it takes 24 hours to reach max bond.

Something else I will do differently: I used a 20 gauge hypodermic needle for the support pin. Those suckers do not bend! A more flexible pin, with a small concession in strength, would have given an opportunity for small adjustments. Something I'll keep in mind next time.

As of now the repairs are solid, but I won't have the opportunity to remove the tape until late this afternoon. I'll clean up the old girl and have her looking like a lady and post pics.

Have a great day, y'all!
 
Good work Chip, it looks very Hellcatish now. I just found a center square for locating the center of circular objects

Center Square, 2-1/2 Inch Capacity

Thanks fubar! I've seen that tool (one of the few tools MicroMark, Amazon and far too many others to recall, has not sent to me - much to the annoyance of SWMBO (She Who Must Be Obeyed) - as 1/32 generally doesn't have circular parts big enough for the tool to work accurately. If your experience is otherwise do tell! I'll simply blame you for the purchase.

I'll post the 'afters' later this evening.

Thanks Again, y'all!
 
I've never used one but just started using the method Wojtek(Wurger) showed and only then for hollowing out exhausts and MGs. I really need to hit MicroMarks site more often
 
Thanks fubar! I've seen that tool (one of the few tools MicroMark, Amazon and far too many others to recall, has not sent to me - much to the annoyance of SWMBO (She Who Must Be Obeyed) - as 1/32 generally doesn't have circular parts big enough for the tool to work accurately. If your experience is otherwise do tell! I'll simply blame you for the purchase.

I'll post the 'afters' later this evening.

Thanks Again, y'all!
 
I would say not bad. Let's see the close up pics of the final effect.
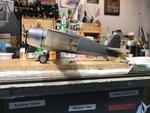
Close ups as promised. Ignore the decal silvering on the prop - the Pledge is on deck.

The 'Cat looks a little pigeon-toed but I think both gear are angled in the same direction. Most certainly a good learning situation with a modest cost to the model. I don't think I'll repeat this gaffe any time soon!

Thanks everyone for all input! With your experience and direction I managed to save the project, as I really didn't want to have my kit displayed with such a glaring mistake.

Honestly, who here would not have noticed?

309B3D76-FCED-44B0-B5CB-224734A1EC8D.jpeg
9F4D4F25-076F-4325-8EEE-1597CE5BA778.jpeg
9A4EBDFF-D275-4AA5-BF70-C51C444444DE.jpeg

FEA5E840-76CE-425C-906C-7901230789B4.jpeg
A5BFDF78-9FD8-40F1-AB9E-6CEA950D0268.jpeg
02FE8B85-C509-4452-BE01-F5F8B000A1BF.jpeg
 
Last edited by a moderator:
That is the reason why I will not use a hypodermic needle for the post in future situations. The needle is inflexible which is why I chose to use it. It did not occur to me that the rigidity would prevent adjustment. I found, more or less, the center of each piece. Drilling without deviation from the center line down the length of the struts is another matter. I have to live with it, no?

Does this pic show what you need to answer your question?

image.jpg
 
Last edited by a moderator:
Yes this pic answered my question. THX. Looking very good. If these wheel bay doors can fit, it means all was done properly.

Great ! :thumbright:
 
Thanks for everything Wurger. Your opinion, and all others, means a great deal!

Doors fit, but off to a granddaughter's christening for the afternoon. Doors on permanently (again) tonight.

I'll be back to further my education!
 
I've fixed bigger mistakes than that, lol. I have disassembled whole fuselage halves just by heating with a hair blower, the glued areas just fall apart. Might be a little tight where the struts are located, but a bit of heat could release them.

Slaterat - Does the blow dryer trick work with the plastic cements or just CA? I was looking at an old Matchbox Supermarine Stranraer model (another Supermarine aircraft that has as much in common with a Spitfire as a bag of hammers ;) ) that is still in the box and found that I had glued a few pieces together many years ago but now want to do more in the fuselage before closing it up.
 

Users who are viewing this thread

Back