What Are Your Panel Scribing Tips?

Ad: This forum contains affiliate links to products on Amazon and eBay. More information in Terms and rules

Mr. Ed

Airman 1st Class
153
0
Oct 27, 2009
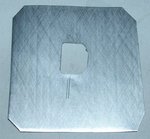
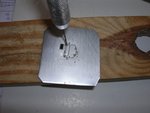
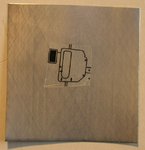
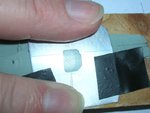
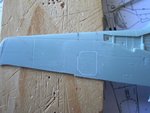
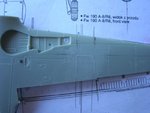
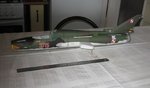
After a long hiatus from aircraft modeling, I'm now, for the first time in my adult life, making a real effort to restore detail that has been sanded off (this is almost never a problem with armor and figures, my former loves). I have a panel scriber and a steel straightedge, and I've figured out one handy thing: Put 2 sided tape on the straightedge to help prevent it from slipping. I've also been working at making my own tools to help guide my scribing, namely taking pieces of metal and cutting them down to size, since my straightedge is too long. Let me tell you, this has given me a healthy appreciation of why we mostly work with plastic, and the relatively softer, styrene stuff at that. Big surprise here - metal is a lot harder to work with! As the sparks and metal chips went flying into my face and things that would take 5 seconds were taking me 20 minutes I realized why it's the called the International PLASTIC Modeler's Society.

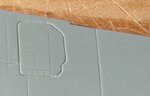
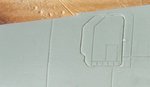
How do you restore lost detail? Specifically, how do you make straight lines and prevent your tool from wandering off course?

I'm all ears over here.
 
I use dymo tape and templates, razorsaw,panel scriber ,Needle

panel scriber for straight lines
Needle for circles and other shapes
razorsaw for the lines around the fusalage
dymo tape as a guide

Piet
 

Attachments

  • pan.jpg
    pan.jpg
    6.5 KB · Views: 250
  • zaag.jpg
    zaag.jpg
    69.9 KB · Views: 267
  • tape.jpg
    tape.jpg
    40.7 KB · Views: 247
  • tem.jpg
    tem.jpg
    16 KB · Views: 266
I use exactly the same tools. But my panel scriber is of Trumpeter one.Also I use a thin nedle for that.
 
Questions for Wurger and Piet:

Can you push your scribing tool up against the dymo tape without it cutting into the tape? I've found that my razor saw makes lines that are too wide. Is yours very thin? How do you guide where the scriber goes? I've found that a needle or xacto blade makes an incision that's noticably different than the ones molded onto the plastic. Is this your experience as well? How do you make sure that the beginning and end of the lines you're scribing match with the ones molded onto the model? Do you use metal straightedges or not?
 
I use a metal (flexible) ruler and thin aluminium strips made of beer cans for engraving of straight lines. For hatches, control panels , inlets etc...I use metal templates that are offered by many manufacturers. Also I make them by my hand with the thin aluminium sheets from beer cans.

Here an example....
 

Attachments

  • szablon1c.jpg
    szablon1c.jpg
    140.1 KB · Views: 242
  • szablon1b.jpg
    szablon1b.jpg
    92.2 KB · Views: 255
  • szablon1a.jpg
    szablon1a.jpg
    101.6 KB · Views: 246
  • szablon1.jpg
    szablon1.jpg
    110.7 KB · Views: 252
  • wing5e.jpg
    wing5e.jpg
    93 KB · Views: 271
  • wing5g_.jpg
    wing5g_.jpg
    70.6 KB · Views: 248
  • wing5g.jpg
    wing5g.jpg
    70.9 KB · Views: 253
  • wing5f_.jpg
    wing5f_.jpg
    99.5 KB · Views: 262
  • wing5f.jpg
    wing5f.jpg
    86.6 KB · Views: 258
Great tip about using the aluminum from cans. It's time for me to go drink some beer!

Okay, I'm more relaxed now and ready to scribe some lines. But I still have a few questions. My biggest problems with this are getting the line I'm scribing to match the remnant of the one I'm restoring in width and depth, and to make sure it starts and ends where the kit's lines start and end. In other words, I have a hard time seeing exactly where I'm scribing until it's too late. Also, I have a hard time seeing where I have scribed while the straightedge is still in place. If I take the straightedge away, I'm afraid I won't be able to place it back again exactly where it was if I need to make a few more passes.

Here's some more gripes: It's hard to estimate how many passes are necessary to get the same width and depth of the kit line I'm matching. The article's tip about drawing each line out with pencil is well taken, however we're working with very small areas here, and I have a hard time estimating exactly where my scribing tool will be relative to the straightedge and relative to my drawn line (the pencil's line is always going to be a little different than the scribing tool because of the relative size of the two impliments. I've even thought about trying to sand down a pencil so that it will draw its line at the same distance to the straightedge as my scriber).

Also, I find that the only way to keep my lines straight is to have the scriber pressed against the straightedge at all times. This is impossible with tape and with anything less than a metal straightedge the odds of the tool cutting into it's guide is high.

Do you catch my drift here? What are your thoughts?
 
i have no problem with the tape,maybe you should not press so hard when scribing ,
And of course i am doining it for a few years now (trial ans error)
Piet
 
Great tips guys!

I use a cut-down aluminium venetian blind as a ruler/guide, as flexible yet fairly strong (and free! - Ivett's mum threw her blinds out, so I grabbed a couple of the foils), and needle or metal worker's scriber for scribing, depending on thickness of line desired.
 
Great tip, a4k. I think the problem I've been having is that my scribing tool doesn't cut right next to the guide as it sits a little far out. I've also encountered a problem with the thickness of the guides I've been using. My little steel ruler seems perfect, but is so long that it can be awkward to work with. I tried the tin can trick this week and found that it's too thin to make for a good guide. The guide, or straightedge, is the key thing for me. I can't wait to tear up the next venetian blind I see!
 
A little steel ruler ...is so long... Sorry but I can't grasp. Or it is small or too long..... How long ruller do you need to be handy? My one is 30cm long and I like to engrave straight lines with this guide.
These lines on the stabilizer and elevator were scribed with its help.
 

Attachments

  • Bf109F MC stery1.jpg
    Bf109F MC stery1.jpg
    75.4 KB · Views: 201
  • Bf109F MC stery1a.jpg
    Bf109F MC stery1a.jpg
    78.2 KB · Views: 212
  • Su22M4_fuselage5.jpg
    Su22M4_fuselage5.jpg
    46.1 KB · Views: 214
Last edited:
Yep...but quite flexible. I can bend it enough to engrave lines on wings, along a fuselage etc.....
 

Attachments

  • IMG_0002.jpg
    IMG_0002.jpg
    48.1 KB · Views: 162
  • Dscn0374.jpg
    Dscn0374.jpg
    68 KB · Views: 142
  • Dscn0376.jpg
    Dscn0376.jpg
    72.3 KB · Views: 160
Last edited:

Users who are viewing this thread

Back