Navigation
Install the app
How to install the app on iOS
Follow along with the video below to see how to install our site as a web app on your home screen.
Note: This feature may not be available in some browsers.
More options
You are using an out of date browser. It may not display this or other websites correctly.
You should upgrade or use an alternative browser.
You should upgrade or use an alternative browser.
1/48 Classic Airframes Heinkel He-51
- Thread starter Grant Barr
- Start date
Ad: This forum contains affiliate links to products on Amazon and eBay. More information in Terms and rules
More options
Who Replied?Good work so far!
- Thread starter
- #23
Grant Barr
Senior Airman
Happily I did get to spend some time at the workbench this weekend. Not a lot of progress to show, but still moving forward.
My next task was to mount the undercarriage legs. As you would expect, the fit of the legs to the fuselage/wing joint was not the best. The profile match of the top of the undercarriage part with the fuselage was not quite right, with some careful re-profiling of the top of the leg required to get a decent match. The other issue I had with this area was the lack of a "positive" joining mechanism. The kit simply requires offering up the leg to the fuselage as a butt-joint to be glued on. The problem here was because the fit was poor, there was no real way to attach the part and allow for some adjustment to the position and alignment of the undercarriage leg. My solution was to put a tiny styrene rod "pin" into the leg that would slot into the fuselage. This way I could initially position the leg via the pin and then make any adjustment to angles and position as required without fear that the part would just fall off.
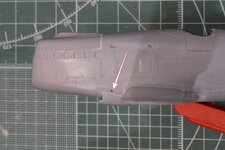
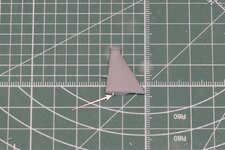
The two shots below show the locating hole in the fuselage and the pin I added to the undercarriage leg.
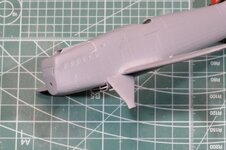
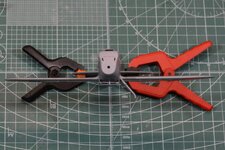
The next two show the undercarriage leg mocked up and aligned prior to gluing into place. As you can see the pin made it much easier, allowing me to keep the part in place whilst ensuring the positioning and alignment would be correct.
The LHS leg has been glued into position now and I am working on the RHS at the moment, no photos taken of this side as yet.
This week looks to be pretty busy, so I may not progress much before next weekend. I may steal a few minutes here and there, but given how slow progress is when the fit of every part is poor, then I don't anticipate much to report.
As always, I appreciate everyone looking in and offering thoughts and feedback.
My next task was to mount the undercarriage legs. As you would expect, the fit of the legs to the fuselage/wing joint was not the best. The profile match of the top of the undercarriage part with the fuselage was not quite right, with some careful re-profiling of the top of the leg required to get a decent match. The other issue I had with this area was the lack of a "positive" joining mechanism. The kit simply requires offering up the leg to the fuselage as a butt-joint to be glued on. The problem here was because the fit was poor, there was no real way to attach the part and allow for some adjustment to the position and alignment of the undercarriage leg. My solution was to put a tiny styrene rod "pin" into the leg that would slot into the fuselage. This way I could initially position the leg via the pin and then make any adjustment to angles and position as required without fear that the part would just fall off.
The two shots below show the locating hole in the fuselage and the pin I added to the undercarriage leg.


The next two show the undercarriage leg mocked up and aligned prior to gluing into place. As you can see the pin made it much easier, allowing me to keep the part in place whilst ensuring the positioning and alignment would be correct.


The LHS leg has been glued into position now and I am working on the RHS at the moment, no photos taken of this side as yet.
This week looks to be pretty busy, so I may not progress much before next weekend. I may steal a few minutes here and there, but given how slow progress is when the fit of every part is poor, then I don't anticipate much to report.
As always, I appreciate everyone looking in and offering thoughts and feedback.
Crimea_River
Marshal
Good solution, one that should have been thought of by the kit maker.
Vic Balshaw
Major General
Nicely done. 
fubar57
General
Moving right along
- Thread starter
- #28
Grant Barr
Senior Airman
Despite a busy week I did manage to do a little bit of work on this project. As I mentioned in the last post the fit of most of the parts is reasonably poor or just not well thought out.
First up the undercarriage legs where they joined with the fuselage were just a plain butt join with no indication of being faired into the fuselage, which is a feature of the real aircraft. So out came the Tamiya and Mr Surfacer again to fill and smooth the legs to the fuselage. The results can be seen below.
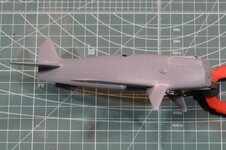
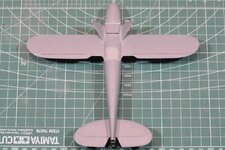
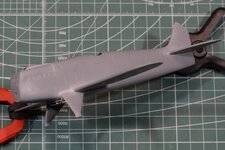
I don't think it's faired in quite as well as that shown by pictures of the real aircraft. I'm sure I've used more filler on this kit than any other I've built - at least my skills in this area are being tested!!
The natural next step is to put together the wheel spats. Like a lot of kits with spats the instructions call for sandwiching the wheel on two stubs protruding from the inside of the spat halves. As you would now come to expect these stubs were pretty poorly molded, so much so that I decided to remove them and replace the whole set up with a brass axle that I will install and patch the end to hide it once glued into place. The next couple of shots show the wheel and spat set up and the remodelled nose panel subsequent to some excellent photos and feedback from Wurger
and
 Crimea_River
.
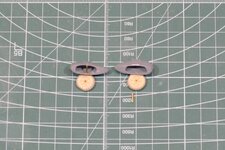
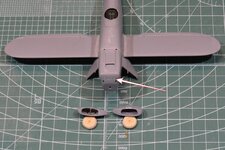
I've highlighted with the arrow where I have placed some very fine stretched sprue to indicated the four hinges on the front of the nose panel. I simply glued these over the holes that I had previously made after thinking the dark shadows were actually holes.
The other task I managed to get done earlier in the week was to thin down the trailing edges of all flight surfaces. I think I mentioned it before, but the part thickness for the flight surfaces are quite thick (probably too thick) across the board and this is really apparent when looking at trailing edges. Each wing/stabiliser has now been thinned without losing too much of the wing rib and stretched fabric look. Tedious but necessary work in my opinion. I've not taken any shots specifically showing this work but it should help make the final product look that tiny bit more realistic (at least I hope so).
That's pretty much as far as I have gone this weekend. I'd like to think I can get some time at the workbench tomorrow, but I am certain that SWMBO will have a list of chores for me to complete once I've done my early morning run. We'll see how it goes!
Thanks again for dropping by...
First up the undercarriage legs where they joined with the fuselage were just a plain butt join with no indication of being faired into the fuselage, which is a feature of the real aircraft. So out came the Tamiya and Mr Surfacer again to fill and smooth the legs to the fuselage. The results can be seen below.


I don't think it's faired in quite as well as that shown by pictures of the real aircraft. I'm sure I've used more filler on this kit than any other I've built - at least my skills in this area are being tested!!
The natural next step is to put together the wheel spats. Like a lot of kits with spats the instructions call for sandwiching the wheel on two stubs protruding from the inside of the spat halves. As you would now come to expect these stubs were pretty poorly molded, so much so that I decided to remove them and replace the whole set up with a brass axle that I will install and patch the end to hide it once glued into place. The next couple of shots show the wheel and spat set up and the remodelled nose panel subsequent to some excellent photos and feedback from


I've highlighted with the arrow where I have placed some very fine stretched sprue to indicated the four hinges on the front of the nose panel. I simply glued these over the holes that I had previously made after thinking the dark shadows were actually holes.
The other task I managed to get done earlier in the week was to thin down the trailing edges of all flight surfaces. I think I mentioned it before, but the part thickness for the flight surfaces are quite thick (probably too thick) across the board and this is really apparent when looking at trailing edges. Each wing/stabiliser has now been thinned without losing too much of the wing rib and stretched fabric look. Tedious but necessary work in my opinion. I've not taken any shots specifically showing this work but it should help make the final product look that tiny bit more realistic (at least I hope so).
That's pretty much as far as I have gone this weekend. I'd like to think I can get some time at the workbench tomorrow, but I am certain that SWMBO will have a list of chores for me to complete once I've done my early morning run. We'll see how it goes!
Thanks again for dropping by...
Vic Balshaw
Major General
Nice progress. 
Crimea_River
Marshal
Solid improvements Grant.
Nice work so far!
- Thread starter
- #33
Grant Barr
Senior Airman
It has been some weeks since my last update. Progress has been slow as my triathlon training program chews up more and more of my free time, but I am pleased to say that there is progress!
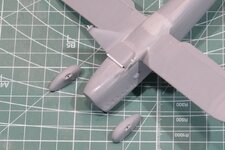
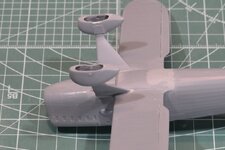
These first two shots show the styrene pins I added to help in locating and fastening the wheel spats to the undercarriage legs. I elected to use styrene rather than brass rod so that liquid cement would help strengthen the joint by melting the plastic across a much larger surface area. It kind of worked, but I don't think I would like to push too hard on the joints as they are still a weak point in the undercarriage structure.
I've also spent quite a bit of time sanding and re-scribing panel lines as necessary. I really wanted to keep the nice surface detail for the cloth covered areas but there were a lot of molding flaws that made this hard, so much so that I just ended up resurfacing the whole thing.
Whilst doing this I pondered the easiest way to ensure the alignment of the centre wing struts. I did see on another He.51 build thread in this forum (sorry cant recall who's thread this was, but the build was excellent) how a plastic sheet "jig" could be used to make sure the spacing of the top of the struts was correct. I ended up using this method as it seemed the most simple and effective method. These first two shots show how I went about making sure the joints had a "positive" way of being located to the fuselage and also allowing the use of a spacing template at the top.
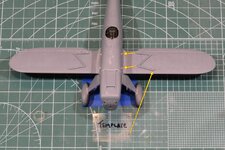
For the fuselage join I again chose to use styrene rod and I've drilled all the way through the base of each strut mount so that I can slide them on and trim the rods back flush and finish them so they will not be seen. I liked the idea that fine plastic rods will allow me some flexibility to move/adjust the angle of the struts as necessary. For the top wing joint I wanted the locating pins to be a bit more robust so I used 0.5mm brass rod instead. These pins will need to withstand a bit more fussing about from both the alignment template and the final fit of the top wing.
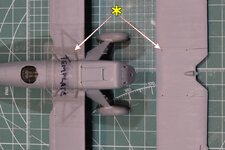
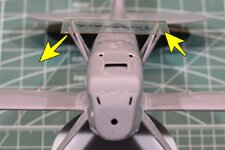
These next few shots show the struts mocked up with the alignment template. With luck this set up will allow me to get the alignment correct at the same time as making the joints as strong as possible given the somewhat dodgy locating method with this kit.
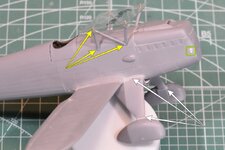
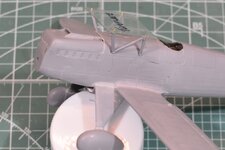
The last two shots in the group above also show my efforts to make the undercarriage legs look nicely faired into the fuselage and wheel spats, just as shown in photos of the real aircraft. The curvatures are not quite right but I really don't want to fluff around with it any further! The other small detail I added was an outlet pipe just aft of the prop on the RHS of the nose. It is quite obvious on the real aircraft and I am surprised it was missed on the kit.
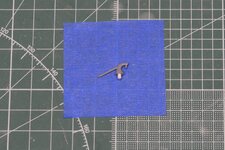
Finally, I have also been busy making sure some of the final "sticky-outy" bits can be mounted with as much strength as possible.
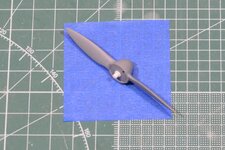
For the propeller I have also added a very small spacer ring as I noticed there is a small gap between the end of the nose fairing and the base of the prop on this aircraft. It might need a bit more shaving down to look correct.
I've probably done other bits and pieces that I've forgotten about already. Hoping to actually glue the centre struts in place later today and I need to check the length of the outer wing struts to make sure they are correct and the top wing will (*hopefully*) fall into place.
As always - thanks for looking in on my ramblings...
These first two shots show the styrene pins I added to help in locating and fastening the wheel spats to the undercarriage legs. I elected to use styrene rather than brass rod so that liquid cement would help strengthen the joint by melting the plastic across a much larger surface area. It kind of worked, but I don't think I would like to push too hard on the joints as they are still a weak point in the undercarriage structure.


I've also spent quite a bit of time sanding and re-scribing panel lines as necessary. I really wanted to keep the nice surface detail for the cloth covered areas but there were a lot of molding flaws that made this hard, so much so that I just ended up resurfacing the whole thing.
Whilst doing this I pondered the easiest way to ensure the alignment of the centre wing struts. I did see on another He.51 build thread in this forum (sorry cant recall who's thread this was, but the build was excellent) how a plastic sheet "jig" could be used to make sure the spacing of the top of the struts was correct. I ended up using this method as it seemed the most simple and effective method. These first two shots show how I went about making sure the joints had a "positive" way of being located to the fuselage and also allowing the use of a spacing template at the top.


For the fuselage join I again chose to use styrene rod and I've drilled all the way through the base of each strut mount so that I can slide them on and trim the rods back flush and finish them so they will not be seen. I liked the idea that fine plastic rods will allow me some flexibility to move/adjust the angle of the struts as necessary. For the top wing joint I wanted the locating pins to be a bit more robust so I used 0.5mm brass rod instead. These pins will need to withstand a bit more fussing about from both the alignment template and the final fit of the top wing.
These next few shots show the struts mocked up with the alignment template. With luck this set up will allow me to get the alignment correct at the same time as making the joints as strong as possible given the somewhat dodgy locating method with this kit.


The last two shots in the group above also show my efforts to make the undercarriage legs look nicely faired into the fuselage and wheel spats, just as shown in photos of the real aircraft. The curvatures are not quite right but I really don't want to fluff around with it any further! The other small detail I added was an outlet pipe just aft of the prop on the RHS of the nose. It is quite obvious on the real aircraft and I am surprised it was missed on the kit.
Finally, I have also been busy making sure some of the final "sticky-outy" bits can be mounted with as much strength as possible.


For the propeller I have also added a very small spacer ring as I noticed there is a small gap between the end of the nose fairing and the base of the prop on this aircraft. It might need a bit more shaving down to look correct.
I've probably done other bits and pieces that I've forgotten about already. Hoping to actually glue the centre struts in place later today and I need to check the length of the outer wing struts to make sure they are correct and the top wing will (*hopefully*) fall into place.
As always - thanks for looking in on my ramblings...
Vic Balshaw
Major General
Some very nice careful modelling going on here. 
Crimea_River
Marshal
Well, I think your jigging and reinforcements should make for an excellent fit of the upper wing. Nice work Grant.
Lovely work so far!
fubar57
General
Beauty
- Thread starter
- #39
Grant Barr
Senior Airman
Minor progress to show.
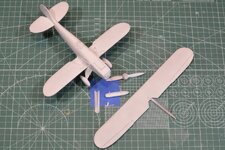
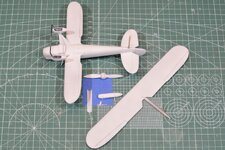
I finally finished the surfaces and got a layer of primer laid down. Will need to give it another day or two to dry as it's been unseasonably cold for the past couple of days.
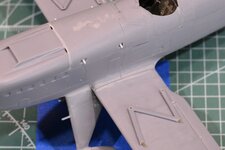
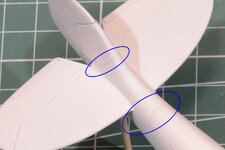
One of the things I did do as prep before paint was to re-scribe the panel lines and touch up on all the rivet details - I've tried to show just some of the rivets that are visible on the photos taken of the primer finish. Hopefully they can be seen in the attached shot. I made a concerted effort to keep the rivet detail very subtle so it doesn't dominate the finish.
Hopefully I'll get to spend some more time at the bench over the next couple of days. I'd really like to get onto the final paint steps for this kit, I'm excited to see how it will all turn out.
Thanks for the feedback, appreciated as always. Cheers!


I finally finished the surfaces and got a layer of primer laid down. Will need to give it another day or two to dry as it's been unseasonably cold for the past couple of days.
One of the things I did do as prep before paint was to re-scribe the panel lines and touch up on all the rivet details - I've tried to show just some of the rivets that are visible on the photos taken of the primer finish. Hopefully they can be seen in the attached shot. I made a concerted effort to keep the rivet detail very subtle so it doesn't dominate the finish.

Hopefully I'll get to spend some more time at the bench over the next couple of days. I'd really like to get onto the final paint steps for this kit, I'm excited to see how it will all turn out.
Thanks for the feedback, appreciated as always. Cheers!
Users who are viewing this thread
Total: 1 (members: 0, guests: 1)
