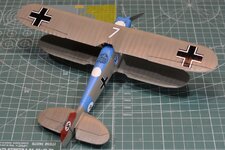
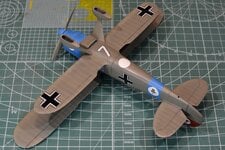
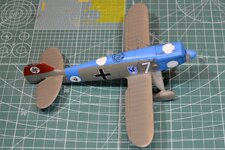
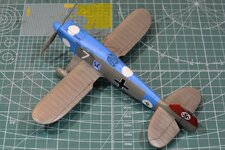
1/48 Classic Airframes Heinkel He-51

Ad: This forum contains affiliate links to products on Amazon and eBay. More information in Terms and rules
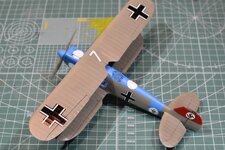
Thanks for the comments guys!

More progress has been made despite a bit of a busy week. I got a reasonable smooth gloss clear coat down earlier in the week. I seem to be getting the hang of glossy clear coats after having experimented a bit with the past couple of kits. Generally they ended up a bit grainy and therefore didn't look to glossy. This time I think I got the thinner to paint ratio and the spray pressure almost right. It's still not a "mirror" gloss finish but its a lot better than my previous attempts.

This provided a good surface for the decals to be applied. Given the age of the kit I was a bit worried that the decals might not want to stick or they may have been too brittle and just disintegrated. It turned out they were OK - with only one of them loosing a little chunk from one edge. Happy days!

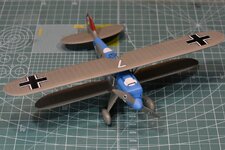
060_He-51 Decals Mock up Front RHS Quarter.JPG 061_He-51 Decals Mock up Rear LHS Quarter.JPG 062_He-51 Decals Mock up Rear RHS Quarter.JPG
063_He-51 Decals Mock up Rear Underside RHS.JPG 064_He-51 Decals RHS Top.JPG 065_He-51 Decals LHS Top.JPG

The photos above were taken just after a clear coat was applied over the decals. To give an idea of how it should look once done I mocked it up with the top wing and prop dry-fitted. I'm feeling pretty happy with how it is all progressing. Next steps will be to apply some subtle weathering, especially on the decals which still look a bit stark compared to the dirty fabric sections between the ribs. On the subject of the light/dark pre-shading I was surprised that the clear coat actually made this more noticeable - I was almost certain it was going to reduce the visibility of the pre-shade. I am thinking the weathering should be subtle given the scenario in which this aircraft was operated. Being 1938 it appears from photos the aircraft were well maintained and kept quite clean, easier to do if you are not in a war zone.

Once the weathering has been finalised I will be attempting to fit the top wing and button up the rigging - wish me luck!!! I'm hoping the outboard wing struts are going to be the correct length; as noted earlier they looked a bit short in an early mock-up. Time will tell!

Once the wing is in place it will be time to move onto all the tiny little bits like exhaust stubs, aerial masts, pitot tubes and various other sticky-outy bits. Most of these parts will need a significant amount of clean up, and some might end up just being replaced with scratch built parts.

That's all I have for now. As always, thanks for popping by for a look. 🙃
 
Not a huge amount of progress this week. I have spent a lot of time trying to get the 12 individual exhaust stubs to look right.
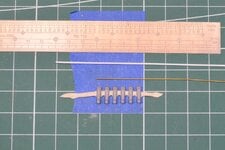
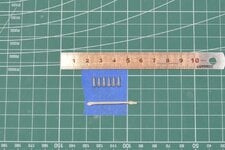
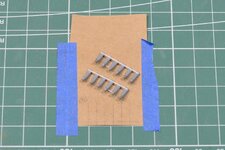
066_He-51 Exhaust Stacks Jig.JPG 067_He-51 Exhaust Stacks Glued.JPG
First up I set up a really simple jig using blue-tack (or what-ever they call the white version...) to hold the stubs in place whilst I CA glued a piece of brass rod to the back side. It all looked great until I offered the assembly up to the fuselage, only to realise that the fuselage curves (doh!!!). Every attempt to apply a curvature to the rod resulted in the stubs just breaking away, so I had to come up with an alternative that was more flexible and forgiving. If you look closely at the second photo where the stub outlets are visible you will see where I had to recreate the stub outlet as the piece was slightly short-shot in the mold making it look malformed. I added a tiny thin piece of styrene and shaped it by hand - its a bit wonky but I can live with it at this point, I certainly don't want to redo it as it took too long.

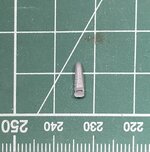
Meanwhile, I also found that one of the stubs was really badly molded. It was so bad that I had to completely reshape the whole stub using one of the others as a template. It turned out all right but it was just another really fiddly thing that needed to be fixed, chewing up a lot of time I didn't really have to spare.
068_He-51 Dodgy Exhaust Stack.jpeg
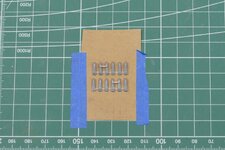
My final solution to the stubs was just using styrene rod. It gave me the flexibility I needed with the added benefit of being melted together to each stub using thin styrene glue. They are not breaking off the rod this time. Whilst on the job I also noticed that there is a rod or tube that runs between the 4th and 5th stubs (counting from the front). I assumed this was a "balance tube" of some type and it doesn't appear to be on all aircraft. It's not noted in the instructions but it is shown on the box art - so I added some very carefully crafted rod to both sets of stubs. Finally I added some brass pins to the stubs so that the joining to the fuselage will be a positive fit, allowing a good anchor should some of the other stubs need a bit of gentle persuasion to fit into place. I think it should work out OK.
069_He-51 Revised Exhaust Stacks Set Up Front.jpeg 070_He-51 Revised Exhaust Stacks Set Up Rear.jpeg
The next job is to get these stacks painted and, once dry, fitted to the aircraft. I've been carefully checking on a lot of the other small/fiddly pieces that will need to be fitted to finish this one up. Some of them are OK, but some, like the elevator tab actuators, will need to be completely scratch built as the kit parts are grossly out of scale and shape.

I'm hoping to get the stacks painted tomorrow - all being well. I've got a 2 hour run to finish in the early morning and hopefully I won't be too knackered to splash some paint around.

Thanks for dropping by, cheers!!
 
Thanks for looking in all.

I have made some small progress - the exhausts have been painted and are ready to be fitted once some weathering and other bits and pieces are done. I've not had time to take any photos but will hope to follow up with some before the weekend. (Fingers crossed as I have a sprint distance race coming up this weekend, so any work has to be done well before then).

Cheers!
 
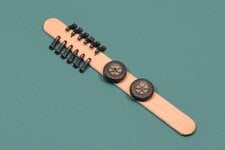
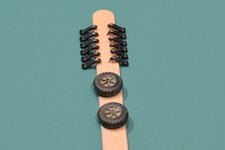
More minor progress to report. Both the exhausts and the wheels have now been painted and weathered in preparation for fitting once the top wing is on.
071_He-51 Wheels & Exhausts.jpeg 072_He-51 Wheels & Exhausts.jpeg
The top edge of the exhaust stacks is still a bit too shiny, but once I get a "dirty" matt varnish coat onto it they should tone down nicely (I hope...). For the wheels I didn't go overboard with the washes and general dirty up - again I figured that the aircraft would have been reasonably well maintained and cleaned regularly.

Busy weekend ahead so probably won't get any more done until sometime next week. As always thanks to anyone that is taking the time to look in on this project. Cheers!
 

Users who are viewing this thread

Back