1/48 Italeri Junkers Ju-87 B (or R... haven't decided yet!)

Ad: This forum contains affiliate links to products on Amazon and eBay. More information in Terms and rules

Doing a fine job there, Doug. You mentioned wondering how to do the cowl flaps. On my Hasegawa R-2 I chopped the kit ones off and replaced then with card and added the actuator rods like so: **** DONE: 1/48 Ju87R-2 "Moshaisk" - Winter War / Eastern Front WWII
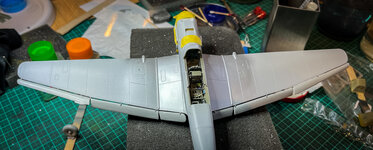
Another "wow" for you Andy, that's a terrific build. Wish I'd hunted around on the site a bit more before I began, I could have stolen a heap more ideas and inspiration! Some great resources on your old thread too, especially the wing tank mounts.
 
Some pics that may be of use to you Doug and if there is anything else just shout and I'll see what the book has.
Thanks very much for taking the time to post these Vic. I have some of the diagrams from the Maintenance Manual, but not with the English translation. Good to see the detail associated with the bomb rack/deflection fork, but my earlier comment related to where that actually attaches on the lower firewall, with the attachment point and associated structural features missing from the kit.
And a general comment that seems to relate to all Ju 87 kits with any engine detail (including the new Border 1:35 Ju87G, judging by pictures I've seen) - there never seems to be any attempt to include the engine cowling framework (exhaust trough, etc...). The lower rear frame (9 in the diagram) is what the radiator cowling cooling flaps are attached to by the push rods that Vic and Andy have modelled so well. If I could find a decent plan diagram of that (rather than the sketch) I'd be tempted to have another go at it...
 
Hey Doug - I'm taking some time out from work to take a quick peek here!!! One of the few advantages of working from home I guess.

Really nice work on the engine and cockpit. All the additions have really made the cockpit "pop", so definitely worth the effort there!

I have my engine assembled and painted but not yet installed. I might borrow some of your additions if that's OK. I've not really invested anything for reference material on this aircraft so my additions thus far have been rudimentary.

I'll be curious to see how your canopy fits - I suspect one of the downsides of the wing chord fix I made was to "pull out" the fuselage width slightly right where it's the weakest (ie: the canopy area). Might have to find a way to apply some gentle heat and pressure to move it back in, assuming it is as bad as I fear that is...

Best get back to work I suppose. Thanks for posting your build - I will definitely be using your build as a spur to get my own back on track. Cheers!
Thanks Grant. Borrow away! If I had my time again (common old man refrain) I'd have put more effort into the exhaust stack ports, which are solid on the kit. I've only had a quick look at the canopy fit, and mine seems a bit wide for the fuselage, so you may find you've hit the goldilocks zone with your other fix and widened it "just right".
 
Greetings Stuka fans! I've finally had a bit more time between work/life/kids to make some more progress. Where I left off: carving up the ailerons and flaps:
Ju-87-Stuka-Italeri-2007.jpg
...and coming up with a way to re-attach them that looked better than before. I used the fan blades from an Fw190 engine cooling fan to replace the flap and aileron "hinge extensions" for want of a better description:
Ju-87-Stuka-Italeri-2008.jpg Ju-87-Stuka-Italeri-2009.jpg
Then cut slots in the wing trailing edge, which has been thinned and tidied up:
Ju-87-Stuka-Italeri-2011.jpg Ju-87-Stuka-Italeri-2011.jpg
While that was drying, I tried to clean up the terrible join I'd managed to create with the front canopy/fuselage. I then splashed on some RLM02 for the inner frames of the canopy:
Ju-87-Stuka-Italeri-2013.jpg Ju-87-Stuka-Italeri-2014.jpg Ju-87-Stuka-Italeri-2015.jpg
And I better defined the cowl flaps:
Ju-87-Stuka-Italeri-2012.jpg
Although I probably needn't have bothered after finding this photo of the aircraft I am hoping to re-create:
IMG_5233.JPG

Note machine in the foreground: no cowl flaps. Looks like the early B models didn't have them?
 
View attachment 745467
Note machine in the foreground: no cowl flaps. Looks like the early B models didn't have them?

The kind of the cowling was used for the early and late B-1 variant. The mid B-1 one had the same , separate cowl flaps like the B-2. The difference were the exhaust pipes. While the early and mid B-1 models had them like the Anton , the late one had them like the B-2. Judging by the shape of the exhaust of the A5+CH it could be the late B-1/R-1 probably. The foreground machine may indicate that.
 
Great progress Doug! Sadly my time at the bench has been almost zero over the winter. If it's any consolation I parked my build right when I found all sorts of fit issues with lower engine cowl to fuselage. I think I know how to fix it, but it will take some time and patience.

I like what you did with the flaps, I really don't want to go to that much trouble, but you've shown just how much better it looks when you do. Dammit…
Hey thanks Grant. Sorry you haven't had a chance to tackle a bit more. I gotta say I was struggling until I got some paint on... always makes me feel better about the project! I was ultimately pretty pleased with how the flaps came out, and it was nice being able to lower them a bit. But it was a process.....
 
Not happy with the chipping. Operator error I think, having sprayed it on a bit thick, so the "chips" were too big.
Ju-87-Stuka-Italeri-2034.jpg
Remasked and resprayed, and while I was at it, darkened up the RLM 70 edges a bit more, where I'd overdone the fading effect:
Ju-87-Stuka-Italeri-2035.jpg Ju-87-Stuka-Italeri-2036.jpg Ju-87-Stuka-Italeri-2037.jpg Ju-87-Stuka-Italeri-2038.jpg Ju-87-Stuka-Italeri-2039.jpg
...I feel better about that!
I've bought the Montex masks and was in two minds about using them. Decided to have a go at the lower huge Balkenkreuz, as they would be the least visible on display, and potentially the easiest for a newbie to do:
Ju-87-Stuka-Italeri-2040.jpg Ju-87-Stuka-Italeri-2041.jpg Ju-87-Stuka-Italeri-2042.jpg
Not too bad, but can do better.
 

Users who are viewing this thread

Back