1/48 Italeri Junkers Ju-87 R2 Stuka (1 Viewer)

Ad: This forum contains affiliate links to products on Amazon and eBay. More information in Terms and rules

Grant Barr

Senior Airman
For my next project I was looking to build a model almost out of the box. For this I chose a Ju-87 by Italeri from the stash. Whilst I say "OOB" I am sure that some minor scratching and enhancements will creep into the build, but the aim is to keep this one as simple as possible. I'd like to finish this one in a more timely manner!

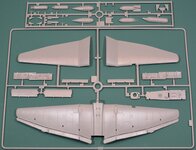
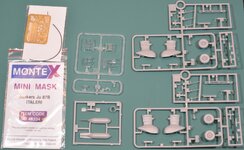
This kit is pretty well known by aircraft modellers so I wont bore everyone with what I think of the kit - simply that it looks good and I am keen to get started. I've added the box art and shots of the kit sprues below:
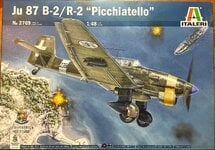
001_Ju-87 R2 Box - Italeri.jpg003_Ju-87 Sprues B&D.JPG004_Ju-87 Sprues A&D.JPG005_Ju-87 Sprues-PE-Masks.JPG
I really only bought this kit as it had an option to do a German version with the North Africa colour scheme. I have no idea why, but the North Africa schemes on German aircraft really appeal to me. The bonus with this kit is the scheme also has a cool snake along the sides. As another of our members, Vic Balshaw Vic Balshaw , has recently built an excellent aircraft from this unit, I wont go into details regarding the veracity of the scheme or conjecture on various possibilities.

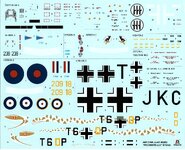
In this kit the scheme is the Version E as shown below along with the very comprehensive decal sheet that comes with the kit (Italeri seem to do a really good job on their decals - every one of their kits I have contains a cracking set).
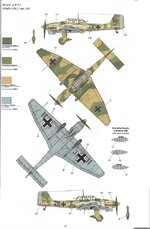
002_Ju-87 Version E Scheme.jpg006_Ju-87 Decal Sheet.jpg
So, having established the basics, I even got to make a start on the cockpit this afternoon. Not a whole lot of work, but I have cleaned up nearly all the cockpit tub parts and assembled those that can be in preparation for a coat of RLM02.
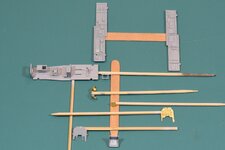
007_Ju-87 Cockpit SubAssemblies.jpg
A couple of things I've noticed about the kit are:
  • The PE is brass, and unlike the newer PE sets (think Eduard) they are nice and soft and easy to clean up and fold. The only downside is that they are unpainted - not a big downside mind you...
  • The instrument faces are on a decal. Initial line up to the PE shows its not 100% accurate. I might need to cut the decal in various places to ensure that it will line up to the PE as necessary.
  • The rear gunner seat is a bit dodgy. I suspect the real seat is actually just a cross web of seat belt webbing type material. The kit has them looking like tubes or rods. My initial reaction was to cut them out of the outside frame and redo with thin styrene strips bent into shape, but this would be going off reservation already, and I am only on the first step! The seat is only lightly pinned with some PVA just in case it gets to me and I rip it apart to "fix"!
With luck I will get some pre-shading and the RLM02 in place tomorrow - I'll need to squeeze this in between watching both the MotoGP and F1 racing this weekend. So many hours of TV viewing and so little time to do it... 👀

Thanks for looking in on my latest project. Cheers.
 
Well - it's Friday night and because I don't have a social life I've been busy at the workbench (I can think of worse ways to spend my evening!!!).

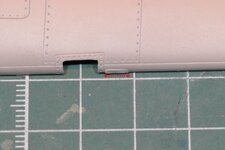
Some shots of progress to date below, starting with the first thing about the kit that has bugged me - sprue attachment points. For some reason this kit has massive attachment lugs, especially on the main airframe components such as fuselage and wings. The shot below shows the single attachment point on the top LHS wing panel - its nearly 4mm long!! The same size attachment is on the lower wing panel and for each fuselage side as well. Its nice that they are held on so well but it makes clean up a right pain...
008_Ju-87 Sprue Attachment Points.jpg
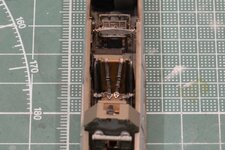
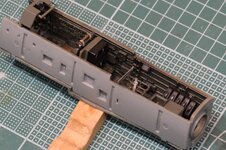
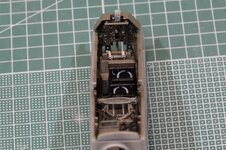
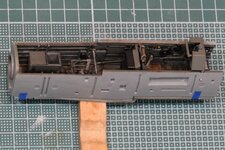
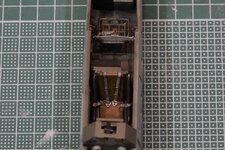
Moving on - I've now almost completed the cockpit tub. I took a couple of shots tonight and they have the added benefit of highlighting to me where a couple of touch-ups are needed. In terms of assembly, all the component parts went together reasonably easily. I am glad, however, that I mocked up a test fit of the whole tub into the fuselage which revealed that I needed to curve out the sides slightly by clamping across the front of the tub (in front of the IP). If I didn't do this the fuselage halves in front of the IP would not have closed up at all, leaving quite a large gap if the tub sides were left straight.
009_Ju-87 Cockpit Seats.jpg 010_Ju-87 Cockpit RHS.JPG 011_Ju-87 Cockpit IP & Radios.JPG 012_Ju-87 Cockpit LHS.JPG 013_Ju-87 Cockpit Seats.JPG
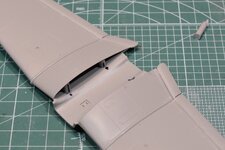
I've also attached the top and bottom wing panels, for which I did not get an photo's. I am very disappointed with the thickness of the trailing edge of the wing. The kit is badly let down by how clunky this part of the wing looks. To some degree it is hidden by the integrally molded flaps (not separate parts like some other kits) but I can see it easily from the bottom. Not sure what solution I will need here, but I will need to think of something. The temptation is to remove the dive flaps and reshape the wing trailing edges then re-attach the dive flaps later with some brass pins. I really wanted this to be a "quick" build, so not sure if I am willing to go down this path.

That's pretty much it for tonight. Lots to do over this weekend so not sure when the next update will be. As always, thanks to everyone who drops by for a look or comment.
 
My my Grant, that is one beautiful cockpit setup, the detail is excellent. As for the sprue connection with Italeri kits, its quite a common thing and I've come across it a number of times particularly in the motor builds I've done. In your kits case I would say it is because there is only one connection point to the sprue. :D
 
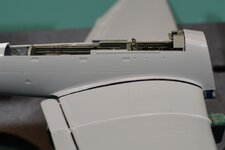
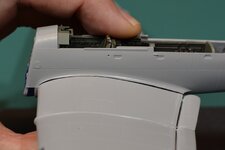
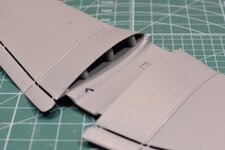
A small progress update on the Stuka. Now that the fuselage is joined and I have joined the upper and lower wing sections the time came to join the wings to the fuselage. This is where the kit is somewhat let down. In an earlier post I noted that the trailing edges of the wings were pretty bad with a gap along the edge. I think this may have been caused by the upper wing sections not having the right curvature. The chord thickness in the middle is generally too thin, which I think may have been the cause of the trailing edge issues. It has also presented a bit of a challenge on how best I can fix the issue so that the wing root joints are now wildly stepped.

To help show the issue I used a black marker to highlight the upper wing curvature on the fuselage sides. When the wing is offered up to the fuselage you can see a black line where the fuselage profile does not match the wing profile, resulting in the step I mentioned. The RHS is slightly bigger than the LHS but is at least even across the wing. The LHS is more uneven and presented a slightly greater challenge to fix.
014_Ju-87 RHS Wing Joint.JPG 015_Ju-87 LHS Wing Joint.JPG
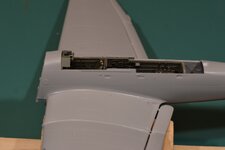
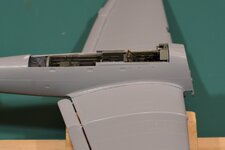
After taking a bit of time to think through the "best" solution I settled on using some cut thick sprue as "wedges or inserts" inside the wing to help push the wing chord up to better match when mated to the fuselage. It was pretty tedious work with a lot of trimming and test fits, but I think it kind of worked OK. You can see below that the LHS wing root needed a lot more inserts to make sure the chord was reshaped correctly.
016_Ju-87 RHS Wing In-Fill.JPG 017_Ju-87 LHS Wing In-Fill.JPG
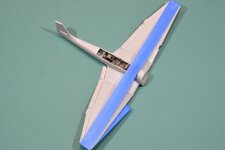
Like I said, tedious work but the wing seemed to line up pretty well once joined to the fuselage and held in place with a length of masking tape.
018_Ju-87 Wing Fitment.JPG
Once the glue cured I think the result was good. Both wings now have a much closer alignment with the fuselage wing profiles - with the ~1mm step from wing to wing root now almost completely gone.
019_Ju-87 LHS Wing Joint Fix.JPG 020_Ju-87 RHS Wing Joint Fix.JPG
Both wing joints will need a bit of profiling to make sure they match perfectly, but I am pretty happy with the outcome.

I'm not sure if the problem was one of my own making - not being careful enough when joining the wing halves - or the wings were just poorly molded. I've read a couple of build reviews of the Italeri Ju-87 by other people and its not been mentioned, so maybe it was just poor attention to detail on my part. Anyway - its solved now.

I have also made a start on the engine assembly with the main block components glued up, but I am yet to take any more photos. We have a public holiday in Oz on Tuesday so I'm hoping to get a bit more done then, and maybe get some more photos to show progress.

My thanks to everyone who has dropped in for a look and/or left some comments or feedback. Cheers!
 
I'm just as impressed that the wing leading and trailing edge joints didn't 'pop' open. That would be my results if I tried to 'stretch' the center!

Are you joining these two, the leading/trailing edges with a typical liquid glue up or do you use super glue, as I have been seeing, more and more, being used as a joining method of choice?
 
As always, you are showing great attention to fit issues to take your subject to the next level. I would suggest that the reason the issues you experienced were not mentioned in reviews is because those people perhaps cared less about the results than you did. Keep up the excellent work Grant.
 
I'm just as impressed that the wing leading and trailing edge joints didn't 'pop' open. That would be my results if I tried to 'stretch' the center!

Are you joining these two, the leading/trailing edges with a typical liquid glue up or do you use super glue, as I have been seeing, more and more, being used as a joining method of choice?
Hey Ralph - I don't use anything special. I've been using bottle of Testors Liquid Cement for the past 5 or 6 years - especially when bonding the major joins on my models. I did learn in the last couple of builds that I need to have a good even coverage along the seam when using this glue and, if possible, give the joined parts a bit of a "wiggle" when bonding to make sure the softened plastic has welded together. As you can see - the results on this kit have been great. Lots of pushing and pulling in the wing has not resulted in any popped seams ("at least not yet" he says with a slightly worried look... 8-[).
 

Users who are viewing this thread

Back