Navigation
Install the app
How to install the app on iOS
Follow along with the video below to see how to install our site as a web app on your home screen.
Note: This feature may not be available in some browsers.
More options
You are using an out of date browser. It may not display this or other websites correctly.
You should upgrade or use an alternative browser.
You should upgrade or use an alternative browser.
1/48th Spitfire Vc, 136 Sqn, Burma, 1943-44.
- Thread starter Airframes
- Start date
Ad: This forum contains affiliate links to products on Amazon and eBay. More information in Terms and rules
More options
Who Replied?- Thread starter
- #162
Airframes
Benevolens Magister
Thanks Max. The dirt and staining will show up more when the matt coat goes on - the reflection from the gloss clear is hiding a lot of it in the photos.
- Thread starter
- #163
Airframes
Benevolens Magister
The clear matt coat is on, applied in a mix to give a slightly dusty look, but not as dirty as the MkVIII. Just got to do a bit more on the exhaust stains, but meanwhile I'm working on the prop and exhaust, whilst the matt coat fully cures.
Thanks again for your continued interest - might have some more to show tomorrow.
Thanks again for your continued interest - might have some more to show tomorrow.
Attachments
Looks great Terry!
- Thread starter
- #165
Airframes
Benevolens Magister
Thanks Hugh.
matt coat really sets it off Terry!
- Thread starter
- #168
Airframes
Benevolens Magister
Thanks Wayne and Wojtek. Still working on the slow job of hollowing-out the exhausts - might have some pics later.
Wildcat
Major
Excellent Terry! The matt finish looks superb.
Peebs
Senior Airman
Nice work Terry!
- Thread starter
- #171
Airframes
Benevolens Magister
Thanks very much Andy and Peter, it's much appreciated.
Moving into the final stages now, with the exhausts hollowed out, painted and installed. The initial work on the prop has also been done.
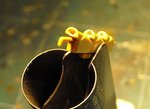
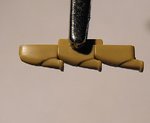
PIC 1. Hollowing out the exhaust stacks. these were first drilled, then cross-drilled, before carefully scraping away with the point of a scalpel blade.
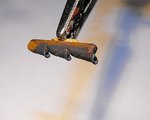
PICS 2 and 3. Research showed that the by-pass tubes for the gun heating were not fitted to the exhausts on this Squadrons aircraft, so these were removed and the parts cleaned-up as required.
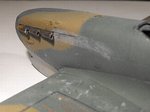
PICS 4 and 5. The exhausts being painted, and installed. Once set and fully dry, the dust and tissue particles will be removed, and a very light amount of extra staining added.
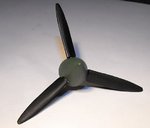
PIC 6. The prop has been assembled, and basic painting done, with the spinner in 'Woodpecker' green. the yellow tips, along with the stencils etc, will be hand-painted later.
All being well, I should have another up-date tomorrow, with the model all but finished, and awaiting the arrival of the display base after being trimmed in wood. then it'll be time to concentrate on the 'terrain' of the base.
Thanks again for looking.
Attachments
T Bolt
Colonel
Fantastic work Terry!
- Thread starter
- #174
Airframes
Benevolens Magister
Thanks Wojtek and Glenn. I hope to get the model virtually finished tonight.
- Thread starter
- #175
Airframes
Benevolens Magister
Well, it's nearly finished, with just some small items to do, and a little retouching, before moving on to the base.
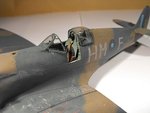
The gun sight, windscreen and canopy have been painted and fitted, not without some minor problems. I was less than impressed by the very heavy sprue attachments on the nicely moulded, internally armoured windscreen. This took over half an hour to separate from the sprue and clean up, avoiding damage. I also spent some time making the Martin (as in Martin-Baker) canopy release, only to knock it off when I fitted the canopy! No problem, I can re-fit it later - I hope!
After struggling to successfully mask the screen and canopy, I ended up painting the frames free-hand, first painting the inside of each.
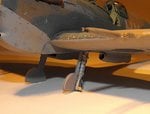
The main gear legs and tail wheel have been fitted, after filing the locating tabs on the gear legs to get a good fit, and the wheels will be added later, when the model is ready for its display base.
PIC 1. The main gear legs in place, and in need of re-touching around the oleos.
PIC 2. The windscreen and canopy in place. The screen has been sealed with PVA to blend it in to the fuselage, and will be re-painted when fully set.
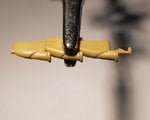
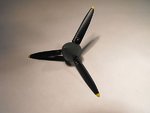
PIC 3. The prop has had the yellow tips added, and the basic stencils hand-painted. The whole lot will be toned down and 'dirtied' later. No chipping, as this was the Rotol prop, with wooden 'Jablo' blades.
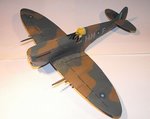
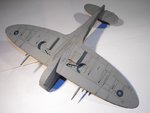
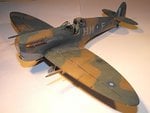
PIC 4. How the model looks to date.
The torn gun port patches will be added tomorrow, made from the tissue from a decal sheet, before moving on to all the small bits such as lamps, door, mirror, antenna mast etc.
Thanks once again for your continued interest and complimentary comments, and I'll post some more tomorrow.
Attachments
Crimea_River
Marshal
Terry, you've done a great job once again on the dust and weathering. Tell me again what you used - was it a light pastel for dust or a very thin coat of paint? before or after gloss?
T Bolt
Colonel
Very nice Terry. You did a wonderful job on the weathering again!
- Thread starter
- #178
Airframes
Benevolens Magister
Thanks guys. This time, the overall weathering was just some areas being dry-brushed, very lightly, in a suitable lighter 'dirt' colour, just mixed from what I had. This was after some areas had been given subtle patches of the base colour, slightly darkened, to represent stains or 'cleaner' areas. The lower engine cowling was just smudged here and there with a darker tone of the Medium Sea Grey, to represent marks from dirty hands, tools etc.
No pastels were used this time, unlike on the Spit VIII where I wanted a much dustier, dirtier look.
The final effect was created by deliberately adding a touch too much Tamiya Flat Base to the second coat of matt varnish mixed from this and 'Future'. The model was first clear coated as normal, with the above mix, then, when fully dry, another coat was sprayed with a touch more Flat Base, to give a very slight greyish tinge to the clear coat, making it absolute dead matt and dusty looking.
Users who are viewing this thread
Total: 1 (members: 0, guests: 1)

