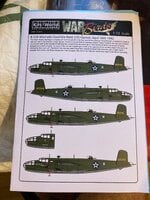
Add-ons: Kits-World Decals, KW172225
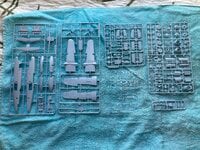
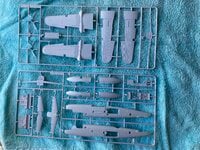
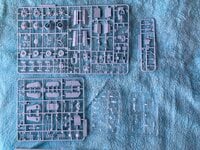
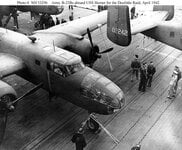
First time participating in a Group Build, very excited to be here! Kit will be built to represent the aircraft ready to take off for the Doolittle Raid on April 18th, 1942. Bomb bay and hatches closed, gear and flaps extended. The Airfix kit is meant to represent 40-2249 "Hari Kari-er", but I have always been more fond of 40-2303 "Whirling Dervish". I was unable to find any photos showing its noseart, though the photo below shows that there is no noseart on the right-hand side (40-2303 can be identified because it was aircraft number 9 , and the photo shows the tail of aircraft number 8). The Ruptured Duck is in the same boat, with 3 different interpretations of what the artwork looked like and no photos of the actual plane. For whatever reason, there seems to be consensus about The Whirling Dervish's noseart. The Doolittle Raid B-25s wore an early version of Olive Drab over Neutral Gray, with a very low and straight demarcation line. There were blotches of darker (more recent) Olive Drab & Neutral Gray on the wingtips, rear fuselage and cowl rings, used to cover up War Games markings and squadron markings. Propellers were painted fully black, without yellow tips. Aircraft were fitted with de-icer boots. Bare aluminum could still be visible in parts on the cockpit frame. Forward section of the flaps was either intentionally lemon-yellow or were accidentally left in bare metal finish when camouflage was applied. I do not know which theory is more likely. All DR aircraft had rather massive exhaust stains on the nacelle sides, but I have no experience with weathering and care too much about this kit to make a botched attempt at it.

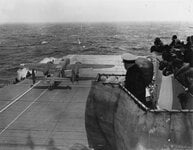
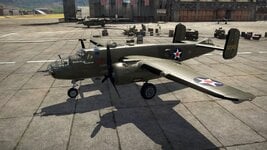
I have made a livery for this aircraft in the past for War Thunder, even though the game does not have the correct variant of the B-25. I went to great lengths back then to try to portray a B-25B, painting on windows and the correct exhaust stacks, so I'm very glad that the Airfix kit already took care of all of that and all I have to do is not break anything. This is my favorite model of the B-25 and I'm very glad to have such an accurate kit for it, my only complaint is that the weights I bought don't seem to fit anywhere in the fuselage!
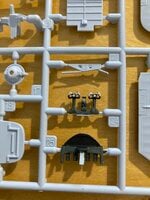
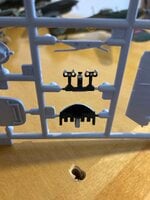
I have already started on the cockpit. Trying to be as detailed as I can put the parts are too small for me. Bronze Green for the cockpit, pedals, yoke and pedestal, black for the yokes, throttle lock and tops of the throttle and prop pitch levers, red for the tops of the mixture levers and silver for details on the yoke and control levers. Couldn't quite make a circle in the center of the yokes, but it won't be visible from outside anyway.


First time participating in a Group Build, very excited to be here! Kit will be built to represent the aircraft ready to take off for the Doolittle Raid on April 18th, 1942. Bomb bay and hatches closed, gear and flaps extended. The Airfix kit is meant to represent 40-2249 "Hari Kari-er", but I have always been more fond of 40-2303 "Whirling Dervish". I was unable to find any photos showing its noseart, though the photo below shows that there is no noseart on the right-hand side (40-2303 can be identified because it was aircraft number 9 , and the photo shows the tail of aircraft number 8). The Ruptured Duck is in the same boat, with 3 different interpretations of what the artwork looked like and no photos of the actual plane. For whatever reason, there seems to be consensus about The Whirling Dervish's noseart. The Doolittle Raid B-25s wore an early version of Olive Drab over Neutral Gray, with a very low and straight demarcation line. There were blotches of darker (more recent) Olive Drab & Neutral Gray on the wingtips, rear fuselage and cowl rings, used to cover up War Games markings and squadron markings. Propellers were painted fully black, without yellow tips. Aircraft were fitted with de-icer boots. Bare aluminum could still be visible in parts on the cockpit frame. Forward section of the flaps was either intentionally lemon-yellow or were accidentally left in bare metal finish when camouflage was applied. I do not know which theory is more likely. All DR aircraft had rather massive exhaust stains on the nacelle sides, but I have no experience with weathering and care too much about this kit to make a botched attempt at it.


I have made a livery for this aircraft in the past for War Thunder, even though the game does not have the correct variant of the B-25. I went to great lengths back then to try to portray a B-25B, painting on windows and the correct exhaust stacks, so I'm very glad that the Airfix kit already took care of all of that and all I have to do is not break anything. This is my favorite model of the B-25 and I'm very glad to have such an accurate kit for it, my only complaint is that the weights I bought don't seem to fit anywhere in the fuselage!

I have already started on the cockpit. Trying to be as detailed as I can put the parts are too small for me. Bronze Green for the cockpit, pedals, yoke and pedestal, black for the yokes, throttle lock and tops of the throttle and prop pitch levers, red for the tops of the mixture levers and silver for details on the yoke and control levers. Couldn't quite make a circle in the center of the yokes, but it won't be visible from outside anyway.


Last edited by a moderator:

