Airframes
Benevolens Magister
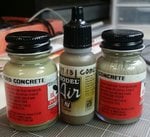
Good stuff Jim.
I've just seen a 1/48th scale aircraft hangar kit, similar to the WW2 German pattern, and I'm tempted. In fact, if I join a few of them together, I could live in them, leaving the house free for models, kits and books !!
I've just seen a 1/48th scale aircraft hangar kit, similar to the WW2 German pattern, and I'm tempted. In fact, if I join a few of them together, I could live in them, leaving the house free for models, kits and books !!