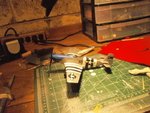
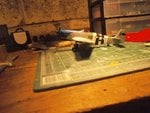
352nd Fighter Group "Blue Nosed Bastards of Bodney" Build

Ad: This forum contains affiliate links to products on Amazon and eBay. More information in Terms and rules

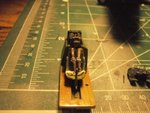
That looks very good indeed H. One thing, if it's not too late. The shoulder straps were anchored behind the seat, with the mountings out of sight. If you can, remove the rings you've made, and tuck the ends of the belts behind the seat, or glue right at the top edge, as if they are behind the seat.
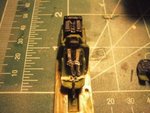
Yes, the radio on the P51 B/C was mounted immediately behind the pilot's head armoutr bulkhead, with a slight space between. The Tamiya kit has it more or less correct.
 
Brother and friends are being loser. No pictures tonight but, I finished instrument panel, looks OK for first attempt and fixed seatbelts and finished painting the interior.
 
It's a bit difficult to give an exact mix ratio H, as I make it to the requirements of the job. Basically, I pour some Future into a small container, such as a yoghurt pot (ensuring all the yoghurt is gone and the pot is clean of course!), then add talc until I get a sloppy goop, rather like porridge, hence my name for it.
I use Future for a relatively thin, 'fine' mix, for very small gaps or depressions, and enamel gloss varnish for a slightly 'heavier' mix for small, but not huge gaps.
Once you've established what mix is required, it's run into the gap and any excess wiped off. Allow to harden, which is much quicker with Future, and repeat as or if required. It should find its own level, and normally doesn't need any sanding.
For very tiny gaps, such as the joint between the one-piece spine and the top of the main fuselage on my MiG, and similar tiny, almost invisible wing joints, then PVA can be run into the joint with the tip of a cocktail stick, and the excess wiped off immediately with a wet finger tip. Again, repeat if required. Once this has hardened, anywhere between 15 minutes and 60 minutes, depending on density/area, it'll be clear, and can be painted over.
Hope this helps a bit.
 
Some work from yesterday and today.

Cripes a Mighty with the gear on.

John Bennett's stang is taking shape. Pilots seat had the last 2 belts added. Worked on some of the controls on the left and right side.....Cut the wheel parts from the trees and will paint later today or tomorrow...part of them atleast.

For a first time the instrument panel is OK, could be better but I'm not complaining.
 

Attachments

  • P7130235.JPG
    P7130235.JPG
    90.3 KB · Views: 88
  • P7130236.JPG
    P7130236.JPG
    78.3 KB · Views: 75
  • P7130237.JPG
    P7130237.JPG
    97.6 KB · Views: 82
  • P7130241.JPG
    P7130241.JPG
    62 KB · Views: 77
  • P7130242.JPG
    P7130242.JPG
    79.2 KB · Views: 88
  • P7130243.JPG
    P7130243.JPG
    83.8 KB · Views: 82
  • P7130248.JPG
    P7130248.JPG
    65 KB · Views: 90
  • P7130250.JPG
    P7130250.JPG
    84.9 KB · Views: 101
Pics are a bit 'soft' but it looks pretty good to me H. Good work mate, and glad I could help with the porridge.
 

Users who are viewing this thread

Back