Academy Opel Blitz build.

Ad: This forum contains affiliate links to products on Amazon and eBay. More information in Terms and rules

Uh, 2 windows came with scratches in them, already, I didn't do them myself because yesterday night I opened the bag ..... :rolleyes:

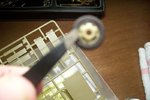
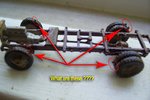
Pic 1 and 2: The trucks spare tire.

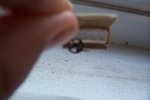
Pic 3:Scratched window in the door.

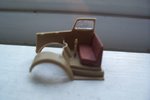
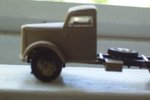
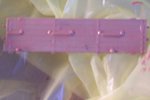
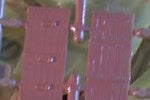
Pic 4: The cab of the truck

Pic: 5 the main windshield :rolleyes:

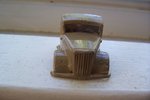
Pic: 6: head on view of the truck cab all put together. :rolleyes:
 

Attachments

  • 102_3879.JPG
    102_3879.JPG
    44.7 KB · Views: 55
  • 102_3880.JPG
    102_3880.JPG
    58.4 KB · Views: 51
  • 102_3886.JPG
    102_3886.JPG
    25.5 KB · Views: 56
  • 102_3895.JPG
    102_3895.JPG
    26.5 KB · Views: 44
  • 102_3896.JPG
    102_3896.JPG
    37.8 KB · Views: 49
  • 102_3899.JPG
    102_3899.JPG
    37 KB · Views: 48
OF COURSE....It should had been done before you painted and attached these ryres.Just for future...:)

I'm so sorry to hear you have the stomach problem. Is that flu? Get well soon !!!!
 
My bad.... I had to replace the tires this morning around 6:00 a.m. because I placed the cab to see how it looked and the tires in the front were higher than those in the back.

Thanks Wojtek I will remember that :D
 
No, I had them barely glued on anyways, the two front tires are on the same axel, w.e you'd like to call it, just simply removed them and placed them where the were even with the back tires and lined up with the wheel well on the cab of the truck.

Jeez, I hope putting paint on this makes it look better... and if I don't get that paint by tomorrow I'm calling the company...
 
They get scratched, and it looks bad.... :(


Here's my shipment of things I got today. Acrylic Resin (Not pertaining to my model) , Pigments (Weathering?) , Matt Mid stone paint , Tamiya weathering set B and a weathering stick....
 

Attachments

  • 102_3908.JPG
    102_3908.JPG
    45.3 KB · Views: 54
  • 102_3906.JPG
    102_3906.JPG
    37.6 KB · Views: 59
  • 102_3905.JPG
    102_3905.JPG
    38.3 KB · Views: 61
  • 102_3904.JPG
    102_3904.JPG
    40.4 KB · Views: 59
  • 102_3903.JPG
    102_3903.JPG
    46.6 KB · Views: 56
  • 102_3909.JPG
    102_3909.JPG
    38.2 KB · Views: 61
  • 102_3910.JPG
    102_3910.JPG
    51.2 KB · Views: 60
  • 102_3911.JPG
    102_3911.JPG
    62.3 KB · Views: 52
Very nice set. Take a few pics of the problem and upload here.We will see what is going on.
 
I painted the bed area of the truck a WOOD color by testors. I will wait for them to dry before assembly.
 

Attachments

  • 102_3916.JPG
    102_3916.JPG
    32.4 KB · Views: 58
  • 102_3917.JPG
    102_3917.JPG
    38.2 KB · Views: 68
  • 102_3918.JPG
    102_3918.JPG
    28.7 KB · Views: 66
  • 102_3919.JPG
    102_3919.JPG
    37 KB · Views: 70
Looking good Harrison. Do you remember when I was talking about the preliminary period? This is one of the rules I had told you about. Checking and comparing all parts that come with a kit..If you would have done that you would notice the scratched glass. And you could polish it in order to get its better transparency. What is more there is no reason of rushing. Try to fit three times , glue once.
 
Alright, nobody is perfect...:lol:

But I would like to pay your attention to the contrast of pics. Look at the first one in the post # 36. Quite nice pic of the truck cab. But what about the rest of them? If you would have taken these three last pics in the same way like the first one (with the same settings) you would have all of them nice, right?
 
True, :lol: sorry. I had a shaky hand and had paint on them and didn't want to dirty the camera. I will try better. :lol: is wood and OK color for the bed of the truck?
 

Users who are viewing this thread

Back