AM SBD-3 Dauntless SOB

Ad: This forum contains affiliate links to products on Amazon and eBay. More information in Terms and rules

Lol, Wayne. But, there is nothing gentle about Don. Subtle to him is a cattle prod to his ample backside. BTW, did we mention we were room-mates while in the USAF over on Guam in the early 80s? Oh, the stories I can tell........

I was thinking something with a bit of a spark....:D

well I'm sure some of those stories may come to light some day....will stay tuned just in case!
 
Been there, read that, I won't do the spoiler. But Patrick wins again. Oh did I say that.
 
Coincidence! I've just been reading a Dale Brown novel, which includes Andersen AFB, Guam!

Have you read "Flight of the Old Dog" yet? I think it was the very 1st Brown novel out there. I loved it and all his other books as well. I was hooked from "Center the PDI!" as the PDI was part of the avionics system I worked on on the old BUFFs.
 
Last edited:
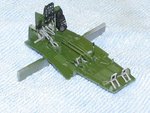
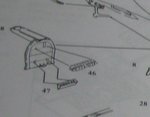
One thing you can count on with an AM kit is if they can screw up the instruction, boy they will. Some times they tell you they did, Sometimes they done't
 

Attachments

  • IMG_2201.JPG
    IMG_2201.JPG
    116.8 KB · Views: 69
  • IMG_2204.JPG
    IMG_2204.JPG
    44.8 KB · Views: 61
  • IMG_2205.JPG
    IMG_2205.JPG
    85.9 KB · Views: 69
  • IMG_2207.JPG
    IMG_2207.JPG
    85.8 KB · Views: 76
  • IMG_2209.JPG
    IMG_2209.JPG
    79.5 KB · Views: 70
Last edited:
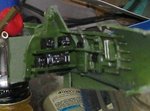
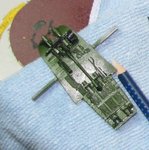
Looking very nice, Don. Don't forget to use a light wash to get all that detail to pop a little once you are done with the assembly.
 
One thing you can count on with an AM kit is if they can screw up the instruction, boy they will. Some times they tell you they did, Sometimes they done't

I just purchased one of these, please don't frighten me. Coming along nicely and I agree with Dale, a wash and dry brush will pop things out. On American interiors, I like to use RAF interior green as a dry brush.

Geo
 
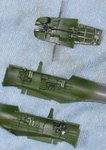
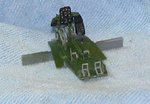
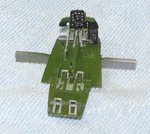
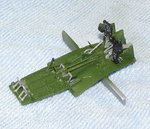
Fubar, the only major issue, is that so the ammo chutes at the back go the gunners compartment, it calls for a part B43 I think, there is no "B" tree in any of the three kits I have, one -1 and two -3's. The -1 though calls for 46 and 48 to be used there. Those parts are in all three kits. So I am doing that. Check you kit and see if it has a "B" tree in it or not. The -3's call for the fuselage to come from the B tree, but mine are on an A tree just like my -1. I bought the two -3's from a seller on eBay like a year or so ago and they were selling the kit bagged no box, so not sure. The B part looks like it may be ammo chutes covered by the canvas tarp.
 

Attachments

  • IMG_2218.JPG
    IMG_2218.JPG
    29.4 KB · Views: 80
  • IMG_2219.JPG
    IMG_2219.JPG
    21.2 KB · Views: 73
Last edited:
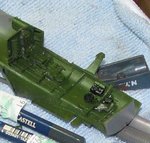
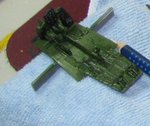
Well did a light wash with water balsck, may have to do a little more. did so highlighting useing a silver pencil as well. I am liking this. I have always like the AM kits but you have to pay close attention all the time. THe will snag you.
 

Attachments

  • IMG_2212.JPG
    IMG_2212.JPG
    35.6 KB · Views: 68
  • IMG_2213.JPG
    IMG_2213.JPG
    69.1 KB · Views: 82
  • IMG_2214.JPG
    IMG_2214.JPG
    61 KB · Views: 70
  • IMG_2215.JPG
    IMG_2215.JPG
    45.4 KB · Views: 84
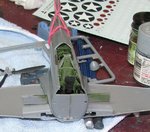
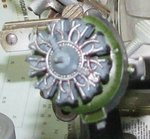
Well got the wash done and may have been a bit over done but it is done. Shot a coat of clear flat over it as it was to glossy. and mated the fuselage together. painted the engine and the push rods/ wiring harness and mated the engine mount. and mounted the lower wing.
 

Attachments

  • sbd3-4.JPG
    sbd3-4.JPG
    90.7 KB · Views: 85
  • sbd3-5.JPG
    sbd3-5.JPG
    122.8 KB · Views: 88
  • sbdeng1.JPG
    sbdeng1.JPG
    34.7 KB · Views: 87
  • sdbeng2.JPG
    sdbeng2.JPG
    34.9 KB · Views: 85
Looking good, but see if you can adjust the instrument panel, and perhaps also the seat. They both appear to be misaligned - check the second photo; the angle in relation to the top line of the forward fuselage.
 

Users who are viewing this thread

Back