Navigation
Install the app
How to install the app on iOS
Follow along with the video below to see how to install our site as a web app on your home screen.
Note: This feature may not be available in some browsers.
More options
You are using an out of date browser. It may not display this or other websites correctly.
You should upgrade or use an alternative browser.
You should upgrade or use an alternative browser.
Designing a siggy need help (1 Viewer)
- Thread starter Vic Balshaw
- Start date
Ad: This forum contains affiliate links to products on Amazon and eBay. More information in Terms and rules
More options
Who Replied?
- Thread starter
- #102
Vic Balshaw
Major General
Morning Wojetk, how's things with you, I hope your kitchen is in a better state than mine. though functional, I've only a bit of a bench top to prepare food on, a fantastic new oven and induction cook top and the plasterer making a mess.
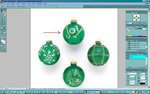
Have been playing with Photoshop (not modelling) and if you are up for it would like to find out what I'm doing wrong with the cut from on picture and pasting to another. I'm using the Pen Tool rather than the Lasso Tool which I found was hard to get accurate. What is happening, is I get the outline of what I want to cut, do the cut and then the paste to the second picture and all that cones across is the outline of what I've traced. It is not bringing over the coloures. I feel this could be something to do with not getting the layering right. Have you any ideas?

Have been playing with Photoshop (not modelling) and if you are up for it would like to find out what I'm doing wrong with the cut from on picture and pasting to another. I'm using the Pen Tool rather than the Lasso Tool which I found was hard to get accurate. What is happening, is I get the outline of what I want to cut, do the cut and then the paste to the second picture and all that cones across is the outline of what I've traced. It is not bringing over the coloures. I feel this could be something to do with not getting the layering right. Have you any ideas?
- Thread starter
- #104
Vic Balshaw
Major General
Ok will do, but have to set it up first.
- Thread starter
- #105
Vic Balshaw
Major General
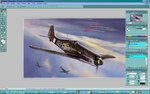
Now I see it now. But I don't use tha way for that. I use the rectangular marking and then Ctrl+C. Then going to another project and Ctrl+V. Of course the pic you are interesting in has to be in the marked area. Them I use the polygonal
lasso tool and magnifying glass to remove these unwanted parts.
ALso you can use magic wanad.
lasso tool and magnifying glass to remove these unwanted parts.
ALso you can use magic wanad.
Last edited:
- Thread starter
- #107
Vic Balshaw
Major General
That is one way I have worked it before, but am trying to improve and quicken the process. I have to go out now, but will keep working on the cut and copy process. Maybe tomorrow if ok and you are not otherwise occupied, you could give me some pointers on colour shading text , similar to the way you have it on your siggy.
For now, thanks again, have a good night and don't work to hard.
For now, thanks again, have a good night and don't work to hard.
- Thread starter
- #109
Vic Balshaw
Major General
G'day my friend, I'm up and running, though am expecting the kitchen bench top fitted this morning so may have a couple of electrical interruptions, so if you up for it, I'm ready
PS Got you message late last night (thanks) when I came home, was to late to reply
PS Got you message late last night (thanks) when I came home, was to late to reply
- Thread starter
- #111
Vic Balshaw
Major General
Not at all, it's just on 9:30am (tomorrow, in your part of the world) so I have the whole day ahead of me
")
- Thread starter
- #113
Vic Balshaw
Major General
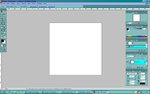
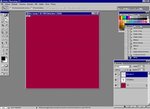
OK. Hit the Ctrl+A keys to mark the whole area. Then set the colour of a tool as dark red for instance.Choose the tool "Bucket with paint" (sixth icon of the right column in the tool bar on left) Then "discharge" the colour into the marked area.You should obtain the red background.
- Thread starter
- #115
Vic Balshaw
Major General
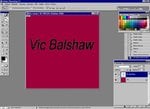
Ok have a deep red background, used the Ctl-Backspace to fill it
OK. Click the T letter in the tool bar and tape a text with black letters for instance. If you need a different letter shape choos other fonts simply. Also if you want to add any effect to the text shape ( bending for instance ) you have to do now with the menu for text.
Attachments

Last edited:
- Thread starter
- #117
Vic Balshaw
Major General
It is done
- Thread starter
- #119
Vic Balshaw
Major General
I have it. I'm also making up a tutorial as we progress
Users who are viewing this thread
Total: 2 (members: 0, guests: 2)