**** DONE: 1/48 Me262A-1a KG(J)54 - Jet/Recon/Transport GB

Ad: This forum contains affiliate links to products on Amazon and eBay. More information in Terms and rules
Cheers fellas...

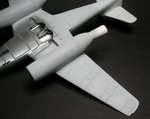
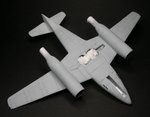
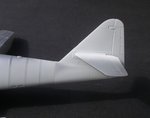
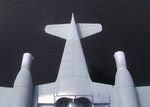
Even though it was mothers Day, slipped in a couple of hours with the airbrush....painted the tail area a whitish version of the RLM76 for the special decal camo on this bird, next up was the standard 76 light Blue/grey for the lower surfaces, carefully covering the putty lines, yet retain some slight hint of them.
This was carried up the sides of the fuselage to a mid point to allow for the blending of the upper colour....

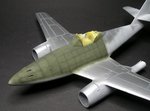
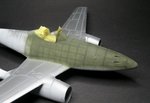
now this was where Plan A or Plan B would take affect depending on the overspray pattern on the putty lines.....well plan A was the light application of some 76 as mentioned then the RLM83 dark green, sticking with this designation for the time being, trying to get the right blending for the green to show the putty lines beneath, but the Green just wasn't going to give the same effect as the 76 over the putty lines on the lower surface....So Plan B...then continued with the light mottling application and the putty lines carefully being gradually obliterated with the green paint and thus building this up to create the same better effect of the darker panel lines beneath the paint, actually looks better and more like I thought it would come out...only had time to do the forward fuselage before time caught up with me and i had to finish up for the day...
 

Attachments

  • 50_Tail Whitish 76_5233.jpg
    50_Tail Whitish 76_5233.jpg
    40 KB · Views: 64
  • 51_Initial RLM76 Lower fuselage-5236.jpg
    51_Initial RLM76 Lower fuselage-5236.jpg
    43.9 KB · Views: 71
  • 52_RLM76 Lower surface Progress_5241.jpg
    52_RLM76 Lower surface Progress_5241.jpg
    54.2 KB · Views: 60
  • 53_Lower surface done_5250.jpg
    53_Lower surface done_5250.jpg
    42.9 KB · Views: 69
  • 55_RLM83 fuselage_5253.jpg
    55_RLM83 fuselage_5253.jpg
    53 KB · Views: 69
  • 56_RLM76 Forward fuselage_5256.jpg
    56_RLM76 Forward fuselage_5256.jpg
    49 KB · Views: 75
now another thing with this Me262 is that it was an early version/production aircraft along with each of the other 20 or so possible aircraft that had the unique tail pattern, which means it most likely didn't have, at that early time, the small teardrop shaped bulge on the Gun Covers. Now study of other aircraft that survived to may '45 with this tail pattern shows that in some pictures the bulges can clearly be seen on the covers, meaning that a number of them that continued operations were most likely upgraded with the improved ejection chutes which stuck out slightly further and therefore required the bulged covers.
So I decided to go with this premise and retain the teardrop blisters rather than remove them.
 
Thanks very much guys, first stage of the Undercarriage stuff...been a bit busy the past few days...
 

Attachments

  • 57_U-C legs prepped_5274.jpg
    57_U-C legs prepped_5274.jpg
    32.4 KB · Views: 63
  • 58_U-C legs prepped_5278.jpg
    58_U-C legs prepped_5278.jpg
    31.6 KB · Views: 64

Users who are viewing this thread

Back