Crimea_River
Marshal
As do I. That's a great idea.
Follow along with the video below to see how to install our site as a web app on your home screen.
Note: This feature may not be available in some browsers.
Ad: This forum contains affiliate links to products on Amazon and eBay. More information in Terms and rules
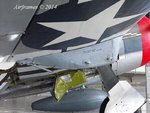
Nice job on the spinner and prop. One concern I have is that prop looks like it is a "cuffed" type. If so the cuffs were usually a hard rubber material that would not show metallic paint chipping on them. I'm not positive on the P-47 props but I'm pretty sure the P-51 props were like that. Maybe someone else here can confirm that. If so, its probably not to late to touch them up.
")