**** DONE: 1/48 Tamiya Spitfire Mk.I DW-O 610 Sqdn BoB GB

Ad: This forum contains affiliate links to products on Amazon and eBay. More information in Terms and rules

Thanks once again Terry. I hope I don't appear to be over-challenging you and I totally agree with you on the Wiki thing. My kid could have written that line and he knows as much about Spitifres as my a$$ knows about snipe shooting.

As to the timing thing, with R6595 coming off the line in May 1940 and the first Spit II's arriving with Squadrons in mid June, 1940, do you think it may be likely that my rig got the engine driven pump even though it wasn't in the X series? I note that some of the R's were produced well into late 1940 and even 1941. My info is from here: production page 003

Sorry to flog this topic but I do find it interesting, if not potentially nauseating!
 
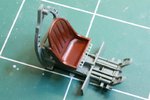
Small update. I decided to add the flare rack, just to pi$$ Terry off!

It was easier than I thought, just drilling at 1mm increments along a metal ruler then cutting the rectangle out. I realize that there was a depth dimension as well but this would be hard to see anyway so will likely leave as is.

I'll need to find a way to offset the rudder pedals a bit as I've decided to crank the rudder a bit to port.
 

Attachments

  • 100930 Seat with Flare Rack.jpg
    100930 Seat with Flare Rack.jpg
    88.3 KB · Views: 182
Nice one mate - and it takes a lot to p*ss me off! (see the 'What Annoyed Today' thread!)
As for the hand-pump Vs Engine pump, that one I'll leave down to you! However, personally, I'd go with the hand-pump, especially as the flare rack is fitted, unless you can discover more evidence of the later pump on this machine, or serial block.
Might be worth asking the question over at 'The Spitfire Site' (may be Spitfire Page - can't remember!).
 
Thanks Terry. Maybe it's "Spitfireforums.com". If so, been there. [EDIT - Oh yeah, there's Spitfiresite.com" too. Been there too.]

It's time to move on though so hand pump it is!

I have a Spit VIII and IX that will leave no doubt so, if only for variety, that's my decision.
 
Last edited:
Thanks Vic.

Over the past couple of days, I was toying with creating my own decal for the instruments. Tamiya did not provide instrument decals in this kit and my initial attempt at trying to pick out the dials and numbers using the traditional paint-on-a-pin approach came out OK but I wanted to try to push my boundaries for a bit more realism (See pic below).

101003 Inst Panel Before.jpg


To make the decal, I took a close-up of the panel and downloaded various instrument panel pics off the net. Then, using Photoshop and with some coaching from my patient spouse, I superimposed the various instruments onto the panel photo to create a layer for the decal:

Panel Instruments Superimposed.jpg


Once correctly sized, the file was saved with multiple copies (in anticiaption of more than 1 attempt at getting these succesfully onto the panel) and printed onto decal paper.

101003 Inst Decal.jpg


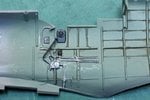
As I type, the decal has been coated with ink preservative and is drying for this afternoon's session. The below pic shows both cockpit halves with the kit parts applied before further detailing commences. The port side (upper photo) has had the kit throttle quadrant and map box added. The latter was trimmed to the correct size as the one provided with the kit was too wide. The starboard side will see the automatic gear selector replaced with a scratch build hand pump and some additional lines and the oxygen hose added.

101003 Cocpit Walls Before Detailing.jpg


Hopefully I'll be able to post some pics of the finished panel tonight. Thanks for checking in.
 
Thanks guys.

Terry, you may be right but the Pilot's Notes for the Mk I shows a cockpit schematic with the flare control box right behind the map box (See ref below - ignore the red highlight as I took this from a website discussing boost controls. The map box is item 4). I haven't put the flare controls in yet. Seems this cockpit will be a mish-mash of Spit I and II features given the sketchy info of when things converted over. The right side seems to have had stuff move around when the gear pump converted over. I don't know if the oxygen socket is in the right place and there's a signal switch box that seems to have moved when the auto gear selector was installed.

spit1pn-port.jpg


At any rate, I got the instrument decals applied and Future dabbed for the glass. The dials are there but hard to see with the reflection. I found that I had to paint the instrument faces completely white before applying the decals. The black background resulted in the fine decal dials and numbers being completely hidden. Good thing I made mroe than one set.

101003 Inst Decals Done.jpg


I'm reasonable happy with the result and think that it's pretty good for a 1/48 non-PE panel. Time to move on to the next steps. Thanks again everyone.
 
Looks bl**dy good Andy !
Thanks for the clarification on the flare/map case thing - I still haven't seen a pic of the original pistol holder.
 
Here's the right side of the cockpit with some details added (compare with last pic in post 49): cockpit light, signal box, undercarriage hand pump and selector and all the electrical/hydraulic lines for these and a metal placard. All these are scratch built from card, sprue, and 30ga copper wire. Yet to come is the oxygen hose and some touch up paint.
 

Attachments

  • 101004 Cockpit Right.jpg
    101004 Cockpit Right.jpg
    90 KB · Views: 150

Users who are viewing this thread

Back