**** DONE: GB-45 1/48 P-40B - BoB/Foreign Service

Ad: This forum contains affiliate links to products on Amazon and eBay. More information in Terms and rules

PM sent Dale
Thanks for the info, George. Exactly what I was looking for. I swear I have a box to two of modeling stuff / books that I have yet to find from the move. Grrrrrrrr.
 
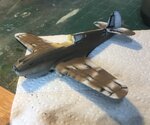
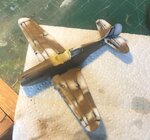
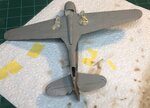
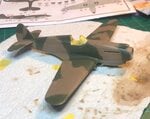
Ok, I finally got my hands on the proper Vallejo paint set for the P-40B (Pic 1). I was looking over just how to get that STRAIGHT, soft edge on the top camo paint and the gray belly. So, I am going to use a "noodle" of blue tack in an attempt to get a straight edge. No way I trust my hands to get a straight edge doing freehand (Pic 2). I now have my light coats started (Pics 3 & 4). Slow and patient Dale, slow and patient. BTW, I am really enjoying the H&S Evo airbrush. And I mean REALLY liking it.

Please forgive the quality of the pics and lighting. I am using my iPhone as I do not have the room for a dedicated photo area like I did before. I will try to pay more attention to the lighting and I am hoping to get something setup for the DSLR and better lighting soon.

Thanks for stopping by.
Vallejo CBI Set.jpgBlueTack Noodle.jpgEarth - Initial Coat.jpgEarth - Initial Coat 2.jpg
 
Last edited:
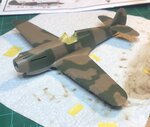
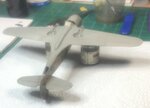
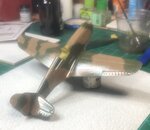
I spent the weekend working on my first attempt at final painting. Still more work to go with touching up and zeroing in on things. It has been over 18 months since I really airbrushed and this is only my 3rd kit over the years that is done in acrylics. Man, the shift to acrylics has been a bit more of a struggle than I recall from my first two I did prior to my long hiatus. So, lots of testing mixes, thinning, flow improver, air pressure, all that fun stuff. But, having said all that, I am really happy with the new airbrush. All the top surface boundaries were done freehand. Did I make some mistakes? Oh, you bet I did. But, stayed calm and corrected without having to completely strip the paint down and start over. Pics below and thanks for stopping by.
Initial First Paint - Belly.jpgFinal Paint rgt top.jpgFinal Paint lft top.jpg
 
Last edited:
Good stuff. I don't have problems free handing on my paint mule; very tight pattern. Once I get near a model all hell breaks loose. Practice, practice, practice.............
 
Good stuff. I don't have problems free handing on my paint mule; very tight pattern. Once I get near a model all hell breaks loose. Practice, practice, practice.............

Oh, I totally relate to that, George. That is one of the reasons I have the paper towel there. Plus, I discovered something to use for the when the tip gets sticky. I keep a damp sponge right at the corner of desktop, when the needle needs a clean, I just lightly poke it into the sponge, done! Easy peasy.
 
Good Afternoon, All,
Well, basic exterior painting is done. I applied pledge (see pic below) today to the entire bird. TBH, the new stuff went down very nicely. I guess time will tell. First test will be how this stuff holds up to decal solvent (fingers crossed). The last picture is the Pledge I used along with the sponge I keep handy for cleaning the needle as the paint spray dries. Of course, I dampen it first.
Now it is time to pause, review the instructions and make up my final to do list. I have found actually reviewing and making a list sure keeps me focused to completion.
Botton Clear Gloss Coat.jpgTop Coat Gloss Clear.jpgGloss Coat.jpg
Thanks for stopping in.
 
Last edited by a moderator:

Users who are viewing this thread

Back