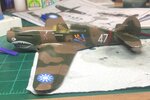
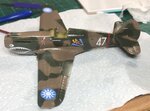
**** DONE: GB-45 1/48 P-40B - BoB/Foreign Service

Ad: This forum contains affiliate links to products on Amazon and eBay. More information in Terms and rules
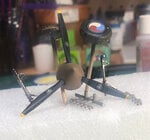
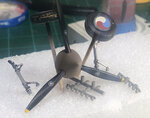
Well, got a good start on what we all call those fiddly bits. Propeller is painted, assembled, gloss finished, decaled, and finally flat coated. Tires are painted, gloss coated, decaled, weathered a touch, finally flat coated. I tried Vallejo's Model Metals on the landing gear legs (ok, maybe not an exact replication, but I was dying to try this stuff; WOW, the pictures just do not do it justice), weathered with washes, and sealed. Finally, I drilled out the exhaust in 5 steps. Man, am I loving being back at the bench!
Thanks for stopping by.
Fiddly Bits 1.jpgFiddly Bits 2.jpg
 
Let me know how they mix, Geo. I am ordering another set or two. I was totally blown away with what I saw on the legs and on a few cards. Almost as lovely as Alclad but far less of a high.
 
Ok, decaling has started. I finally found a shade of green drab that works well for the flying tiger decal. That is on and sealed up now. That shark mouth decal was a real pain to get set in place. Lots of water and a fine brush to get it in place and wicking away the water with bits of paper towel. It is perfectly in place? Probably not, but it came ok IMO. So far the new Pledge is holding up well to the decal solvent. I had one place just above the 47 that faded a bit, but a few gentle swipes with a windex dampened q-tip and reapplication with a brush cleared that up nicely.
One pic below. Thanks for stopping in.
Decals left side.jpg
 
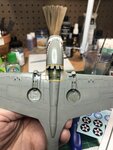
Thanks for all the kind words and assistance (Geo, you rock!). Ok, I have a question. I have very limited resources on the P-40 other than the Osprey AVG book. See the picture below. The area outlined in the picture. Ok, that should be the same shade of grey as the underside? That sure seems so to me. My main question is, just how far into the "throat" should the grey extend? Do things transition to interior green or I am sweating a detail a bit too much?
Thanks in advance for the help, guys.
Lowerside color question.jpg
 
Well, all, decals are on. I did a light coat of pledge to seal the decals. Now it is time for weathering. It has been awhile since I did this. So, I think sitting back and working out a plan on paper would be a wise idea. Andy, you idea of staining the crap out of that underside area is exactly what I have in mind. I did spray that area in light gray. Pics below and thanks for stopping by.
Lft side ready for weathering.jpgrgt side ready to weather.jpgUnderside ready for weathering.jpg
 
Last edited:

Users who are viewing this thread

Back