**** DONE: GB-46 1:48 Me-410 B-2 - WW2 Eastern Front / Twin Engine A/C, Transports and Gliders

Ad: This forum contains affiliate links to products on Amazon and eBay. More information in Terms and rules

Good Morning, all,
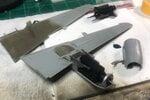
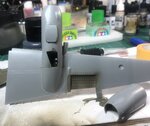
Well, I place the forward bay doors on the fuselage with some PVA. As you can see, there is a significant gap there. I cut a couple of strips of 0.1 inch card, glued them together and they slip right in. I then added a bit of card over the ejector port and a piece on the interior of the doors to reinforce the the patch and seam. I am now sanding things down. One thing I need to sort out is just where and what size the ejector port for the 50mm shell is placed. I am working through a PDF book Don sent me. After the sanding and describing / re-riveting I will figure out the cannon barrel exit. Don gave me the dimensions of the exit in the Revell kit and I will start with that as a starting point. And, no, the Revell piece does give me ANY clue as to the ejection port.
Thanks for stopping by.

Forward door gap.jpgDoor gap filled.jpginterior door patch.jpg
 
Well, after more digging and finding just a few hazy photos, I am giving up on the 50mm cannon as an option. Way too much aggravation in dealing with incorrect doors on this kit. I am looking over the decals and the kit to settle in on a final subject. Updates to come very soon. I think I bit off more than I should have for just a second build.
 
Hey, Guys,
Well, still thinking through what markings to use. Closing in on one now. I should have my mind made up in a day or two. in the mean time, I have started in on the wings. I have both basically painted. I did make up the very basic engine for the exhausts and propeller. I am now trying to figure out the proper placement of the engines in the nacelles to ensure exhausts and prop will set up correctly. BTW, after looking at opening the kit exhausts, I decided to look for some aftermarket exhausts. I found a set of Quickboosts on e-Bay and those are on their way. In the meantime, I need to sort out the proper engine placement. I did tack the nacelles for the left wing together with some PVA as an aid to placement. Fit looks good as does the rear of the nacelles in the wing. Slow steady progress.
BTW, Snautzer01 Snautzer01 , thanks for that link. Great reference for a future build.
Thanks for stopping in.
Left Wing and Nacelle.jpgleft Wing Bottom and Nacelle.jpg
 
Ok, between work, seams, patience, I have not made a post in quite awhile. So, here goes. This will be a bit longer than usual with images embedded versus thumbnails (my preference).

Started dealing with wing seam issues. I cannot comment on is this a Meng thing or the resin cockpit thing. Probably more the resin, than Meng.

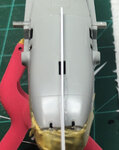
Picture 1 shows the bottom seams, they are further apart as I am not applying any pressure to the wings for the picture. They do close up about 50% with a mild pressure.

Picture 1
Bottom Wing Seams.jpg


I am not sure if this is the resin cockpit as the seam is uniform.

Next is the top wing seam before work was started on them. These appear to be more of fuselage bulge from the resin. (picture 2)
Top Wing Seam 1.jpg


After looking these seams over carefully I decided to fill with some card stock first.

The next pics (3 & 4) give you a glimpse of the card stock in place. I did have to use 2 pieces of 0.05 in the lower seams.
Picture 3
Bottom Card Stock inserted.jpg

Picture 4
Top card stock in place.jpg


The seam closed up almost perfectly when a mild pressure was applied. The remaining bit of opening was closed with very carefully applied superglue (I love those little slip over nozzle / needles).

I then let everything dry for 24 hrs. After that, I taped off the plastic on either side of the seams to minimize putty getting smeared everywhere. I then applied a few light applications of Tamiya white putty letting each application dry over night. Once things were looking ok I then used some acetone on q-tips to carefully start removing the putty. This was done while the tape was still in place. Once that was done, off came the tape, a quick wipe down with alcohol and I started priming. Picture 5 - one top seam only - need another pic or three.
Top Wing Seam Puttied.jpg


So, I think I need one or two more rounds of filling, clean up, and primer and I will have the wing seams dealt with. I need to get hustling as I am I down to the last month of the build and I do want to get this one done and move to the ZM Ta-152.
 
Good Morning, All,
Work continues, slower than I care for, but progress nonetheless. First picture is of the gear leg with brake lines. One question is whether the oleo bellows should be black (instructions called for black and RLM02 on the wheels)? I find numerous pictures (well, numerous in the context of a 410) than indicate both what seems to be gloss black or RLM02. I decided to stick with the kit call out for the hub colors.
Gear leg with brake lines.jpg


Next is little bit of detail I added to the rear gun aiming system. Just a couple of lines that I could get in place. Plus the glass for the outside sights. The center piece took a flight off into the carpet. I will find some spare mylar and replace it.
Gunsight rear.jpg


Last is the front gunsight. The lit included a TINY PE mount. I looked at the PE, then the sight, then the canopy, then the PE and decided "Oh hell NO". I made up a mount from some thin sheet card and have it mounted to the sight. I feel that getting this to stick to the forward canopy will be far easier than that TEENY PE piece.
Front gunsight.jpg


BTW, the Meng canopy is a real pain in the ass, it has 6 pieces and is a royal pain to get together. Yeah, this one will be a closed canopy.
 

Users who are viewing this thread

Back