**** DONE: GB-51 1/48 FJ-4B Fury - No Propellers

Ad: This forum contains affiliate links to products on Amazon and eBay. More information in Terms and rules

N4521U

Colonel
14,107
6,649
Nov 1, 2009
Miranda, NSW
User Name: N4521U
Name: Bill
Category: Advanced
Kit: Hobby/Boss FJ-4B Fury
Scale: 1/48th
Accessories: Custom decals as per WINGS PALETTE Image
May add some scratch stuff!

There was an FJ-3 flown off the deck of a carrier, but the 4 is just too different to substitute.
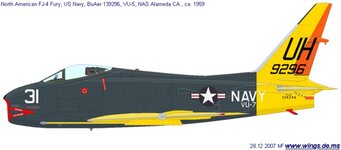
I lived about 10 miles from NAS Alameda California as a kid, about seven years before the time the FJ-4B was around so I have chosen a rather Garish Alameda paint scheme, which of course will require the customary Custom decals.
I bought this kit at auction night at one of the IPMS NSW meetings and Blimey a Cockpit!!!!!!! So that will be included.
Nothing glued together.
Less than a month to build.............. so a Speed Building I will go!
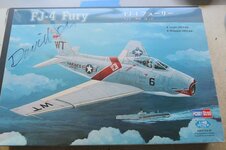
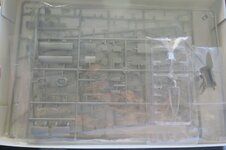
GB51C-01.jpg
The box.
GB51C-02.jpg
The kit.
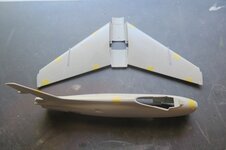
GB51C-03.jpg
Main parts.
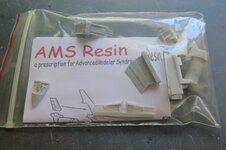
GB51C-04.jpg
The pit.
GB51C-05.jpg
The scheme!
 
I believe this is your bird with useful notes for modellers, but some details differ from your colour profile:
View attachment 643538
The photo shows a VU-7 lineup at MCAAS Yuma and was taken from this very interesting article with a few more tips.
The above photo can be seen on the back cover of Steve Ginter's book North American FJ-4/4B Fury (Naval Fighters # 25).
Cheers!
Well now, I didn't know NAVY was under wing!
A revelation!!!! I'll have to go back and add That to my decals sheet!!!!
Thanks you for that......
 
Well now, I didn't know NAVY was under wing!
A revelation!!!! I'll have to go back and add That to my decals sheet!!!!
Thanks you for that......
Yep, UH + number is on top of wing only. Bottom of wing is NAVY + number. I couldn't find a photo of this a/c with NAVY in black on the fuselage though (as in your profile in post #4).
Attached are some more photos of VU-7 FJ-4s revealing additional details.
Cheers!
 

Attachments

  • FJ-4_4B Fury.pdf
    1.2 MB · Views: 89
Last edited:
Yep, UH + number is on top of wing only. Bottom of wing is NAVY + number. I couldn't find a photo of this a/c with NAVY in black on the fuselage though (as in your profile).
Attached are some more photos of VU-7 FJ-4s revealing additional details.
Cheers!
Champion!!!!!!
 
Sometimes it ain't easy working with resin pieces.
Sometimes they shrink and distort and do funny things we have to compensate for.
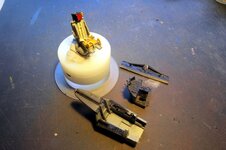
The painting of the seat is pretty straight forward. All the details are in one casting!
GB51C-07.jpg
But............ installing the cockpit tub?
That is another thing.
I had to notch the back of the tub,
Then attach block for the notch to rest on.
That's because the tail end of the tub sits too low
and it needs a bit of lifting. There is also space
at the tail and the curve of the fuselage.
So I'll have to fill that gap as well.
GB51C-08.jpg
This is just the start!
 
Thanks for looking in and all the great comments.
We tend to cheer everyone on, and This is what keeps us here and building!

So I've done a bit, some a headache, some fun.
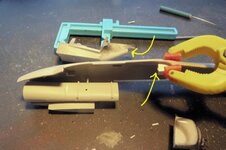
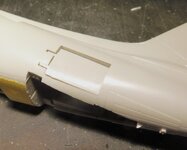
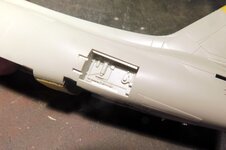
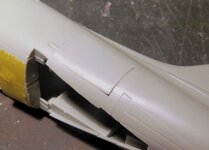
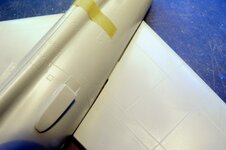
I have the speed brakes closed, first picture shows how it fits as in kit.
Second is 1x1mm styrene fitted into the slots of the hinges and both sides INside.
Third is how they now fit. I did do some bending of the door to fit the curve of the fuselage.
Is better now.
GB51C-09.jpgGB51C-10.jpgGB51C-11.jpg
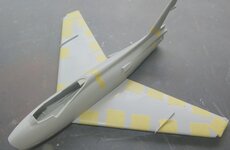
Glued up the wing halves, has center section below and top and bottom of port and starboard.
But where did this Ugly Gap come from??? In fact it's the wheel well attached to the bottom section.
I remember it forcing the wing downward when fitted to the well in the wing section.
But it HAS to do this for the gear legs and the outer gear doors to fit where they belong.
So I will shim to fill the gap before gluing. Not a big deal. Filling and start painting the
wing off the plane, then attach! Turning out to be a quicker build than I thought.
They were simple in the aerly days!
GB51C-12.jpgGB51C-13.jpg
 

Users who are viewing this thread

Back