Navigation
Install the app
How to install the app on iOS
Follow along with the video below to see how to install our site as a web app on your home screen.
Note: This feature may not be available in some browsers.
More options
You are using an out of date browser. It may not display this or other websites correctly.
You should upgrade or use an alternative browser.
You should upgrade or use an alternative browser.
****DONE Heavy Hitters GB Revell 1/48 Ju-87D
- Thread starter B-17engineer
- Start date
Ad: This forum contains affiliate links to products on Amazon and eBay. More information in Terms and rules
More options
Who Replied?- Thread starter
- #202
B-17engineer
Colonel
Sure. May have to go soon.
- Thread starter
- #204
B-17engineer
Colonel
- Thread starter
- #206
B-17engineer
Colonel
- Thread starter
- #208
B-17engineer
Colonel
Not badly. I tiny lil scrape. 
- Thread starter
- #210
B-17engineer
Colonel
Yes it does 
- Thread starter
- #212
B-17engineer
Colonel
Snug. 
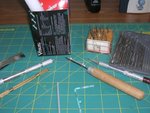
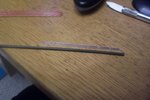
OK. Here a few pic with tools and materials you need for the light.The pinvice, a few drill bits, something sharp for cuttung, etc...
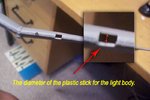
Also you need a candle and two pieces of a sprue frame , one have to be of the "glass" one. The diameter of the non glassy stick is determinated by the hight of the light bay.
Also you need a candle and two pieces of a sprue frame , one have to be of the "glass" one. The diameter of the non glassy stick is determinated by the hight of the light bay.
Attachments
- Thread starter
- #214
B-17engineer
Colonel
Alright Wojtek.
The thing is I can't get a candle now. It's late my parents are in bed and they'll be pissed if I light a fire.
I can get all of the others organized, can we resume tomorrow? Thanks for the picture of tools its helpful! I must go do some school work now too.
Gets some sleep!! Talk to you later today (For you atleast )
)
Have a nice night! My best wishes.
The thing is I can't get a candle now. It's late my parents are in bed and they'll be pissed if I light a fire.
I can get all of the others organized, can we resume tomorrow? Thanks for the picture of tools its helpful! I must go do some school work now too.
Gets some sleep!! Talk to you later today (For you atleast
Have a nice night! My best wishes.
Vic Balshaw
Major General
OK. Here a few pic with tools and materials you need for the light.The pinvice, a few drill bits, something sharp for cuttung, etc...
Also you need a candle and two pieces of a sprue frame , one have to be of the "glass" one. The diameter of the non glassy stick is determinated by the hight of the light bay.
Looking forward to this


- Thread starter
- #218
B-17engineer
Colonel
Ok....I believe.
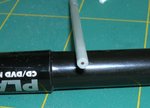
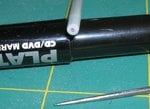
The next step is to mark the centre of the front circled surface with a marker.Then use a needle for making the initial point.Then take your pinvice with a thin drill bit and bore the central hole 3-4mm deep.
The next step is to mark the centre of the front circled surface with a marker.Then use a needle for making the initial point.Then take your pinvice with a thin drill bit and bore the central hole 3-4mm deep.
Attachments
- Thread starter
- #220
B-17engineer
Colonel
Users who are viewing this thread
Total: 1 (members: 0, guests: 1)

