The last few weeks have been typical for me when it comes to building. Enough projects already on the go, loads of ideas for these builds, good intentions to do some work on 'em…but for some reason I'm in a bit of deadlock when it comes to these builds…and then down the line I end up making serious progress on a kit I didn't even consider building until some other stuff was finished. So, with that said….I'm gonna throw another build at y'all for good measure.
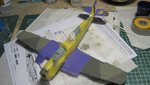
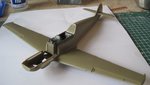
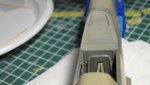
A few weeks ago I purchased this large scale Eduard Bf-109E-4 Weekend Edition, but I didn't consider building it on such short notice….well, it turned out I was wrong. The kits has been a joy to build sofar, and progress was quite quick…let alone one or two small niggles.
I mostly build 1/48 fighters and 1/72 for the larger fighters and bombers, but I had been thinking about taking a little detour, and build a big scale kit. Why? Well it's a bit of a childhood thing I guess. My father used to be a pretty good model builder back in the day (that is until me and brother and three sisters came along) One of my earliest memories from when I was just a small lad was that I had two 1/32 scale a/c hanging on the ceiling of my bedroom. It was a 1/32 Bf-109E (Galland's kite) 'chased' by a 1/32 Spitfire MK.22/Mk.24. Both Matchbox kits I believe. I'm convinced these two kits worked their magic one way or the other and were instrumental in me discovering this fine hobby as well, and becoming the aviation nutter I am today. Therefore building a Bf-109E as a first big scale kit seemed like the natural thing to do for some reason.
Warning, I'm no member of the Messerschmitt Mafia, so if I missed a thing or two, or something isn't 100% hysterically correct… so be it. In other words a build according to the principle of "if it looks like a Bf-109 it probably is one". I've read that this Eduard kit is supposed to have one or two minor accuracy issues, but I didn't look into that really. If you feel a 109 should look 250% accurate....look the other way.
Preliminary conclusion of this build sofar:
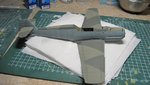
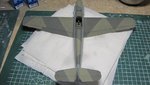
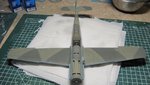
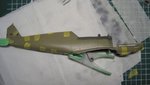
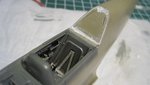
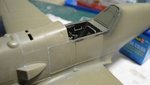
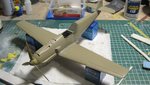
- A very fine kit indeed. Comes together very quickly with little problemens for the most part
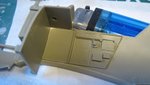
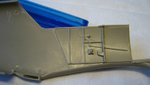
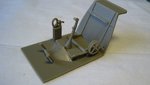
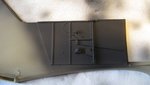
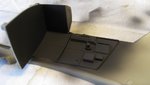
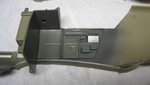
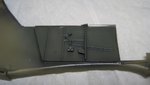
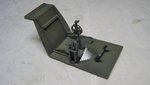
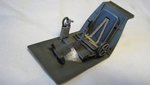
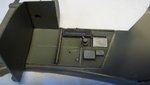
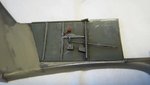
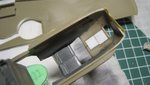
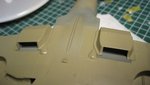
- Given the large scale detrail is a little sparse here and there (interior for the most part) This is ofcourse the result of the compromises of the Weekend Edition concept. On the other hand....experienced scratch builders should be able to take it to the next level without needing all the extra pre-fab bits and pieces that come with the Profi-Pack.
A few weeks ago I purchased this large scale Eduard Bf-109E-4 Weekend Edition, but I didn't consider building it on such short notice….well, it turned out I was wrong. The kits has been a joy to build sofar, and progress was quite quick…let alone one or two small niggles.
I mostly build 1/48 fighters and 1/72 for the larger fighters and bombers, but I had been thinking about taking a little detour, and build a big scale kit. Why? Well it's a bit of a childhood thing I guess. My father used to be a pretty good model builder back in the day (that is until me and brother and three sisters came along) One of my earliest memories from when I was just a small lad was that I had two 1/32 scale a/c hanging on the ceiling of my bedroom. It was a 1/32 Bf-109E (Galland's kite) 'chased' by a 1/32 Spitfire MK.22/Mk.24. Both Matchbox kits I believe. I'm convinced these two kits worked their magic one way or the other and were instrumental in me discovering this fine hobby as well, and becoming the aviation nutter I am today. Therefore building a Bf-109E as a first big scale kit seemed like the natural thing to do for some reason.
Warning, I'm no member of the Messerschmitt Mafia, so if I missed a thing or two, or something isn't 100% hysterically correct… so be it. In other words a build according to the principle of "if it looks like a Bf-109 it probably is one". I've read that this Eduard kit is supposed to have one or two minor accuracy issues, but I didn't look into that really. If you feel a 109 should look 250% accurate....look the other way.
Preliminary conclusion of this build sofar:
- A very fine kit indeed. Comes together very quickly with little problemens for the most part
- Given the large scale detrail is a little sparse here and there (interior for the most part) This is ofcourse the result of the compromises of the Weekend Edition concept. On the other hand....experienced scratch builders should be able to take it to the next level without needing all the extra pre-fab bits and pieces that come with the Profi-Pack.
Attachments
-
 00 - dooske.jpg73.3 KB · Views: 547
 -
 01 - interior 01.JPG74.9 KB · Views: 539
 -
 02 - interior 02.JPG65.5 KB · Views: 475
 -
 03 - interior 03.JPG55.1 KB · Views: 455
 -
 04 - interior 04.JPG55.8 KB · Views: 547
 -
 05 - interior 05.JPG54.3 KB · Views: 444
 -
 06 - flat black 01.JPG72.7 KB · Views: 564
 -
 07 - flat black 02.JPG65.5 KB · Views: 431
 -
 08 - flat black 03.JPG59 KB · Views: 449
 -
 09 - RLM02 and gloss 01.JPG62 KB · Views: 457
 -
 10 - RLM02 and gloss 02.JPG56.6 KB · Views: 424
 -
 11 - RLM02 and gloss 03.JPG56.8 KB · Views: 428
 -
 12 - RLM02 and gloss 04.JPG39.9 KB · Views: 446
 -
 13 - office sub assembly.JPG63.4 KB · Views: 504
 -
 14 - side wall detail 01.JPG59.9 KB · Views: 418
 -
 15 - side wall detail 02.JPG64 KB · Views: 429
 -
 16 - IP detail.JPG54 KB · Views: 432
 -
 17 - fuselage halves glued.JPG69.1 KB · Views: 419
 -
 18 - added strength.JPG72 KB · Views: 414
 -
 19 - cockpit rear bulkhead putty.JPG60.8 KB · Views: 631
 -
 20 - cockpit rear bulkhead sanded.JPG50.8 KB · Views: 588
 -
 21 - interior in place.JPG65.2 KB · Views: 584
 -
 22 - wings glued.JPG74.3 KB · Views: 430
 -
 23 - wings glued to fuselage.JPG86.1 KB · Views: 545
 -
 24 - overview 01.JPG70.7 KB · Views: 477
 -
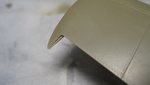
 25 - poor wing to fuselage fit.JPG55.5 KB · Views: 556
 -
 26 - streched sprue glued in gap.JPG54.5 KB · Views: 607
 -
 27 - putty on join.JPG57.1 KB · Views: 592
 -
 28 - Mr Surfacer on join.JPG59.2 KB · Views: 475
 -
 29 - poor fit oil cooler insert.JPG58.4 KB · Views: 523
 -
 30 - cowling in place.JPG64.9 KB · Views: 440
 -
 31 - additional cowling panels.JPG65 KB · Views: 545
 -
 32 - angled back plate cockpit.JPG68.8 KB · Views: 418
 -
 33 - under wing radiators.JPG60.6 KB · Views: 420
 -
 34 - cowling panels Mr Surfacers.JPG62.9 KB · Views: 424
 -
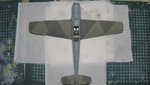
 34 - overview 02 Emil alright.JPG108.6 KB · Views: 532
 -
 35 - wingtip 01.JPG41.4 KB · Views: 452
 -
 36 - wingtip 02.JPG53.4 KB · Views: 424
 -
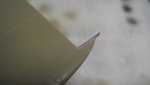 37 - wingtip 04.JPG32.3 KB · Views: 424
 -
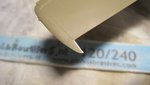 38 - wingtip 04.JPG51.7 KB · Views: 431
 -
 39 - preparation for painting.JPG105.4 KB · Views: 539
 -
 40 - pre-shade.JPG105 KB · Views: 551
 -
 41 - RLM65_01.JPG85.5 KB · Views: 524
 -
 42 - RLM65_02.JPG70.7 KB · Views: 389
 -
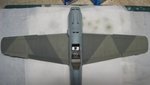
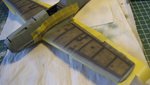 43 - vleugels afplakken.JPG82.4 KB · Views: 420
 -
 44 - RLM02 uit den losse polsch.jpg85.1 KB · Views: 434
 -
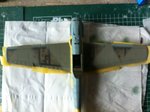
 45 - splinters afplakkeren.JPG80.5 KB · Views: 547
 -
 46 - met iets anders de splinter camo afmaken en uitpakken.JPG79.6 KB · Views: 449
 -
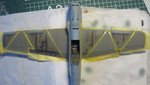
 47 - splinters done 01.JPG63.4 KB · Views: 439
 -
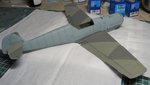 48 - splinters done 02.JPG72.8 KB · Views: 784
Last edited:
") 8)
8)