southerndoug
Airman
Having just made a tentative return to the modelling world, thanks mainly to COVID-19 lockdown, it is with some trepidation that I embark on this build in the esteemed and talented community of WW2aircraft.net! When I was modelling back in the 1970's I was probably OK for a teenager, but looking at what folks produce these days has me ... well, amazed! I figured if I had a go and put it out there, I may get some help (and much needed encouragement) to press on and finish. As well as showing anyone who is crazy enough to follow along what I am up to, hopefully I can ask advice along the way.
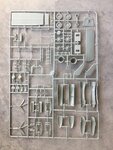
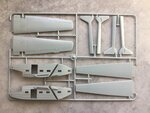
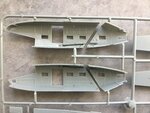
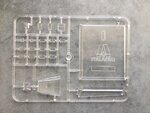
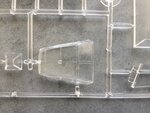
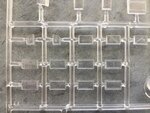
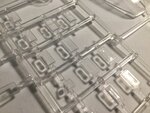
My folks bought this kit for me when I was about 13 I reckon, and it has sat for four and a half decades, moving from house to house in one of those cardboard boxes that you're never quite sure what's in them, waiting for me to have a go at it! My dad flew gliders, and was perhaps tired of me making powered aircraft all the time, so I was supposed to build the Go 242, but am more interested now in modelling the Go 244.
There are a few nice builds online:
Go 244
Gotha Go 242/244
Rick's 1/72 Gotha GO-244 - Finished! | Modelers Social Club Forum
Italeri 1/72 Go-244, by Torben Plesberg
1/72 Italeri Gotha Go242A-1 by Gavin Parnaby
including the one on ww2aircraft.net by Bustedwing:
Italeri 1:72 scale Gotha 242
…but as the Go 242/244 is not the sexiest aircraft ever built, and perhaps because this is the only (old) model available, it doesn't get shown off much. Initially I thought I might be Robinson Crusoe in attempting to depict the structural interior of the cargo hold (well, this is my intention anyway), but a bit more online hunting found a couple more builds on a French site that had put in a lot more effort than was standard:
Planeur Gotha GO-242, Italeri 1/72
gotha - [Concours avions allemands WWII] Gotha 242 Italeri 1/72 : Photos finales p.24 et je conclus. - Page 9
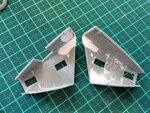
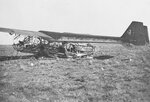
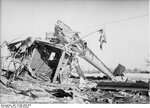
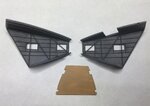
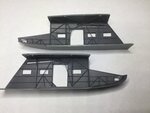
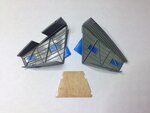
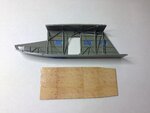
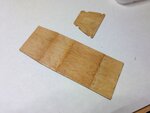
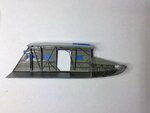
I had already begun my first ever attempt at scratch building when I found these French builds, and was only slightly surprised that someone else in the world had stumbled on the same photos I was using, and had made a mud map of what-probably-went-where-in-the-guts of the fuselage in an attempt to give some credibility to the cavernous interior of the Gotha. I remember when my parents bought me the kit, I was marveling at the interior details that came with it! Times change… the attempt at replicating the doped fabric looks more like a hessian bag, and the "details" of the structural steel members are an artist's impression at best. If this was a popular aircraft, I'm sure Eduard would have a PE aftermarket for it, especially for the very visible but sparsely detailed cockpit.
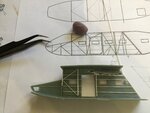
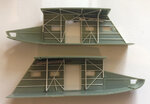
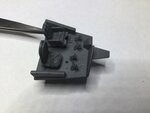
As it is, aftermarket options are limited to a replacement cockpit canopy and tail cone glazing by Falcon Clearvax (canopy set 42: Luftwaffe Part 7), which I hunted down and ordered from NZ. Even though the canopy is pretty good with the kit (all the side windows are another story though...), my intention is to have the two small outward opening side windows opened, which I think I can only do with the much thinner vacformed unit. Stay tuned… if I wreck it I still have the original to fall back on! I've also ordered some replacement pilot seating, as the kit seats would be about 980mm wide in the real world, and take up most of the cockpit! No AUS supplier has the Eduard Luftwaffe rudder pedals in stock, so I have bought what was available from BNA Model World, and have been forced to cannibalize a couple of Me 262 Eduard cockpit kits.
I know this would be a good kit for the current GB 46 Split Build - WW2 Eastern Front / Twin Engine A/C, Transports and Gliders, especially as the 242 was a glider before becoming a 244, but there is NO WAY I will finish this in time!
Anyway, thanks for looking in, and if you're so inclined, stay tuned! Cheers


My folks bought this kit for me when I was about 13 I reckon, and it has sat for four and a half decades, moving from house to house in one of those cardboard boxes that you're never quite sure what's in them, waiting for me to have a go at it! My dad flew gliders, and was perhaps tired of me making powered aircraft all the time, so I was supposed to build the Go 242, but am more interested now in modelling the Go 244.
There are a few nice builds online:
Go 244
Gotha Go 242/244
Rick's 1/72 Gotha GO-244 - Finished! | Modelers Social Club Forum
Italeri 1/72 Go-244, by Torben Plesberg
1/72 Italeri Gotha Go242A-1 by Gavin Parnaby
including the one on ww2aircraft.net by Bustedwing:
Italeri 1:72 scale Gotha 242
…but as the Go 242/244 is not the sexiest aircraft ever built, and perhaps because this is the only (old) model available, it doesn't get shown off much. Initially I thought I might be Robinson Crusoe in attempting to depict the structural interior of the cargo hold (well, this is my intention anyway), but a bit more online hunting found a couple more builds on a French site that had put in a lot more effort than was standard:
Planeur Gotha GO-242, Italeri 1/72
gotha - [Concours avions allemands WWII] Gotha 242 Italeri 1/72 : Photos finales p.24 et je conclus. - Page 9
I had already begun my first ever attempt at scratch building when I found these French builds, and was only slightly surprised that someone else in the world had stumbled on the same photos I was using, and had made a mud map of what-probably-went-where-in-the-guts of the fuselage in an attempt to give some credibility to the cavernous interior of the Gotha. I remember when my parents bought me the kit, I was marveling at the interior details that came with it! Times change… the attempt at replicating the doped fabric looks more like a hessian bag, and the "details" of the structural steel members are an artist's impression at best. If this was a popular aircraft, I'm sure Eduard would have a PE aftermarket for it, especially for the very visible but sparsely detailed cockpit.


As it is, aftermarket options are limited to a replacement cockpit canopy and tail cone glazing by Falcon Clearvax (canopy set 42: Luftwaffe Part 7), which I hunted down and ordered from NZ. Even though the canopy is pretty good with the kit (all the side windows are another story though...), my intention is to have the two small outward opening side windows opened, which I think I can only do with the much thinner vacformed unit. Stay tuned… if I wreck it I still have the original to fall back on! I've also ordered some replacement pilot seating, as the kit seats would be about 980mm wide in the real world, and take up most of the cockpit! No AUS supplier has the Eduard Luftwaffe rudder pedals in stock, so I have bought what was available from BNA Model World, and have been forced to cannibalize a couple of Me 262 Eduard cockpit kits.
I know this would be a good kit for the current GB 46 Split Build - WW2 Eastern Front / Twin Engine A/C, Transports and Gliders, especially as the 242 was a glider before becoming a 244, but there is NO WAY I will finish this in time!
Anyway, thanks for looking in, and if you're so inclined, stay tuned! Cheers
Last edited:

