Nice work so far!
Navigation
Install the app
How to install the app on iOS
Follow along with the video below to see how to install our site as a web app on your home screen.
Note: This feature may not be available in some browsers.
More options
You are using an out of date browser. It may not display this or other websites correctly.
You should upgrade or use an alternative browser.
You should upgrade or use an alternative browser.
Gotha Go 244 - 1974 Revell - Italaerei build... with trepidation!
- Thread starter southerndoug
- Start date
Ad: This forum contains affiliate links to products on Amazon and eBay. More information in Terms and rules
More options
Who Replied?Grant Barr
Senior Airman
Some great scratch work in there! A daunting subject to model but you look to have it well and truly under control.
That wooden floor is stunning
- Thread starter
- #24
southerndoug
Airman
I know... it's been months right? Anyway, finally grabbed a moment and FINALLY glued something substantial together! The rear cargo door. Continued with the interior, which is what is really taking the most time. Looks OK in real life, the photo shows all the imperfections, which I am choosing to ignore! Main fuselage soon. I hope...

Last edited:
Nicely done so far!
Crimea_River
Marshal
That looks really good.
Awesome brother
- Thread starter
- #31
southerndoug
Airman
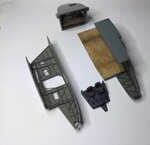
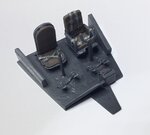
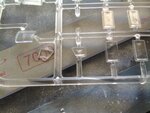
Getting close to mustering up the courage to joining the fuselage together... some final tweaks needed in the cockpit, as well as addressing some issues with the front lower windows. Have been able to polish out the "dimples" in the kit clear parts. This model is a "tail sitter" without weight up front, and will be even more so with all the added plastic I've dumped in the tail cone! I didn't want to stuff plasticine under the cockpit floor... I'm toying with the idea of filling the engine nacelles forward of the rear wheels and/or adding some cargo to the floor. Don't really want to hide all my hard work in there! Any suggestions?



fubar57
General
Looking good. Any 1:72 vehicles you could load up with lead and stick them inside?
GrauGeist
Generalfeldmarschall zur Luftschiff Abteilung
Perhaps make a few wooden crates that have fishing weights inside?
The build is coming along nicely!
The build is coming along nicely!
Last edited:
Airframes
Benevolens Magister
Really nice work, and very neat.
Apart from "weighted" cargo, or concealed nose weight ( Plasticine and lead shot or air rifle pellets), the weight in the nacelles may work, You'd need to do a trial fit of the parts, and then do a balance test, holding the wing tips on top of the fingers, if this is possible.
Alternatively, the completed model could be fixed to a display base, either using CA, or perhaps with "pins" in the base, fitting into holes drilled in the landing gear.
Crimea_River
Marshal
All the viable options have been mentioned I think.
Last edited:
vikingBerserker
Lieutenant General
Very nice!
Nice work so far!
- Thread starter
- #39
southerndoug
Airman
Hello again Gotha 244 fans... 
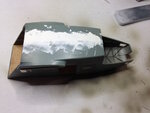
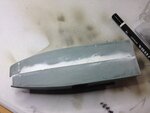
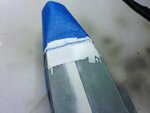
So I've finally joined the fuselage together, and despite many dry fittings and thinking it would be pretty good, it wasn't really, and has required quite a bit of filler...
I've still got a bit of filling to do internally below the cockpit floor (that very obvious gap). I was thinking I might get away with it once it's all closed in, but it may still be visible, so will get on to that soon. I have confirmed (before joining the fuselage) that I can instal the cockpit after the gluing, if you were wondering!
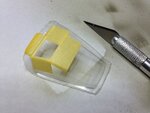
I got to thinking about the glazed canopy, and decided I wanted to open the sliding upper cockpit section. So I carved into the Falcon Clearvax canopy, and opened it up. Somewhat disappointingly, the vac-formed canopy is actually less clear than the kit one, although obviously much thinner. I may end up using the kit canopy after all, if I can fugure out how to polish out a few scratches. Also, not quite sure how to glue the vac-formed canopy on should I choose to use it: it's so thin! (advice on both these conundrums appreciated...).
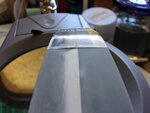
Dry fitting the canopy revealed an annoying gap, which has required yet more filling. I'm not sure if it's the Christmas alcohol or the toxic fumes from the Tamiya filler that has been giving me the headaches lately...
Thanks for dropping by! Really appreciate the comments and help so far! Trust you all had a great Xmas, wherever you are...
- Thread starter
- #40
southerndoug
Airman
Users who are viewing this thread
Total: 1 (members: 0, guests: 1)

