Nicely done so far!
Navigation
Install the app
How to install the app on iOS
Follow along with the video below to see how to install our site as a web app on your home screen.
Note: This feature may not be available in some browsers.
More options
You are using an out of date browser. It may not display this or other websites correctly.
You should upgrade or use an alternative browser.
You should upgrade or use an alternative browser.
Hawker Typhoon IB "Nicky" 439 Squadron RCAF 1/48
- Thread starter Totalize
- Start date
Ad: This forum contains affiliate links to products on Amazon and eBay. More information in Terms and rules
More options
Who Replied?Yep!...looking good alright...
Airframes
Benevolens Magister
Agree with all.
Crimea_River
Marshal
Agree with Terry agreeing with all. I really like hose belts.
Catch22
Major
Looks great!
vikingBerserker
Lieutenant General
Well done.
Tony Hill
Tech Sergeant
Looking nice.
- Thread starter
- #108
Totalize
Tech Sergeant
HI Guys,
Thanks to all for your comments. Things have been moving a bit slow but I was able to finish the seat and harness. I will post some pics in the next day or so. I am presently posting from work on my lunch hour. I want to get the cockpit in and the fuselage together so I can begin filling all the gaps and start working on the intake.
Cheers for now.
Dave.
Last edited:
- Thread starter
- #109
Totalize
Tech Sergeant
The cockpit seat is now complete and ready for installation. I dirtied up the belts and the seat itself with washes and dry brushing. I wanted to have them look well worn instead of looking like they were just freshly installed. The harness in the photo of Fraser looks pretty dirty and well handled too not only by the pilot and but also by the ground crew.


Last edited:
fubar57
General
Yep, I like it.
Geo
Geo
Airframes
Benevolens Magister
Looking good there Dave. BTW, the harness in the photo of Fraser is a rather grubby, darker webbing, (normally a off-white colour) seat-type parachute harness, not the seat harness.
Catch22
Major
That looks fantastic!
vikingBerserker
Lieutenant General
Nice!
Crimea_River
Marshal
Very convincing Dave. Well done.
- Thread starter
- #117
Totalize
Tech Sergeant
Thanks Guys,
I was going for the well worn look. My thinking was the people that handled these belts specifically the pilot and ground crew would probably have fairly dirty gloves or hands this would rub off on the belts.
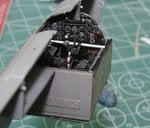
Next up was the cockpit itself. I managed to get the cockpit in minus the seat of course which will go in last. I dry fitted the fitted the fuselage halves and everything went together okay. The Fuselage has some fit issues along the top. When I get the fuselage together I will show where these fit issues are.
Here are some shots.
Attachments
Last edited:
Crimea_River
Marshal
Airframes
Benevolens Magister
Looking very nice indeed, Dave.
fubar57
General
Those are some great looking innards.
Geo
Geo
Users who are viewing this thread
Total: 1 (members: 0, guests: 1)

