Nuuumannn's European Tour of 2019

Ad: This forum contains affiliate links to products on Amazon and eBay. More information in Terms and rules

Interesting post Grant. I remember seeing a documentary on those tunnels told from a Canadian perspective. Many of the soldiers, waiting underground for the battle to start, carved their names and poignant messages in the walls and these can still be seen.
 
Many of the soldiers, waiting underground for the battle to start, carved their names and poignant messages in the walls and these can still be seen.

Indeed they can. The surviving tunnels are extensive and the local council is doing what it can to preserve the caverns. Many of the illustrations and grafitti has been covered over with mesh. The visitor centre is quite busy and was packed when I was there. You can only go down in a tour. When I went, Christian told the guy at the entrance that I was from New Zealand, but there were a few Canadians there too, I think the big red marijuana leaf on a white background gives it away.
 
In this post we visit some of the principal visitor sites of the Somme battlefields. From Grevillers we drive south west to Thiepval and take a lunch stop at the Ulster Tower. The inscription on a plaque at the entrance best describes it;

"This Tower is Dedicated to the Glory of God in grateful memory of the Officers, Non-Commissioned Officers and Men of the 36th (Ulster) Division and of the Sons of Ulster in other forces who laid down their lives in the Great War, and of all their Comrades-In-Arms who, by Divine Grace, were spared to testify to their glorious deeds."

The tower itself is Northern Ireland's national war memorial and is a replica of Helen's Tower on the grounds of Clandeboyne Estate in County Down, near Belfast and was one of the first national monuments to be located in the Somme region after the war, in 1921.

48802015376_a24deab743_b.jpg
Great War Tour 17

On the first day of the Somme offensive on 1 July 1916, the 36th Ulster Division made significant headway on the battlefield, advancing up this valley that looks toward the River Ancre where the Ulstermen began their charge, to where the Ulster Tower is located, from where this picture was taken to fortifications called the Schwaben Redoubt. Through clever tactics and a headlong drive up the hill, the Ulstermen's advance caught the Germans by surprise following the artillery barrage that signalled the beginning of the offensive and achieved a considerable strategic objective in storming the German defenses. Advancing whilst under fire from their own artillery, which served to mask their approach and keep their opponents' heads down, many courageous Ulstermen were killed by their own gun fire. Over the first two days of the offensive, the 36th Ulster was the first to achieve its objective, but it came at a high price, some 5,500 lost their lives in that time alone.

48802015046_ecf95bf43f_b.jpg
Great War Tour 18

Inside the cafe at the Ulster Tower, staffed by members of the Irish Somme Society - strange to hear Irish accents in an eaterie in the heart of France - there is a small room full of artefacts, including this Toffee Apple mortar, or 2 Inch medium trench Mortar, sometimes also called a Plum Pudding mortar. It was designed in response to the German Minenwerfers that were proliferating round the trenches. Introduced in 1915, the 2 Inch mortar had a short range, as did the German equivalent and was ideally designed for ease of transportation between trenches.

48802014896_0a64cc2116_b.jpg
Great War Tour 19

A monument to the Orangemen on the grounds of the Ulster Tower. It's worth noting that on the Julian Calendar that July 1st was also the date of the Battle of the Boyne.

48802014731_5ff354d45f_b.jpg
Great War Tour 20

From the Ulster Tower we drive back through Thiepval Village to the British Somme memorial, the largest on the Western Front and the largest Commonwealth memorial of its kind in the world. Some 72,337 British and South African missing servicemen are commemorated on its walls, although the site also commemorates French losses, too. Designed by noted architect Sir Edward Lutyens, who had a busy time in the 20s and 30s designing CWGC grave sites, the colossal monument took four years to construct, between 1928 and 1932.

48802158507_8fe576448d_b.jpg
Great War Tour 21

On the slopes in front of the monument are the obligatory head stones. These are French ones, distinctive in their appearance from the Commonealth ones in that they are a simple cross. The unknown are commemorated with the simple inscription "Ingonnu".

48802014381_c8d6006e96_b.jpg
Great War Tour 23

The Thiepval memorial is located on the site of German trenches, visible in the foreground, littered with daisies. Between the 26th and 30th of September 1916, the Battle of Thiepval Ridge took place. After concentrating attacks against the German lines on the rise to the left of the ville of Thiepval where the aforementioned Schwaben Redoubt was located, General Haig then focussed on attacking the defences to the right of the town. Led by the Canadians under Lt Gen Byng, their objective was ascending this hill to the site of the memorial, behind us and directly assaulting the trenches in front of us, across a 6,000 yard stretch. This also included strong points, more redoubts and their deep tunnel systems. In this the Canadians were only partially successful in capturing the trenches, the redoubts proving a more problematic proposition and not being over run until early October. The forested area hides the Ancre River and the Canadian point of advance.

48802157807_bb189d3d04_b.jpg
Great War Tour 25

The Canadians' objective; the trenches on the Thiepval Ridge in the foreground, with the great memorial crowning the achievement.

48801666733_6a89f14ec6_b.jpg
Great War Tour 26

We then drive the short distance from Thiepval to the town of Albert and its basilique Notre Dame de Brebières. This is, of course a reproduction, as we'll soon see.

48802013646_e2a3f90169_b.jpg
Great War Tour 27

During the war, Albert was captured by the Germans twice, but was largely occupied by the British and became a garrison town, which regularly attracted the attention of German artillery. Ultimately, the basilique and the town was largely reduced to rubble by both British and German shelling, leaving little behind. This is the interior of the reconstructed basilique.

48802157377_9b505a324c_b.jpg
Great War Tour 28

During an artillery barrage in January 1915 a shell struck the golden statue atop the tower, knocking it horizontal, and thus the legend of the Leaning Virgin was born. Soldiers on both sides, a superstitious lot began stories connecting the statue's fate to that of the war, which the French had secured in its askew position, believing that the war would end the day it fell - the Germans believing that the side which demolished the statue would lose. As it was, British shelling finally brought the Golden Virgin down in 1918. This is a free postcard that can be obtained within the basilique and shows the Leaning Virgin to good effect, as well as some of the destruction wrought on the building.

48802157212_613323ea19_b.jpg
Great War Tour 29

Next we take a short drive to the east of the town to Boiselle and this rather impressive hole - the Lochnagar crater. The result of an explosive mine dug by the Royal Engineers' Tunnelling Company to go off on the opening day of the Somme Offensive, 1 July 1916, the tunnel was dug directly under a German strong hold named the Schwabenhohe. Named the Lochnagar mine after the trench from whence the tunnel originated, the mine was one of 19 dug to go off to open the offensive, known as the Battle of Albert at this stretch of the front. At 98 ft (30 m) deep and 330 ft (100 m) wide, the crater is an impressive sight; some 400 feet of German trenches were destroyed and the explosion was believed to have been the biggest and the loudest man made noise at the time. Every year on 1 July a service is held at the crater.

48801666068_8355f01273_b.jpg
Great War Tour 31

Looking away from the crater toward the Scottish held Lochnagar Street trenches. Wiki describes the tunnel;

"It was begun 91 metres (300 ft) behind the British front line and 270 metres (900 ft) away from the German front line. Starting from the inclined shaft, about 15 metres (50 ft) below ground, a gallery was driven towards the German lines. For silence, the tunnellers used bayonets with spliced handles and worked barefoot on a floor covered with sandbags. Flints were carefully prised out of the chalk and laid on the floor; if the bayonet was manipulated two-handed, an assistant caught the dislodged material. Spoil was placed in sandbags and passed hand-by-hand along a row of miners sitting on the floor and stored along the side of the tunnel, later to be used to tamp the charge.

"When about 41 metres (135 ft) from the Schwabenhöhe, the tunnel was branched and the end of each branch was enlarged to form a chamber for the explosives, the chambers being about 18 m (60 ft) apart and 16 metres (52 ft) deep. When finished, the access tunnel for the Lochnagar mine was 1.37 by 0.76 m (4.5 by 2.5 ft) and had been excavated at a rate of about 46 cm (18 in) per day, until about 310 m (1,030 ft) long, with the galleries ending beneath the Schwabenhöhe. The mine was loaded with 27,000 kg; 27 t (60,000 lb) of ammonal in two charges of 16,000 kg; 16 t (36,000 lb) and 11,000 kg; 11 t (24,000 lb). As the chambers were not big enough to hold all the explosive, the tunnels that branched to form the 'Y' were also filled with ammonal. One branch was 18 m (60 ft) long and the other 12 m (40 ft) long. The tunnels did not quite reach the German front line but the blast would dislodge enough material to form a 4.6 m (15 ft) high rim and bury nearby trenches."

48801665943_571ec46132_b.jpg
Great War Tour 32

Relics for sale at the site of the crater. An enterprising Frenchman has a caravan full of artefacts recovered from the local area, which he sells. The spiral stake held barbed wire in place.

48802156772_be74625c7b_b.jpg
Great War Tour 33

Next, we rejoin the Kiwis at Longueval.
 
Last edited:
In this installment, we drive deep into the battlefields of the Somme region, where, following the first day of the Somme Offensive, 1st July 1916, British and Commonwealth troops made a cautious but steady advance eastwards toward Longueval by September. On the 14th, the New Zealand Divison, which had been in training and had seen action in and around Armentieres previously, gathered at what was named Caterpillar Wood, one of a series of woods, this one elongated and reputedly caterpillar shaped, around the small ville of Longueval and prepared for their role in the Third Phase of the Battle of the Somme, known as the Battle of Flers-Courcellette. This was to be the first set piece battle of the NZ Div.

We take the road from Boiselle into Bazentin to Caterpillar Wood CWGC Cemetery, which sits on top of the German trenches, as has become common. This is from where, in 2004 the grave of an unknown soldier was, amid much ceremony removed and reinterred in New Zealand.

48801664218_2d9d0ae9dd_b.jpg
Great War Tour 34

The soldier's last resting place in Wellington, New Zealand as the Tomb of the Unknown Warrior adjacent to the National War Memorial and was unveiled on Thursday 11 November 2004. Nothing is known of his name, rank or birthplace, but that he was a New Zealand soldier.

48802154852_f055699f85_b.jpg
Great War Tour 35

The rear wall of the cemetery follows the German trench line, captured by the 12th Royal Scots and 9th Cameronians on 14 July 1916. This wall is one of the seven New Zealand Memorials to the Missing in the Western Front and is the largest. Some 1,272 names of those who lost their lives during the Somme campaigns are carved on this wall. There are 214 New Zealand named graves in Caterpillar Wood, however. It was from here that the NZ Div began its assault on Longueval, which it successfully captured on the 14th of September.

48801663978_44ed7d1d72_b.jpg
Great War Tour 37

From Caterpillar Wood Cemetery we move west into Longueval ville itself to the Piper's Monument, initially thought to be erected as a memorial to the 9th Scottish Division, but was put in place as a permanent memorial to all pipers that fell during the Great War and Longueval was chosen as its location owing to it being the approximate centre of the British advance during the Somme offensives.

48862965721_2047458680_b.jpg
Great War Tour 38 1

From Longueval we change direction to face due north and follow the course of the NZ Div's advance beginning on 15 September 1916. From approximately where this obelisk stands was where the NZ Div, flanked by the British 14th Div began its assault on the town of Flers and a prominent ridge to the north of it called Factory Corner. This is the New Zealand Somme memorial and follows the same pattern as similar obelisks at Messines Ridge and Gravenstafel, both of which we will visit over the next two days.

48802154672_a00ec92c12_b.jpg
Great War Tour 38

During the war, New Zealand had sufficient men to provide one division, comprising four Companies; Auckland, Wellington, Canterbury and Otago.

48802154617_6c17e723d9_b.jpg
Great War Tour 39

"From The Uttermost Ends Of The Earth". Every major New Zealand memorial on the Western Front is inscribed with this simple line, also written in French. The NZ Div suffered around 7,000 casualties in the battles of the Somme, with around 2,000 dead, in a month of their arrival on the battlefield.

48802154572_a78225fe34_b.jpg
Great War Tour 40

To commemorate 100 years since the Great War, the New Zealand government commissioned display boards describing in pictorial form the advance of the NZ Div across battlefields of historic significance; this one being Flers-Courcellette. Each is made of a curved rusting iron slab with this striking fern leaf motif and the words Nga Tapuwae - Sacred Steps. We'll see more of these as we progress.

48801663813_d81d07941f_b.jpg
Great War Tour 41

From the top of the hill along what was called the North Road by the British, we look toward the line of advance of the Div, with the town of Flers obscured by the bushes to the right. Between here and Flers, the trees at centre right mark the location of the German Switch Trench, one of a system of German emplacements that had to be traversed during the advance. All three were successfully taken by the New Zealanders in bitter hand to hand combat on the 15th, as well as the Div assisting in the taking of Flers. Over three days from the 15th, around 900 NZ solders lost their lives, with the most being lost on the first day, some 600 dead and 1,200 wounded or missing. Less than a month later, on 3 October, the NZ Div was withdrawn from the Somme region. It's also worth mentioning at this point that on 15 September, accompanying the previously mentioned 14 Div were four tanks, Mk.I Males, the first time tanks were used in combat and on Flers' capture a line of cheering British soldiers was seen walking through the ville behind one of the metal monsters.

48802154462_a195bb751e_b.jpg
Great War Tour 42

From Longueval, along the route the NZ and the 14th Divs would have taken to Flers, we head north to Bapaume and the scene of action in the Second Somme Offensive in August 1918, where we had previously visited at Grevillers, where the NZ Div had assaulted the German lines with the help of Whippet light tanks on the 24th. This was all a part of the 100 Days Offensive, within which the Commonwealth policy was one of encirclement and envelopment and artillery continued crashing down on the town of Bapaume for days after the Kiwis' arrival on the scene. Finally, on the 29th the Germans withdrew from the town to strong points eastwards, leaving booby traps throughout the town that claimed the lives of the unwary for some time afterwards.

Bapaume's town hall today. Bapaume was captured from the Germans in mid March 1917, and following their withdrawl, mines had been below the town hall to go off with delayed fuses on the night of 26th and 27th March. Following the explosion that could be seen from nearby villages, the town was reoccupied by the Germans, leading to its capture a year later during the action previously described. 30 Australian troops and two French civilians were killed in the blast.

48802171537_aae68ee6e4_b.jpg
Great War Tour 43

From Bapaume we drive east following the German retreat from August 1918 through the villes of Bancourt, Haplincourt, Bertincourt and Hermies to the Canal du Nord. Of note is that during the Commonwealth assault on Bancourt, the Germans deployed A7V tanks, which caused the Kiwis to halt their advance, as they had never been on the opposite end of mobile armour before, but the Germans were not able to take advantage of this because in the murk of night, the tanks were mistaken for British ones and came under fire from the Germans' own lines, two of them damaged, running down an embankment. These were successfully captured by the Kiwis near Fremicourt, less than a kilometre from Bancourt. One of these tanks, Nr 504 "Schnuck's" Maxim-Nordenfelt gun is on display in IWM North, Manchester.

During the high ground battles of the assault on Havrincourt, the Kiwis ran into difficulty at Trescault Ridge, where they encountered disciplined and motivated German troops, which wore the NZers down. Recovering to the rear at Bapaume, by the end of the month, the Kiwis reached the Canal du Nord to take part in the assault on that stretch of the Hindenburg defences, led by the Canadians, which the newly built canal was incorporated into. At this point, the NZers built a temporary bridge and effortlessly crossed the canal to rejoin the battle to overrun the formidable Hindenburg Line - the bridge remaining in place after the battle as the principal crossing point between Havrincourt and Hermies. This is not to be confused with the Scheldt Canal, which was further east of Havrincourt and which the NZ Div crossed at Crevecour-sur-L'Escault.

48801681388_e1f597a261_b.jpg
Great War Tour 44

This is Chateau Havrincourt, the original dynamited in the Spring of 1917 to aid in the preparation of the defences along the Hindenburg Line, which ran to the east of the town. Prior to the offensives in 1918, Havrincourt was the scene of bitter fighting that began on 20 November 1917 - better known as the Battle of Cambrai. During the opening phases of battle, the town of Havrincourt was devastated by artillery fire, the barrage heralding the British assault, which was carried out by tanks! There were six infantry divisions of the III Corps as well as nine battalions of the Tank Corps armed with 437 tanks, which amassed early morning on 20 November, some of which ploughed through Havrincourt almost unopposed, but the advance was soon to slow. Within a week, infantry follow-up heralded by the tanks' advance had not succeeded because the British commanders dithered, so the Germans, using effective stormtrooper tactics and artillery fire halted the British advance. Havrincourt was retaken by the Germans in March 1918, until the Commonwealth assaults of September. A display board outside the gates of the chateau describes the unfolding battle.

48801680923_c2d2df368e_b.jpg
Great War Tour 46

The chateau in close up. Infamously, Kaiser Wilhelm and his Chiefs of Staff visited the Chateau in October 1916. Originally constructed in 1880 on the site of a castle torn down during the French revolution, with its destruction during the Great War to make way for defences as part of the Hindenburg Line, the Chateau was rebuilt in its original form beginning in 1928.

48801680803_fed3118eb1_b.jpg
Great War Tour 47

From Havrincourt we sprint across the French countryside, passing Cambrai to the north and reach Vertigneul and the Eglise Notre Dame de Vertigneul, which holds one of the smallest CWGC cemeteries on the Western Front and, specifically the grave of Henry James Nicholas VC. His citation reads as follows:

"For most conspicuous bravery and devotion to duty in attack. Private Nicholas, who was one of a Lewis gun section, had orders to form a defensive flank to the right of the advance, which was checked by heavy machine-gun and rifle fire from an enemy strong-point. Whereupon, followed by the remainder of his section at an interval of about 25 yards, Private Nicholas rushed forward alone, shot the officer in command of the strong-point, and overcame the remainder of the garrison of sixteen with bombs and bayonets, capturing four wounded prisoners and a machine-gun. He captured this strong-point practically single-handed, and thereby saved many casualties. Subsequently, when the advance reached its limit, Private Nicholas collected ammunition under heavy machine-gun and rifle fire. His exceptional valour and coolness throughout the operations afforded an inspiring example to all.

The London Gazette, No. 30472, 11 January 1918"

Nicholas was killed whilst on guard duty at a bridge near the fortified town of Le Quesnoy when a German patrol encountered his position, on 23 October 1918.

48802026921_cf2691c994_b.jpg
Great War Tour 49

One remarkable aspect of the war at this point was how swiftly the Commonwealth soldiers, used to years of static advances across No-Man's Land between trenches, moved through open countryside, the German defences not used to the fluidity of the constant attacks. Putting up fierce resistance however, the Commonwealth suffered huge casualties in these last months of the war at German hands, but it was clear that a toll was being taken on the defenders. The villes of Vertigneul and Romeries were taken by 1st Otago Regiment and the 2nd Canterbury Regiment of the NZ Div and the British 8th Lancashire Fusiliers on 23 October 1918; the day of Henry Nicholas' death. The wee eglise in Vertigneul CWGC cemetery contains the graves of 20 Commonwealth servicemen of the First World War, 19 of them New Zealanders.

48802170787_52dc1420a0_b.jpg
Great War Tour 50

Next, Le Quesnoy and the Kiwis' last triumph of the war.
 
Last edited:
So, on to the last act by the Kiwis in their charge east in late 1918. After their steady advance eastwards through northern France, Commonwealth soldiers were reaching the furthest reaches of the static lines of trenches established toward the end of 1914; the 100 Days Offensive had blunted the German Spring Offensive and they were being forced back by the rapidity of the Commonwealth advance. Le Quesnoy (pronounced Le KEN-wa) is to the north east of Cambrai and is surrounded by concrete and dirt fortifications, so was a difficult prospect for capture from the German 22 Division holed up inside. With the NZ Div having established camp west of the town, instructions were given for it to be surrounded and emptied of Germans as part of the Battle of Sambre. We took the easy route along the road through the ramparts into the town from the west, approximately from where the Kiwis made their initial approach. On 4 November 1918, New Zealand soldiers breached the town walls at this point.

48801680158_74396f6dbb_b.jpg
Great War Tour 52

Owing to the two rows of fortifications ringing the town, a frontal assault was undesirable and artillery couldn't be used as there were civilians within the walls, so the Kiwis opted to surround the town and swamp its German defenders with mortar fire against the ramparts and advance under cover of smoke screens. On 3 November the Kiwi brigades began their advance, completely surrounding it by 11am, then pondered the assault on its ramparts. This was to be carried out by batallions of the Rifle Brigade commencing at 5:30am on the morning of the 4th, the beginning of the Sambre assault. Carrying out multi pronged advances being covered by mortars, the Kiwis probed the defences, heavily defended by machine gun fire. 2 Lt Leslie Averill, the 4th Rifle Batallion's intelligence officer had been searching for a weakpoint in the defences and from the west, he came across a branch of the ramparts seemingly undefended, with its approach covered by a defensive wall called a demilune, seen here, looking to the direction from whence he instructed an approach to be made.

48802170457_1e5836caf0_b.jpg
Great War Tour 53

At around 1600, led by 2 Lt Averill, No.14 Platoon of the 4th Rifles, 6 men, ran across the wall at the right and reached this port in the defences. They were carrying a rickety wooden ladder some 30 feet in length...

48802170332_2e2ca3e622_b.jpg
Great War Tour 54

...Which the divisional engineers had pilfered from this farm yard a few kilometres from the town, the walled Ferme du Fort Martin...

48802026641_5ab90ab870_b.jpg
Great War Tour 51

Then, crossing the top of the defenses, the soldiers leaned the ladder against this wall, to the right of the portal and began ascending it, a man at a time, owing to its flimsiness. Once the rest of the platoon had reached the inside of the ramparts, the rest of the battalion followed. On their arrival, it all ended rather suddenly - the German commanding officer, realising the precariousness of his position surrendered. 1243 prisoners were taken.

48801679893_3276885345_b.jpg
Great War Tour 55

This is the back cover of John H. Gray's excellent book From The Uttermost Ends Of The Earth; The New Zealand Division On The Western Front 1916 to 1918 - A History And Guide To Its Battlefields (Wilson Scott Publishing, 2010) with a depiction of the scaling of the wall, with 2 Lt Averill having reached the top, by official artist of the NZ Expeditionary Force, George Edmund Butler.

48801679758_04d659788e_b.jpg
Great War Tour 56

The plaque mounted to the right of the point at which the men scaled the wall; some 122 Kiwis lost their lives with 500 casualties suffered during the assault on Le Quesnoy. Inaugurated in 1923, it was designed by New Zealand sculptor A.R. Fraser. Every year, on the weekend that falls closest to Anzac Day (25th of April) and Remembrance Day - need I state the date, the New Zealand delegate in France and Kiwi travellers make a beeline for this spot to attend a remembrance service.

48801679418_38e96da5bb_b.jpg
Great War Tour 57

Between the outer ramparts and the inner wall are a series of gardens, one of which is dedicated to the New Zealanders. A portal has been placed in the ramparts to enable visitors to walk around them, with this simple plaque above it.

48802025656_e9da5f48f2_b.jpg
Great War Tour 58

Within Le Quesnoy the efforts of the New Zealanders are not far from the town's collective consciousness. In the main square is a ceremonial archway with this plaque above it. There are many links between the country and the town; Le Quesnoy is twinned with the small Waikato town of Cambridge, New Zealand. Visiting Kiwis always get a warm welcome here; whilst walking around near the ramparts, we saw a young woman walking a cat on a lead (!) and went to say hello. She expressed surprise when my guide Christian said I was from Nouvelle Zealand and she shook my hand!

48802169417_48c58fb919_b.jpg
Great War Tour 59

This is the name of a side road off the main square. Fans of Les Bleus would be mortified!

48801678788_3e09ae7491_b.jpg
Great War Tour 60

Le Quesnoy's town hall. It's worth noting that owing to the fact that the town wasn't demolished by artillery fire during the war, most of Le Quesnoy is in a remarkable state of preservation and its older structures are indeed original, unlike everywhere else we have been on our travels today - and indeed for the rest of the battlefield tour. The inner town within the ramparts is one of the most complete and original fortified towns in Western Europe.

48802025031_d012329e35_b.jpg
Great War Tour 61

This is the Le Quesnoy War Memorial outside the town hall.

48802168887_8a409b5739_b.jpg
Great War Tour 62

On its flank is this script honouring the efforts of the New Zealanders. Note the iron information board of the same type placed around the Western front battlefields by the New Zealand Ministry of Tourism in the background to the right.

48801678143_7dffe59bcc_b.jpg
Great War Tour 63

Now, we say goodbye to Le Quesnoy and the Somme battlefields in France and head north to Belgium, and Flanders Fields. On the way I spotted this WW2 era German machine gun emplacement.

48802168482_c99f4ccf4b_b.jpg
Great War Tour 64

After a long day's exploring battle sites, we reached the pretty town of Ieper in Vlanderen and my hotel - the Hotel Regina on Grote Markt. The big picture window on the second floor below the turret on the corner was my room.

48801677738_4803bd289a_b.jpg
Great War Tour 65

The Hotel Regina has a secret history. During the German occupation in WW2, officers frequented the hotel restaurant, unaware that below their feet in the basement were British airmen, awaiting escape with the aid of the local Resistance.

48802168112_3a6b0bf213_b.jpg
Great War Tour 66

Next, the Menenpoort, the Last Post, and the most beautiful CWGC cemetery.
 
Last edited:
So, here we are in Ieper, the town ravaged by war known as Ypres, or Wipers as the British soldiers called it. Directly opposite the Hotel Regina on Grote Markt is the impressive Cloth Hall. Here it is. We'll talk more about it later.

48801677253_cdbc367456_b.jpg
Great War Tour 67

Devastated through continual shelling, Ieper was completely rebuilt post war, the Cloth Hall itself being almost completely demolished, with what remained of it being reused in its reconstruction. This photograph comes from the excellent Great War Exhibition in Wellington New Zealand and shows the remains of the Cloth Hall.

48801677178_da2f14bf08_b.jpg
Great War Tour 68

This is the Menenpoort, or the Menin Gate, unveiled on 24 July 1927 as a memorial to the fallen in the Ypres salient that have no known grave, the Menenpoort occupies the entrance to the Ieper city walls at its easternmost fortified barricade wall and moat. Note the Ypres Lion, reproductions of course...

48801677078_c9c433bef5_b.jpg
Great War Tour 69

...As the originals were pilfered by the Australians! In actual fact they were gifted to the Australian government by the mayor of Ieper in 1938 and are currently on display at the Australian War Memorial in Canberra, guarding the entrance to the gift shop.

48802167472_e64617d79c_b.jpg
Great War Tour 70

Every year, millions of tourists come to Ieper to watch the Last Post, which is performed every night at 8pm without fail.

48801676933_efc3afec34_b.jpg
Great War Tour 71

Designed by Sir Reginald Blomfield, who was also responsible for the RAF Memorial on the Thames in London, as well as a proliferation of historic edifices in the UK and elsewhere, prior to the construction of the memorial, the gate was unadorned and was named as the road led to the town of Menen.

48802023261_1418bf0906_b.jpg
Great War Tour 72

Recorded on the memorial walls are the names of 54,896 soldiers of the Great War, broken down by country as follows; UK - 40,244, Canada - 6,983, Australia - 6,198, South Africa - 564, India - 414, West Indies - 6, New Zealand - none; the New Zealanders preferring to place their memorials to the missing near the actual spots where the soldiers were killed. For the local conflicts in the Ypres salient, there are New Zealand Memorials in the massive Tyne Cot cemetery commemorating those lost in the Third Battle of Ypres, one at the Buttes New British Cemetery at Polygon Wood with another near the town of Mesen, commemorating those lost in the battles for Messines Ridge. We'll visit all these sites.

48801676823_7c335f30df_b.jpg
Great War Tour 73

This is what draws the crowds to the site and although it is held every night, it is still performed with such majesty.

48801676778_70ef5d251f_b.jpg
Great War Tour 74

The money shot. On my second night, forum member Marcel drove down from the Netherlands and we met for the ceremony and dinner and we discussed getting this exact shot! This and the next image was taken on the second night I was there, with Marcel. They were better than the ones I took on my first night in Ypres.

48802023141_d3a692151e_b.jpg
Great War Tour 75

Wreath laying. The entire ceremony takes around half an hour, then the massed crowds evaporate into the town and the many eateries and bars, to sample some of that fine Belgian beer they talk about!

48802167137_8ae7c3237a_b.jpg
Great War Tour 76

After the Last Post I took a stroll to the Ramparts Cemetery on the banks of the moat next to the Lille Gate entrance to the town, at its southernmost end. This has to be the loveliest of all the CWGC cemeteries and at this time of night in summer was blissfully tranquil.

48802167102_dab6f7858d_b.jpg
Great War Tour 77

There are a total of 188 soldiers interred here, 155 British, 14 New Zealanders, 11 Australians and 10 Canadians. Ten of the Kiwis are from the New Zealand Maori (Pioneer) Battalion.

48802167072_6fb5e5d43b_b.jpg
Great War Tour 78

I envy those who get to spend the rest of eternity in such a beautiful location.

48802167022_994c2ce2b3_b.jpg
Great War Tour 79

After visiting the cemetery I wandered across the top of the ramparts walkway back toward the Menenpoort, very pleasant at this time of the evening.

48845683282_f098bf5462_b.jpg
Europe 452

A memorial to the Indian soldiers killed in Vlanderen. The Indians made up four divisions; one Infantry Corps and one Cavalry Corps of two divisions each. Other than in Flanders, Indians fought in the Somme at the Battle of Flers-Coucellette in September 1916, the First Battle of Cambrai in November 1917 and the advance on the Hindenburg Line in 1918 as part of the 100 days Offensive, all of which we have seen already. The names of the 414 lost are recorded on the Menenpoort.

48845495216_091bb13231_b.jpg
Europe 453

The Menenpoort at dusk.

48845494901_df2876b84d_b.jpg
Europe 454

48845127753_914e4b9687_b.jpg
Europe 455

Finally, a couple more from around the square on the way back to my hotel for the night.

48845494631_5e34baaf00_b.jpg
Europe 456

48845494526_5c05836f3d_b.jpg
Europe 457

Coming up, the Ypres Salient and more from the Cloth hall.
 
Last edited:
Great stuff Grant, and a number of places I recognised, from pics taken by my friend Mick.
He visits the area every year, about now, with a group from the village (The Sutton Pals), who visit the battle sites, and place a wreath on the graves of each of those lost from the village. They normally stay in a hotel which I think is just off to the left in your last pic, in a corner of the square.
 
They normally stay in a hotel which I think is just off to the left in your last pic, in a corner of the square.

Yup, there are quite a few hotels around the square, and eateries, and bars! Great wee place. The thing about Flanders is that there are cemeteries all over the place, just everywhere. Understandable, but it still hits home when you're there going about the place.
 
The next morning I had a wander about the square in the glare of the morning sun, before my tour bus arrived, and snapped these pics of the Cloth Hall. It's a magnificent structure.

48845494316_6769450221_b.jpg
Europe 459

Its funny that despite being just over 50 years old, it still feels older.

48845682167_085b260a27_b.jpg
Europe 460

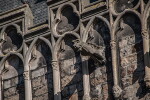
Who doesn't love a good gargoyle?

48845127078_6cdf733579_b.jpg
Europe 461

There will be more photos of the town as Marcel and I did a photoshoot round the place. So, on the way to our first stop on the Flanders battlefields I saw these British bunkers. They can be identified as British because of the corrugations in the stone work. They were built with corrugated iron sheets, within which steel reinforced concrete was poured, then the iron sheets were removed. We'll see examples of both German and British bunkers for comparison throughout the rest of the tour.

48818564737_867835418e_b.jpg
Great War Tour 81

This is a gateway to a property on the road between Ieper and Kemmel, there was previously a mansion house and all that remains are these pillars marking the gateway; a common theme in this part of the world, as we shall see. I've attempted to find out more information about the property, without success, sadly, as there was a reason why it was pointed out to us.

48818564777_a9b1f1ab79_b.jpg
Great War Tour 80

This peculiar structure is the recreation of a mansion house that was destroyed during the war and on its site was built this skeletal version, named the Elzenwallekasteel. Google Translate's version of the original language page:

"The Elzenwallekasteel is a castle located along the Kemmelseweg in Voormezele, a part of Ypres. The current castle was built in 1921. The name is derived from the moist environment that was suitable for planting alder shrubs. The original castle dates from the 18th and 19th centuries and was situated in the middle of an omwald park. Later, some remains of this older castle were placed in this park, such as columns and statues. To the east of the castle was De Plas, a hamlet where, among other things, staff members of the castle lived. The castle was destroyed in the First World War. In 1921 architect-contractor Ernest Blerot from Brussels designed a new castle that became a mixture of art nouveau and art déco. By marriage he also became the owner of the castle. The castle was erected on the pre-war foundations of Atrecht sandstone. It is an original building in terms of design and building materials, so it is very different from traditional castle construction. The open dome was intended for a wind generator. The castle has been on the Property Heritage Inventory since 2009"

48818409771_a2f2c19fbe_b.jpg
Great War Tour 82

In Kemmel there is a visitor centre, where a film was shown to us about the mining efforts by the Commonwealth forces on the eve of the Messines Ridge Offensive in 1917, whose key sites we will be visiting today. A display stand of things recovered from local battlefields in the visitor centre.

48818564397_0c7dab2b26_b.jpg
Great War Tour 83

We then drove up the only hill in Vlanderen, Kemmelsberg; the scene of some bloody fighting in April 1918, as German forces hoping to make a break for the North Sea, advanced on the British troops holding the hill - this became known as the Battle of the Lys (named Operation Georgette by Ludendorf), or the Fourth Battle of Ypres, as one objective was to retake Ypres from the British - between the 16th and 19th. Although successful in their defence, the British soldiers were relieved by the French 36th Army, but on the 25th the Germans advanced on the hill again; the result was slaughter; more than 5,000 French soldiers were killed and the hill fell to the victorious Imperial armies. It wasn't retaken by Commonwealth forces until September. This is a memorial to French losses - Monument Aux Soldats Français, constructed in 1932. Along the road over the hill there is evidence of the trenches in the form of ditches along the route.

48818409531_252f7b9a40_b.jpg
Great War Tour 84

This is the entrance to the French Cemetery and Ossuary on the western side of the hill, which contains the remains of 5,294 soldiers, of which just 57 are identified.

48818049643_2ebdcece59_b.jpg
Great War Tour 85

Kemmelsberg was the site of a bunker during the Cold War, which is now a visitor attraction, but what is little known is that the British general who took command of the Commonwealth effort to retake Messines Ridge, Gen Herbert Plumer also had a bunker on Kemmelsberg, under this rise on the south side of the hill. there he had his headquarters and makeshift accommodation and holdings for staff were constructed, although there is little remaining today.

48818563762_fbc80448fa_b.jpg
Great War Tour 86

We have left Kemmelsberg and are in open countryside to the east of the hill, in Heuvelland. Throughout the war, during the various battles for the Ypres salient, the lines moved backwards and forwards, although never too far from one another. Today trees have been planted throughout Vlanderen that indicate the position of the trenches, these were elms commissioned by the In Flanders Fields Museum and regional government and planted in 2014. They are known as the Remebrance Trees or, Herdenkingsbomen, Arbre de Mémoire and Gedenkbaum in Dutch, French and German respectively. The British lines are ringed in blue, the German in red.

48818049223_698a086169_b.jpg
Great War Tour 87

This view is taken looking south west roughly halfway between the villages of Kemmel and Wijtschaete, or Witches' Hat to the Commonwealth soldiers (the British also named the town White Sheet). In the right foreground can be seen the Sint Machutuskerk in Wulvergem, with the village of Nieuwkerk to the left. We are standing on the German lines as they were at the time of the assault on Messines Ridge, the British lines were less that a hundred metres away in the ridge in the foreground. These were the British 'N' trenches, where the names started with 'N', at this point was Narrow Trench, with Nathan to the left and Naples to the right; note that the Germans have the upper hand with the high ground, not an uncommon scenario.

48818049083_9b346c7505_b.jpg
Great War Tour 88

This is looking toward Kemmelsberg; what Adolf Hitler referred to as "The Eye of Flanders". It is worth remembering that this is sacred ground to the Germans as well, with slightly more sinister implecations for the Nazis. Langemark-Poellecapelle, the site of the German memorial is to the north east of Ieper and the German losses during the First Battle of Ypres played a part in Nazi German mythology, being used beyond the initial intent of remembering war dead and emphasising the bravery and superiority of Reich soldaten - see the Langemarckhalle at the Olympiastadion site, which we saw in Berlin.

48818563347_10602a74b0_b.jpg
Great War Tour 89

Next, the assault on Messines Ridge.
 

Attachments

  • 48845127078_6cdf733579_b.jpg
    48845127078_6cdf733579_b.jpg
    242.6 KB · Views: 32
Last edited:

Users who are viewing this thread

Back