Great shots Grant!
Navigation
Install the app
How to install the app on iOS
Follow along with the video below to see how to install our site as a web app on your home screen.
Note: This feature may not be available in some browsers.
More options
You are using an out of date browser. It may not display this or other websites correctly.
You should upgrade or use an alternative browser.
You should upgrade or use an alternative browser.
Nuuumannn's European Tour of 2019
- Thread starter nuuumannn
- Start date
Ad: This forum contains affiliate links to products on Amazon and eBay. More information in Terms and rules
More options
Who Replied?- Thread starter
- #242
Thanks again mate. As I said in an earlier post, forum member Marcel came to visit me while I was in Ieper after my second day of the tour and after watching the Last Post at the Menenpoort, we had a nice dinner then went on a photoshoot round the town. Here are some of my images. This is Sint Maartenskerk sitting behind the Grote markt and the Cloth Hall.
 Europe 462
Like the Cloth Hall, Sint Maartenskerk has been rebuilt using original materials since the war.
 Europe 463
The face of the Cloth Hall that most tourists don't get to see. Note the damaged statues.
 Europe 464
These are original war damaged features and have been returned to their place in the new building, adding to its atmosphere.
 Europe 465
Sint Maartenskerk's bell tower.
 Europe 466
The lighting was beautiful at this time of night.
 Europe 467
The Ieper War Memorial against the Cloth Hall wall at dusk.
 Europe 468
The entrance to the In Flanders Fields Museum within the Cloth Hall.
 Europe 469
The face of the Cloth Hall on Grote Markt.
 Europe 470
Next, Bloody Passchendaele.
Like the Cloth Hall, Sint Maartenskerk has been rebuilt using original materials since the war.
The face of the Cloth Hall that most tourists don't get to see. Note the damaged statues.
These are original war damaged features and have been returned to their place in the new building, adding to its atmosphere.
Sint Maartenskerk's bell tower.
The lighting was beautiful at this time of night.
The Ieper War Memorial against the Cloth Hall wall at dusk.
The entrance to the In Flanders Fields Museum within the Cloth Hall.
The face of the Cloth Hall on Grote Markt.
Next, Bloody Passchendaele.
Airframes
Benevolens Magister
Beaut shots Grant.
Crimea_River
Marshal
Lovely.
Lovely shots Grant!
fubar57
General
Very nice shots
- Thread starter
- #247
Thanks again everyone. Been a few days since I got into this, just been busy with work and stuff.
So, we are on the third and last day of my Great War battlefield tour and we start in the thick of the action amid the Battle of Broodseinde and what became known simply as Passchendaele, after the nearby village of Passendale, during the Third Battle of Ypres in September and October 1917. The first action at Broodseinde was a rare success in this campaign and the NZ Div was in the thick of it, literally, since as Summer turned to Autumn, the ground turned to sludge and that famous Flanders Mud stymied both sides' attempts at making headway across the battlefield. Passchendaele however was a bloody defeat, the first suffered by the bouyant NZ Div of its time on the Western Front and the worst in New Zealand military history.
This is the New Zealand Memorial to losses suffered at Passchendaele and sits, like its counterpart on the Messines Ridge, on the German trench line at a place called Gravenstafel.
 Great War Tour 143
The Gravenstafel Spur, the objective of the NZ Div on 4 October 1917 was successfully captured, with the 3rd Australian Div to the right of the Kiwis having achieved their objective at Tyne Cot, with some 9,000 yards of territory gained in total between Poellecapelle in the north, to the Ypres - Menin Road in the south - there were over 5,000 German prisoners captured , with the NZ Div providing 1,159 from Gravenstafel, in exchange for the losses of 330 killed and 1,323 wounded.
 Great War Tour 144
This is taken from the German lines on the Gravenstafel Spur looking eastwards in the direction the NZ Div took to reach them, with the obelisk to our backs. Prior to Broodseinde the Div, after the Messines Ridge Offensive, retired to St Omer, France for R&R and training, but returned to the Ypres salient in September, taking part in the battles at Polygon Wood - more of which later, but here, north of that location, the high command wanted the Kiwis to push against the German lines at Gravenstafel on 4 October, then advance across the former enemy held territory to objective lines near the town of Passendale at a place called Bellevue Spur on the 12th. As visible here, the Germans held the high ground, with a panoramic view of the British trenches, in the ditch in front of the lines of hay bales. The NZ Div began forming at Kansas Farm as part of the II ANZAC Corps, at the line of trees on the ridge to the right of the picture and advanced across this terrain in the foreground to reach the German trenches.
 Great War Tour 145
On the 12th, the Div had pushed across the territory it gained at Gravenstafel toward Belleville Spur, in this view the rise in the background to the right of the tree in the foreground at the far right of the picture, but on that day, never reached its objective. Opening with the traditional artillery barrage to counter the fixed defences - barbed wire, machine gun bunkers and so forth, the bombardment was not as strong as what it should have been and failed to destroy the strong points, and the boggy ground just turned to sludge. German counter artillery fire added to the mire and after going 'Over The Top', the ANZAC advance was making headway, but was soon stalled; the German machine gunners were mowing them down and the advance slowed - the reinforcements catching up to the struggling first wave. Although the barbed wire defences had been reached, they were quite extensive and the artillery had not been successful in breaking them apart - and so it was, that on that day, on the ground fanning out in front of the New Zealand Tourist Board plaque, the slaughter of Passchendaele took place.
 Great War Tour 146
This is a display inside the Tyne Cot CWGC Cemetery Visitor Centre - it is dirt and remains picked from the battlefield.
 Great War Tour 147
This is a compressed fibre dog tag recovered from the grounds, and is typical of those that were worn by British soldiers. Details are obvious, with the 'CE' denoting this individual's religious preference, in this case Church of England. At Tyne Cot, there is a speaker system from which the names of everyone buried in the cemetery are read out every minute.
 Great War Tour 148
Tyne Cot is the largest CWGC cemetery in the world. The numbers speak for themselves: there are 11,956 graves here, of which 520 are New Zealanders. The memorial commemorates the loss of 34,857 men whose last resting places are unknown, of which 1,166 are New Zealanders. It is breathtaking in its enormity.
 Great War Tour 149
 Great War Tour 150
 Great War Tour 151
This is the New Zealand Memorial To The Missing, which records those who fell during Broodseinde and Passchendaele who have no known grave. As mentioned earlier, the losses suffered during Passchendaele were the worst in New Zealand military history - author and historian Ian McGibbon has researched that on 12 October alone, 957 New Zealanders died from their wounds, significantly higher than was previously estimated. McGibbon's book 'New Zealand's Western Front Campaign' (David Bateman Ltd, 2016) is a must-read to gain a greater understanding of the NZ Div's role in the conflict. Link to his research: ww100.govt.nz/passchendaele-casualties
 Great War Tour 152
This stretch of the German trenches was captured by the 3rd Australian Division during the Battle of Broodseinde on 4 October 1917 - it was no easy task owing to the machine gun blockhouses prevalent around this portion of the trenches.
 Great War Tour 153
Tyne Cot was named after a farm building that sat on the road between Broodseinde and Passendale surrounded by machine gun blockhouses; there are two surviving within the cemetery grounds and are of the same pattern as those seen previously at the New Zealand Messines Ridge Memorial.
 Great War Tour 155
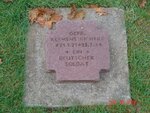
Two unknown soldiers share a common grave at Tyne Cot.
 Great War Tour 156
And finally for now, the grave of Capt Clarence Smith Jeffries VC, of the 34th Battalion of the 1st Australian Imperial Force, who was killed on 12 October 1917. His Victoria Cross citation reads:
"War Office, 18th December, 1917
His Majesty the KING has been graciously pleased to approve of the award of the Victoria Cross to the undermentioned Officers, Noncommissioned Officers and Man:—
Capt. Clarence Smith Jeffries, late Australian Imperial Force.
For most conspicuous bravery in attack, when his company was held up by enemy machine-gun fire from concrete emplacements. Organising a party, he rushed one emplacement, capturing four machine guns and thirty-five prisoners. He then led his company forward under extremely heavy enemy artillery barrage and enfilade machine-gun fire to the objective. Later, he again organised a successful attack on a machine-gun emplacement, capturing two machine guns and thirty more prisoners. This gallant officer was killed during the attack, but it was entirely due to his bravery and initiative that the centre of the attack was not held up for a lengthy period. His example had a most inspiring influence."
 Great War Tour 158
Next, Polygon Wood.
So, we are on the third and last day of my Great War battlefield tour and we start in the thick of the action amid the Battle of Broodseinde and what became known simply as Passchendaele, after the nearby village of Passendale, during the Third Battle of Ypres in September and October 1917. The first action at Broodseinde was a rare success in this campaign and the NZ Div was in the thick of it, literally, since as Summer turned to Autumn, the ground turned to sludge and that famous Flanders Mud stymied both sides' attempts at making headway across the battlefield. Passchendaele however was a bloody defeat, the first suffered by the bouyant NZ Div of its time on the Western Front and the worst in New Zealand military history.
This is the New Zealand Memorial to losses suffered at Passchendaele and sits, like its counterpart on the Messines Ridge, on the German trench line at a place called Gravenstafel.
The Gravenstafel Spur, the objective of the NZ Div on 4 October 1917 was successfully captured, with the 3rd Australian Div to the right of the Kiwis having achieved their objective at Tyne Cot, with some 9,000 yards of territory gained in total between Poellecapelle in the north, to the Ypres - Menin Road in the south - there were over 5,000 German prisoners captured , with the NZ Div providing 1,159 from Gravenstafel, in exchange for the losses of 330 killed and 1,323 wounded.
This is taken from the German lines on the Gravenstafel Spur looking eastwards in the direction the NZ Div took to reach them, with the obelisk to our backs. Prior to Broodseinde the Div, after the Messines Ridge Offensive, retired to St Omer, France for R&R and training, but returned to the Ypres salient in September, taking part in the battles at Polygon Wood - more of which later, but here, north of that location, the high command wanted the Kiwis to push against the German lines at Gravenstafel on 4 October, then advance across the former enemy held territory to objective lines near the town of Passendale at a place called Bellevue Spur on the 12th. As visible here, the Germans held the high ground, with a panoramic view of the British trenches, in the ditch in front of the lines of hay bales. The NZ Div began forming at Kansas Farm as part of the II ANZAC Corps, at the line of trees on the ridge to the right of the picture and advanced across this terrain in the foreground to reach the German trenches.
On the 12th, the Div had pushed across the territory it gained at Gravenstafel toward Belleville Spur, in this view the rise in the background to the right of the tree in the foreground at the far right of the picture, but on that day, never reached its objective. Opening with the traditional artillery barrage to counter the fixed defences - barbed wire, machine gun bunkers and so forth, the bombardment was not as strong as what it should have been and failed to destroy the strong points, and the boggy ground just turned to sludge. German counter artillery fire added to the mire and after going 'Over The Top', the ANZAC advance was making headway, but was soon stalled; the German machine gunners were mowing them down and the advance slowed - the reinforcements catching up to the struggling first wave. Although the barbed wire defences had been reached, they were quite extensive and the artillery had not been successful in breaking them apart - and so it was, that on that day, on the ground fanning out in front of the New Zealand Tourist Board plaque, the slaughter of Passchendaele took place.
This is a display inside the Tyne Cot CWGC Cemetery Visitor Centre - it is dirt and remains picked from the battlefield.
This is a compressed fibre dog tag recovered from the grounds, and is typical of those that were worn by British soldiers. Details are obvious, with the 'CE' denoting this individual's religious preference, in this case Church of England. At Tyne Cot, there is a speaker system from which the names of everyone buried in the cemetery are read out every minute.
Tyne Cot is the largest CWGC cemetery in the world. The numbers speak for themselves: there are 11,956 graves here, of which 520 are New Zealanders. The memorial commemorates the loss of 34,857 men whose last resting places are unknown, of which 1,166 are New Zealanders. It is breathtaking in its enormity.
This is the New Zealand Memorial To The Missing, which records those who fell during Broodseinde and Passchendaele who have no known grave. As mentioned earlier, the losses suffered during Passchendaele were the worst in New Zealand military history - author and historian Ian McGibbon has researched that on 12 October alone, 957 New Zealanders died from their wounds, significantly higher than was previously estimated. McGibbon's book 'New Zealand's Western Front Campaign' (David Bateman Ltd, 2016) is a must-read to gain a greater understanding of the NZ Div's role in the conflict. Link to his research: ww100.govt.nz/passchendaele-casualties
This stretch of the German trenches was captured by the 3rd Australian Division during the Battle of Broodseinde on 4 October 1917 - it was no easy task owing to the machine gun blockhouses prevalent around this portion of the trenches.
Tyne Cot was named after a farm building that sat on the road between Broodseinde and Passendale surrounded by machine gun blockhouses; there are two surviving within the cemetery grounds and are of the same pattern as those seen previously at the New Zealand Messines Ridge Memorial.
Two unknown soldiers share a common grave at Tyne Cot.
And finally for now, the grave of Capt Clarence Smith Jeffries VC, of the 34th Battalion of the 1st Australian Imperial Force, who was killed on 12 October 1917. His Victoria Cross citation reads:
"War Office, 18th December, 1917
His Majesty the KING has been graciously pleased to approve of the award of the Victoria Cross to the undermentioned Officers, Noncommissioned Officers and Man:—
Capt. Clarence Smith Jeffries, late Australian Imperial Force.
For most conspicuous bravery in attack, when his company was held up by enemy machine-gun fire from concrete emplacements. Organising a party, he rushed one emplacement, capturing four machine guns and thirty-five prisoners. He then led his company forward under extremely heavy enemy artillery barrage and enfilade machine-gun fire to the objective. Later, he again organised a successful attack on a machine-gun emplacement, capturing two machine guns and thirty more prisoners. This gallant officer was killed during the attack, but it was entirely due to his bravery and initiative that the centre of the attack was not held up for a lengthy period. His example had a most inspiring influence."
Next, Polygon Wood.
Last edited:
fubar57
General
A very moving set of photos Grant
Airframes
Benevolens Magister
Agreed.
manta22
Banned
Lovely shots Grant!
- Thread starter
- #252
The German gravestone says TWO unknown soldiers.
Thanks mate, ammended accordingly.
WOW.....top series of Photo's..
- Thread starter
- #254
Thank you all, for following on and offering comments. Next, we head south from Tyne Cot to Zonnebeke, where I photographed this mural commemorating the Battle of Polygon Wood, the subject of this post. Between 26 September and 3 October 1917, the day before the opening salvoes of the Battle of Broodseinde, the fighting over a crop of barren land worn by artillery and the boots of weary soldiers that had been a copse a kilometre south of Zonnebeke took place. We'll go into the battle plans and the reason for the assault on German positions, but first, the mural displays a panorama of the battlefield based on photographs taken by Australian Frank Hurley, who is acknowledged at the right of the image.
An official war photographer, Hurley had, by the time he joined the Australian Imperial Force in 1917, spent more than four years in Antarctica, firstly with Australian geologist Douglas Mawson's 1911 to 1914 scientific expedition, which covered the 3,200 kilometre stretch of the icy continent that was Australian territory, then with Ernest Shackleton's doomed Trans-Antarctic Expedition between 1914 and 1916, being marooned with the crew, but being able to rescue a number of the glass plate negatives he took during the voyage. The presense of the aircraft in the mural acknowledge the use of Australian Flying Corps, RFC and RNAS aircraft to harass the German trenches, with the Deutsche Luftstreitkräfte getting in the action against the Allied air forces.
 Great War Tour 161
We leave Zonnebeke and drive the short distance south to the southernmost corner of Polygon Wood, known as Black Watch Corner. Named after the elite Scottish unit, the legend of Black Watch Corner predates the Battle of Polygon Wood, as on the morning of 11 November 1914, in the face of heavy artillery and attack by a division of the elite Prussian Guard during the First battle of Ypres, the Scots Guards, the Cameron Highlanders and Black Watch defended the spot with great heart and determination despite acute losses. Today the memorial stands on the site of the Polygon Inn, which served as a defensive position and owing to its occupiers' fierce resistance stifled the German advance and forced the Prussian Guard to bisect Polygon Wood, to avoid tracts still held defiantly by the Scots. On that day the German aim was to press on to Ypres to the west of the wood and drive the British lines backward. In this they succeeded, but throughout the rest of the war they failed to reach Ypres, despite the devastated town being the focus of determined attacks four years later during the Kaiserschlacht, or Spring Offensive of April 1918.
 Great War Tour 162
Directly opposite Black Watch Corner is the pedestrian entrance into Polygon Wood, which in 1917 there was nary a tree to be seen. Throughout the war, the area swapped hands on a few occasions and by September 1917 the eastern half was solidly held by the German 4th Army, with defensive machine gun bunkers and dugouts stretching northward to the Buttes, a rifle range at the north-eastern end of the ground. The attack on the German lines here was one of the minor campaigns of the greater Third Battle of Ypres and was a prelude to attacking the German positions north of Polygon Wood between the villages of Zonnebeke and Passendale. A successful attack at Polygon Wood would weaken the German forces in advance of the broad push that was the Battle of Broodseinde. This was organised by Gen Herbert Plumer, he who planned the successful Messines Ridge Offensive the previous June from his headquarters at Kemmelsberg.
 Great War Tour 163
A German bunker within the dense woodland, which at the time of the Autumn offensive by the British and Australian troops, would have stood out like the proverbial dog's bollocks. Early in the morning of 25 September, almost in anticipation of the Commonwealth offensive the next day, the Germans launched a Gegenangriff - counter-offensive using artillery and air support against ground gained by the Commonwealth forces since the Messines Ridge Offensive. This only partially succeeded, German troops pushing a salient into the British held lines that cut across the western half of Polygon Wood, reaching Black Watch Corner and driving westward, which had the effect of stifling British plans for a creeping barrage to launch the 26th September offensive. As a result, tanks were brought in to drive against the advancing German troops on the right flank of I ANZAC Corps to the south of Black Watch Corner and the British 33rd Division to the north of the corner. At this time, the Germans held onto this bunker, originally built by them, in the drive forward, only to be repelled from it during the offensive launched the next day.
 Great War Tour 164
The bunker's multi-chambered interior. The Commonwealth attack of 26 September was designed to push the Germans from their fixed positions using layered rapid attacks against German strong points, such as this bunker, following limited artillery barrages and air attacks. Capturing these raised positions enabled the advancing Commonwealth troops to observe German troop movements and with the help of aerial reconnaissance, stifled their plans for counter attacks. A creeping artillery barrage and support from tanks enabled the Australian 5th Divison to advance on the rifle range at the far end of the Wood, where German dugouts were concentrated, that held troops for reinforcing their counter-attacks. Layered British troop movements from the rear kept the Germans at bay and further Gegenangriff attacks were stifled, with the help of improving weather, which dried the ground and aided the British in observing German troop movements from the air. The battle left the German 4th Army in tatters and worked in severely weakening German lines further north before the big push at Broodseinde.
 Great War Tour 165
This is the Buttes New British Cemetery and is located at the foot of the rifle range butte, which is capped by the 5th Australian Division obelisk, the Aussies having captured the German positions at the butte on the opening day of the offensive. There are 431 identified casualties in the cemetery, but there are 2,108 British and Commonwealth servicemen in total here, the rest of the 1,677 are unidentified. Despite the cemetery's name, there is a greater percentage of Commonwealth graves here than British ones, 160 Australians, 95 New Zealanders and six Canadians.
 Great War Tour 167
This is the Buttes New British Cemetery (New Zealand) Memorial, which records the names of 378 servicemen of the NZ Div with no known grave who perished in attacks around the Polygon Wood area, including the failed attack on Polderhoek Chateau to the south of Polygon Wood on 3 December 1917 by the Kiwis. This minor offensive was unsuccessful in that the New Zealanders fielded their 'B' team, men who had had not marched into the Passchendaele meat market, because of the losses suffered by the Div there.
 Great War Tour 168
 Great War Tour 169
These are the graves of five Australian soldiers who were lost for 90 years, their final resting place unknown to their families, but finally laid to rest here after being discovered during routine pipe laying work at Westhoek nearby. All Australian, all killed during the Battle of Polygon Wood. Their names are Sgt George Calder, Pvts John 'Jack' Hunter and George Storey, as well as two unidentifiable men. In 2007 they were finally laid to rest with full military honours and the families of those who were able to be identified through DNA records finally got closure. This was a big event in Australia and was recorded in the major news outlets.
 Great War Tour 171
This is the foot of Pvt Jack Hunter's grave. This is what Findagrave has to say about hs end and eventual recovery: "Private John "Jack" Hunter who was serving with the 49th Battalion AIF lost his life from a German shell when he went over the trenches on September 26, 1917 during the Battle for Polygon Wood. The Battle of Polygon Wood was an attack against entrenched German positions that began on September 26, 1917 and Private Hunter died that day in the arms of his younger brother Jim at the age of 29. His brother buried him there, on the frontline, in a shallow grave and once the guns had fallen silent, Jim returned to look for his brother's body, but the ground had been chewed up by artillery and he could find no trace. At the end of the war his grave was not found during the consolidation of the many small, temporary cemeteries into much larger ones. In August of 2006, his remains were among six Anzac bodies discovered by gas workers laying a pipe in Westhoek, a few kilometres east of Ypres, in Belgium. The bodies were wrapped in blankets tied up with signal wire, their hands were clasped before them as though in prayer, and were remarkably preserved by the heavy clay. Dirt-smudged rising sun badges clung to the uniforms but a lack of personal effects hampered identification so the Belgium's National Institute for Criminalistics and Criminology identified him through mitochondrial DNA. A cattle farmer and timber worker from the southern Queensland town of Nanango, Hunter was engaged to be married when he enlisted in the Australian Army in 1916
90 years after his death, he was finally re-interred with full military honors at Buttes New British Cemetery. The ceremony, before a crowd of 500 people, was attended by the Governor-General, Major General Michael Jeffery and the New Zealand Prime Minister, Helen Clark. Relatives of Private Hunter laid flowers and a toy kangaroo and the Governor-General's wife, Marlena, laid a sprig of golden wattle on the coffin before it was lowered into the earth on the afternoon of Thursday, October 4, 2007, the day of the official Australian and New Zealand Passchendaele commemorations."
The small urn is one of thousands cast and placed at the foot of Aussie graves in commemoration.
 Great War Tour 172
The view from the top of the butte.
 Great War Tour 173
The inscription on the obelisk honouring the Aussie 5th Div.
 Great War Tour 174
This is the small Polygon Wood CWGC Cemetery, which contains mainly New Zealanders and adjoins the Buttes New British cemetery at its western end, with the butte to our backs across the road. Those interred here are largely from Passchendaele around the Zonnebeke area.
 Great War Tour 175
There are a total of 89 graves here, 58 New Zealanders, 30 British and one German. That's Polygon Wood in the background, unrecogniseable to those who would have been here in 1917.
 Great War Tour 176
Next, we return to the Messines Ridge Offensive in June 1917 and the Hooge Crater Museum.
An official war photographer, Hurley had, by the time he joined the Australian Imperial Force in 1917, spent more than four years in Antarctica, firstly with Australian geologist Douglas Mawson's 1911 to 1914 scientific expedition, which covered the 3,200 kilometre stretch of the icy continent that was Australian territory, then with Ernest Shackleton's doomed Trans-Antarctic Expedition between 1914 and 1916, being marooned with the crew, but being able to rescue a number of the glass plate negatives he took during the voyage. The presense of the aircraft in the mural acknowledge the use of Australian Flying Corps, RFC and RNAS aircraft to harass the German trenches, with the Deutsche Luftstreitkräfte getting in the action against the Allied air forces.
We leave Zonnebeke and drive the short distance south to the southernmost corner of Polygon Wood, known as Black Watch Corner. Named after the elite Scottish unit, the legend of Black Watch Corner predates the Battle of Polygon Wood, as on the morning of 11 November 1914, in the face of heavy artillery and attack by a division of the elite Prussian Guard during the First battle of Ypres, the Scots Guards, the Cameron Highlanders and Black Watch defended the spot with great heart and determination despite acute losses. Today the memorial stands on the site of the Polygon Inn, which served as a defensive position and owing to its occupiers' fierce resistance stifled the German advance and forced the Prussian Guard to bisect Polygon Wood, to avoid tracts still held defiantly by the Scots. On that day the German aim was to press on to Ypres to the west of the wood and drive the British lines backward. In this they succeeded, but throughout the rest of the war they failed to reach Ypres, despite the devastated town being the focus of determined attacks four years later during the Kaiserschlacht, or Spring Offensive of April 1918.
Directly opposite Black Watch Corner is the pedestrian entrance into Polygon Wood, which in 1917 there was nary a tree to be seen. Throughout the war, the area swapped hands on a few occasions and by September 1917 the eastern half was solidly held by the German 4th Army, with defensive machine gun bunkers and dugouts stretching northward to the Buttes, a rifle range at the north-eastern end of the ground. The attack on the German lines here was one of the minor campaigns of the greater Third Battle of Ypres and was a prelude to attacking the German positions north of Polygon Wood between the villages of Zonnebeke and Passendale. A successful attack at Polygon Wood would weaken the German forces in advance of the broad push that was the Battle of Broodseinde. This was organised by Gen Herbert Plumer, he who planned the successful Messines Ridge Offensive the previous June from his headquarters at Kemmelsberg.
A German bunker within the dense woodland, which at the time of the Autumn offensive by the British and Australian troops, would have stood out like the proverbial dog's bollocks. Early in the morning of 25 September, almost in anticipation of the Commonwealth offensive the next day, the Germans launched a Gegenangriff - counter-offensive using artillery and air support against ground gained by the Commonwealth forces since the Messines Ridge Offensive. This only partially succeeded, German troops pushing a salient into the British held lines that cut across the western half of Polygon Wood, reaching Black Watch Corner and driving westward, which had the effect of stifling British plans for a creeping barrage to launch the 26th September offensive. As a result, tanks were brought in to drive against the advancing German troops on the right flank of I ANZAC Corps to the south of Black Watch Corner and the British 33rd Division to the north of the corner. At this time, the Germans held onto this bunker, originally built by them, in the drive forward, only to be repelled from it during the offensive launched the next day.
The bunker's multi-chambered interior. The Commonwealth attack of 26 September was designed to push the Germans from their fixed positions using layered rapid attacks against German strong points, such as this bunker, following limited artillery barrages and air attacks. Capturing these raised positions enabled the advancing Commonwealth troops to observe German troop movements and with the help of aerial reconnaissance, stifled their plans for counter attacks. A creeping artillery barrage and support from tanks enabled the Australian 5th Divison to advance on the rifle range at the far end of the Wood, where German dugouts were concentrated, that held troops for reinforcing their counter-attacks. Layered British troop movements from the rear kept the Germans at bay and further Gegenangriff attacks were stifled, with the help of improving weather, which dried the ground and aided the British in observing German troop movements from the air. The battle left the German 4th Army in tatters and worked in severely weakening German lines further north before the big push at Broodseinde.
This is the Buttes New British Cemetery and is located at the foot of the rifle range butte, which is capped by the 5th Australian Division obelisk, the Aussies having captured the German positions at the butte on the opening day of the offensive. There are 431 identified casualties in the cemetery, but there are 2,108 British and Commonwealth servicemen in total here, the rest of the 1,677 are unidentified. Despite the cemetery's name, there is a greater percentage of Commonwealth graves here than British ones, 160 Australians, 95 New Zealanders and six Canadians.
This is the Buttes New British Cemetery (New Zealand) Memorial, which records the names of 378 servicemen of the NZ Div with no known grave who perished in attacks around the Polygon Wood area, including the failed attack on Polderhoek Chateau to the south of Polygon Wood on 3 December 1917 by the Kiwis. This minor offensive was unsuccessful in that the New Zealanders fielded their 'B' team, men who had had not marched into the Passchendaele meat market, because of the losses suffered by the Div there.
These are the graves of five Australian soldiers who were lost for 90 years, their final resting place unknown to their families, but finally laid to rest here after being discovered during routine pipe laying work at Westhoek nearby. All Australian, all killed during the Battle of Polygon Wood. Their names are Sgt George Calder, Pvts John 'Jack' Hunter and George Storey, as well as two unidentifiable men. In 2007 they were finally laid to rest with full military honours and the families of those who were able to be identified through DNA records finally got closure. This was a big event in Australia and was recorded in the major news outlets.
This is the foot of Pvt Jack Hunter's grave. This is what Findagrave has to say about hs end and eventual recovery: "Private John "Jack" Hunter who was serving with the 49th Battalion AIF lost his life from a German shell when he went over the trenches on September 26, 1917 during the Battle for Polygon Wood. The Battle of Polygon Wood was an attack against entrenched German positions that began on September 26, 1917 and Private Hunter died that day in the arms of his younger brother Jim at the age of 29. His brother buried him there, on the frontline, in a shallow grave and once the guns had fallen silent, Jim returned to look for his brother's body, but the ground had been chewed up by artillery and he could find no trace. At the end of the war his grave was not found during the consolidation of the many small, temporary cemeteries into much larger ones. In August of 2006, his remains were among six Anzac bodies discovered by gas workers laying a pipe in Westhoek, a few kilometres east of Ypres, in Belgium. The bodies were wrapped in blankets tied up with signal wire, their hands were clasped before them as though in prayer, and were remarkably preserved by the heavy clay. Dirt-smudged rising sun badges clung to the uniforms but a lack of personal effects hampered identification so the Belgium's National Institute for Criminalistics and Criminology identified him through mitochondrial DNA. A cattle farmer and timber worker from the southern Queensland town of Nanango, Hunter was engaged to be married when he enlisted in the Australian Army in 1916
90 years after his death, he was finally re-interred with full military honors at Buttes New British Cemetery. The ceremony, before a crowd of 500 people, was attended by the Governor-General, Major General Michael Jeffery and the New Zealand Prime Minister, Helen Clark. Relatives of Private Hunter laid flowers and a toy kangaroo and the Governor-General's wife, Marlena, laid a sprig of golden wattle on the coffin before it was lowered into the earth on the afternoon of Thursday, October 4, 2007, the day of the official Australian and New Zealand Passchendaele commemorations."
The small urn is one of thousands cast and placed at the foot of Aussie graves in commemoration.
The view from the top of the butte.
The inscription on the obelisk honouring the Aussie 5th Div.
This is the small Polygon Wood CWGC Cemetery, which contains mainly New Zealanders and adjoins the Buttes New British cemetery at its western end, with the butte to our backs across the road. Those interred here are largely from Passchendaele around the Zonnebeke area.
There are a total of 89 graves here, 58 New Zealanders, 30 British and one German. That's Polygon Wood in the background, unrecogniseable to those who would have been here in 1917.
Next, we return to the Messines Ridge Offensive in June 1917 and the Hooge Crater Museum.
Last edited:
fubar57
General
Lovely shots Grant!
- Thread starter
- #257
Thanks again guys. Next we drive the short distance to the Bellewearde Ridge and a small town called Hooge on the road to Ieper; this was the eastern-most point of the Ypres Salient and was hotly contested throughout the war. This is the Hooge Crater Museum and is widely regarded as the best privately run Great War museum in Vlanderen. The building to the left was a church built in the '20s and houses the museum proper, with the annexe, originally built as a school house serving as the cafe, where we had lunch that day.
 Great War Tour 177
The museum is only yards away from the front line and first opened in 1994, housing a range of intersting artefacts gathered from the surrounding area, including this artillery piece, the name of which escapes me.
 Great War Tour 178
British helmet fitted with chainmail for shrapnel protection, as worn by infantry and tank crews.
 Great War Tour 179
Gas mask.
 Great War Tour 180
German camouflaged plate armour.
 Great War Tour 182
Interesting arrangement of pellets, shell casings and warheads.
 Great War Tour 183
The museum was interesting in that it housed many fascinating items, but I was aware that the land next to the museum had remains of German trenches and artefacts left from the war, including a German bunker. I had heard about this site from Marcel, so hurried round the museum to give myself the opportunity to explore it. Called Frontline Hooghe, I asked our tour guide about it, the property on which a hotel stands, but he stated that the hoteliers were not happy about strays wandering around. I took my chances. For a small fee, a gold coin in a tin, I accessed the fenced off area and was immediately glad I did. This is the German concrete bunker of the same pattern as those seen at Messines, Tyne Cot and Polygon Wood. Note the gun, hapazardly placed on top of the bunker.
 Great War Tour 184
The bunker's interior.
 Great War Tour 185
So, while we are here, what was the Hooge Crater? It was a crater in Hooge, of course! In 1915, during the 2nd Battle of Ypres, with the Germans holding a commanding position, the British sought to extricate the Germans from this most eastern part of the Ypres salient, whose georgraphy meant that their trenches were precariously positioned and exposed. Initial attempts at pushing into the German lines failed, as their defences were, as was typical, even at this early stage of the fighting, very strong. The Germans definitely hunkered in for the long haul. The trenches were quite close at this point, being some 60 to 130 metres apart.
On 19 July, The British unleashed their plan for attacking the German trenches at Hooge. From Wikipedia:
"Inside the German salient was a fortification under which the 175th Tunnelling Company had dug a gallery 190 ft (58 m) long and charged a mine with 3,500 lb (1,600 kg) of ammonal but waterlogged ground required the explosives to be loaded upwards. The mine was sprung at 7:00 p.m. and left a crater 120 ft (37 m) wide and 20 ft (6.1 m) which was rushed by two companied of the 8th Brigade, 3rd Division. No artillery-fire had been opened before the attack and the Germans were surprised as bombers of the 8th Brigade advanced 300 yd (270 m) but then had to retire 200 yd (180 m) when they ran out of bombs. The trenches near the crater were consolidated and connected to the old front line, the 8th Brigade losing 75 casualties and taking 20 prisoners."
This is not the Hooge Crater; that was to the east of our current position, but is indeed a crater made by artillery. It is, in fact two craters right on the German trenches.
 Great War Tour 186
This fenced off area is the actual location of the German trenches; the crater to the right of us.
 Great War Tour 187
All around this place, lending atmosphere to it are piles of shell casings.
 Great War Tour 188
There is a reconstruction of a trench network on site, looking and feeling somewhat authentic, despite being artificial, although they are on the site of original trenches.
 Great War Tour 189
There's a little of that Flanders mud that they keep going on about.
 Great War Tour 190
The artificial trench network and spent shell casings give one an eerie feeling whilst wandering about this place.
 Great War Tour 191
It's interesting to note that here, the Germans first used flame throwers against the British. This section of mock-up trench is a part of the museum and by contrast to the Frontline Hooghe, looks and feels artificial.
 Great War Tour 192
Looking west through the barbed wire, this was the direction from whence the British attack was launched. During the Kaiserschlact, the April 1918 Spring Offensive, the Germans regained this land and held on to it until a spirited attack by the 9th Scottish and 29th Divisions retook it in September 1918.
 Great War Tour 193
This is the Hooge Crater CWGC Cemetery. It is located across the road from the museum. There are 5,916 soldiers commemorated here, with 2,353 known graves, of which 78 are New Zealanders.
 Great War Tour 194
After Tyne Cot and Lijssenthoek, this is the largest CWGC cemetery in Flanders.
 Great War Tour 195
Next, Hill 60 and more from the Messines Ridge Offensive.
The museum is only yards away from the front line and first opened in 1994, housing a range of intersting artefacts gathered from the surrounding area, including this artillery piece, the name of which escapes me.
British helmet fitted with chainmail for shrapnel protection, as worn by infantry and tank crews.
Gas mask.
German camouflaged plate armour.
Interesting arrangement of pellets, shell casings and warheads.
The museum was interesting in that it housed many fascinating items, but I was aware that the land next to the museum had remains of German trenches and artefacts left from the war, including a German bunker. I had heard about this site from Marcel, so hurried round the museum to give myself the opportunity to explore it. Called Frontline Hooghe, I asked our tour guide about it, the property on which a hotel stands, but he stated that the hoteliers were not happy about strays wandering around. I took my chances. For a small fee, a gold coin in a tin, I accessed the fenced off area and was immediately glad I did. This is the German concrete bunker of the same pattern as those seen at Messines, Tyne Cot and Polygon Wood. Note the gun, hapazardly placed on top of the bunker.
The bunker's interior.
So, while we are here, what was the Hooge Crater? It was a crater in Hooge, of course! In 1915, during the 2nd Battle of Ypres, with the Germans holding a commanding position, the British sought to extricate the Germans from this most eastern part of the Ypres salient, whose georgraphy meant that their trenches were precariously positioned and exposed. Initial attempts at pushing into the German lines failed, as their defences were, as was typical, even at this early stage of the fighting, very strong. The Germans definitely hunkered in for the long haul. The trenches were quite close at this point, being some 60 to 130 metres apart.
On 19 July, The British unleashed their plan for attacking the German trenches at Hooge. From Wikipedia:
"Inside the German salient was a fortification under which the 175th Tunnelling Company had dug a gallery 190 ft (58 m) long and charged a mine with 3,500 lb (1,600 kg) of ammonal but waterlogged ground required the explosives to be loaded upwards. The mine was sprung at 7:00 p.m. and left a crater 120 ft (37 m) wide and 20 ft (6.1 m) which was rushed by two companied of the 8th Brigade, 3rd Division. No artillery-fire had been opened before the attack and the Germans were surprised as bombers of the 8th Brigade advanced 300 yd (270 m) but then had to retire 200 yd (180 m) when they ran out of bombs. The trenches near the crater were consolidated and connected to the old front line, the 8th Brigade losing 75 casualties and taking 20 prisoners."
This is not the Hooge Crater; that was to the east of our current position, but is indeed a crater made by artillery. It is, in fact two craters right on the German trenches.
This fenced off area is the actual location of the German trenches; the crater to the right of us.
All around this place, lending atmosphere to it are piles of shell casings.
There is a reconstruction of a trench network on site, looking and feeling somewhat authentic, despite being artificial, although they are on the site of original trenches.
There's a little of that Flanders mud that they keep going on about.
The artificial trench network and spent shell casings give one an eerie feeling whilst wandering about this place.
It's interesting to note that here, the Germans first used flame throwers against the British. This section of mock-up trench is a part of the museum and by contrast to the Frontline Hooghe, looks and feels artificial.
Looking west through the barbed wire, this was the direction from whence the British attack was launched. During the Kaiserschlact, the April 1918 Spring Offensive, the Germans regained this land and held on to it until a spirited attack by the 9th Scottish and 29th Divisions retook it in September 1918.
This is the Hooge Crater CWGC Cemetery. It is located across the road from the museum. There are 5,916 soldiers commemorated here, with 2,353 known graves, of which 78 are New Zealanders.
After Tyne Cot and Lijssenthoek, this is the largest CWGC cemetery in Flanders.
Next, Hill 60 and more from the Messines Ridge Offensive.
Airframes
Benevolens Magister
Great stuff Grant.
excellent info and pictures Grant
Grant, the bunker is actually build by the British and then used by the Germans. You can see that as the entrance actually faces Ypress, so on the British side of the front. It's directly in the linerof fire, so the Germans built a small wall to protect people coming in and out.
I believe the trenches are real, only the decoration isn't and they are British.
I might be mistaken, but I believe the pond to be there real Hooge krater. It actually consists of 2 mine craters.
I believe the trenches are real, only the decoration isn't and they are British.
I might be mistaken, but I believe the pond to be there real Hooge krater. It actually consists of 2 mine craters.
Users who are viewing this thread
Total: 1 (members: 0, guests: 1)