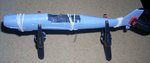
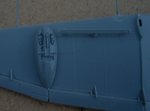
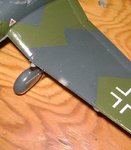
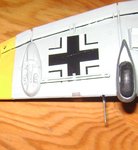
Revell Ju-87 D Stuka 1/48

Ad: This forum contains affiliate links to products on Amazon and eBay. More information in Terms and rules

I've noticed a few other things that will be an issue down the road.

1.) There is no 'lense cover' for the landing light. I plan on using a bit of sprue. Soften it and flaten it out a bit. I'll place it back further behind the hole to cover the gap in the wing. I'll probably paint it white or a very light grey. What I do not have is a piece on the 'clear' sprue to act as a lense cover. I thought about using a bit of the clear sprue. There are a few flat peices, but none big enough to cover the entire hole. Could I put 2 of those pieces together to cover it? I'd be worried about it not being clear.

2.) I've looked at some other Revell Ju 87 builds. The outter wing bomb ranks have the little tabs to place into holes in the wings for mounting. The wings, however, do not have any such places. They are tear dropped shape with the point at the rear of the wing. There is a notch that looks like it fits against one of the flap spars. I'm sorry if I'm not being clear. I'm writing this at work, and didn't have time to take any pics this morning. Does anyone have any pics of them mounted? From the underside, showing the placement.

Again, I appreciate all the advice and support so far. I'll get the fuselage together on Sunday and will have some more pics to show!
 
Kevin, as far as the clear plastic you're looking for, The packaging of a lot of stuff at the grocery store comes with clear vacuformed covers. See if you can spot one with a similar curve to what you need and cut it to size.
 
Kevin when I am brush painting I use the cap as my paint and I dip the brush in thinner and quickly to the cap.I do this often enough till I get the consistency of the paint I want.I have seen work by one paticular individual whose brush painting is everybit as good as an airbrush.He states thin the paint and and several coats this talking in regards to large areas what I mentioned with the cap I use for WW,Pits or small scale a/c. ;) Cheers Kevin
 
Cockpit mounted, and Fuselae together.
 

Attachments

  • DSCN3219.JPG
    DSCN3219.JPG
    42 KB · Views: 153
The Directions are not very clear on mounting the bomb racks or dive breaks. There are no pre-drilled holes to mount either one. There are posts on both for them to be mounted. Based on the pics in the directions this is as close as I can get them (IMHO).
 

Attachments

  • DSCN3226.JPG
    DSCN3226.JPG
    36.1 KB · Views: 146
There may have been partial holes on the inside of the wing that needed to be drilled through if the bomb rack option is used. Anyway the racks look good where you put then and it's coming along nicely Kevin. :thumbright:
 
It's been a while since I've posted an update. Had to work on the kitchen again. Wife decided that she didn't like the textured plaster walls, so that has taken up most of my free time lately.. anyway.

I've got the bomb racks mounted and filled in the seams. The dive breaks will be next.

I did see something as I was looking at the fuselage. The tail of the plane is 'warped' to one side. It's not really noticeable until you look at it dead on. I plan on heating it up using a heat gun (really a hair dryer) to slighty, but not sure how to keep it straight while it sets up. The only thing I've come up with so far is using 2 heavy books to sandwhich the tail.

I'll get some pics posted this weekend hopefully.
 
I've noticed a few other things that will be an issue down the road.

1.) There is no 'lense cover' for the landing light. I plan on using a bit of sprue. Soften it and flaten it out a bit. I'll place it back further behind the hole to cover the gap in the wing. I'll probably paint it white or a very light grey. What I do not have is a piece on the 'clear' sprue to act as a lense cover. I thought about using a bit of the clear sprue. There are a few flat peices, but none big enough to cover the entire hole. Could I put 2 of those pieces together to cover it? I'd be worried about it not being clear.
et the fuselage together on Sunday and will have some more pics to show!

I've had good luck using a small piece of clear plastic tape cut slightly larger than the hole. I then brush touch-up to the hole's edge. Here's the one on my Revell Stuka:
 

Attachments

  • Stuka light.jpg
    Stuka light.jpg
    54.9 KB · Views: 114
  • Stuka light bottom.jpg
    Stuka light bottom.jpg
    46.6 KB · Views: 128

Users who are viewing this thread

Back