- Thread starter
- #21
KevinK.
Airman
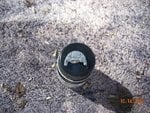
Sadly Crimea, I don't have an SLR or DSLR. I currently have a Nikon Coolpix L-10. Which is pretty good. I've gotten some great photo's with it. I just can't seem to get the lighting right for the macro focus to work. It seems like it's getting too much light. The photos are coming out so bright that it's whiting out part or most of the screen at worst. If i turn the flash off, for some reason I lose the 'anti-shake' and it gets pretty bad. I'm just going to keep experimenting with it.
Well, the panel lines I'm either going to leave alone, or sand them down. I've not decided yet and have got some time to deal with it.
Well, the panel lines I'm either going to leave alone, or sand them down. I've not decided yet and have got some time to deal with it.
")