Well got my Russian planes (1 Viewer)

Ad: This forum contains affiliate links to products on Amazon and eBay. More information in Terms and rules

TimEwers

Airman 1st Class
224
0
Aug 28, 2010
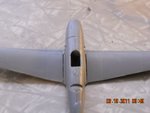
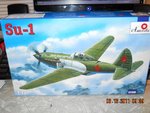
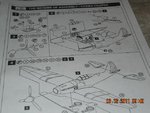
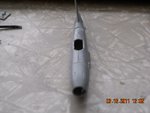
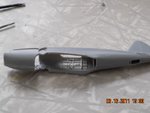
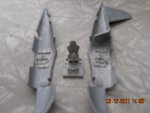
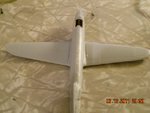
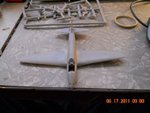
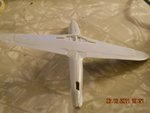
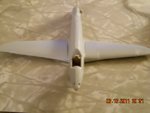
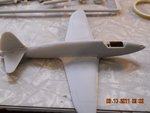
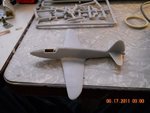
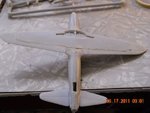
First up the SU-1 in 1/72

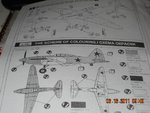
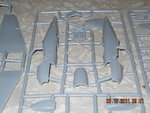
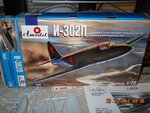
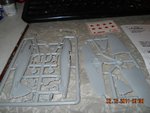
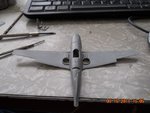
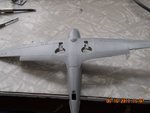
Next is the I-302 in 1/72 and yes there are only two frets for the 302.

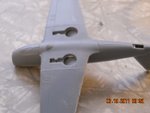
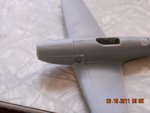
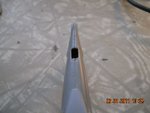
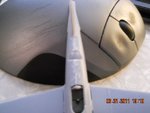
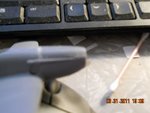
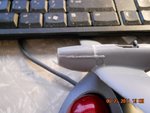
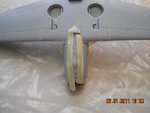
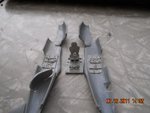
Very basic kits but considering they are limited kits I guess enough Detail for the scale.
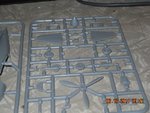
 

Attachments

  • Picture 235.jpg
    Picture 235.jpg
    110.9 KB · Views: 174
  • Picture 239.jpg
    Picture 239.jpg
    116.2 KB · Views: 172
  • Picture 237.jpg
    Picture 237.jpg
    115.5 KB · Views: 229
  • Picture 236.jpg
    Picture 236.jpg
    124.4 KB · Views: 163
  • Picture 240.jpg
    Picture 240.jpg
    106.6 KB · Views: 171
  • Picture 238.jpg
    Picture 238.jpg
    128.4 KB · Views: 170
  • Picture 241.jpg
    Picture 241.jpg
    101.7 KB · Views: 183
  • Picture 243.jpg
    Picture 243.jpg
    99.8 KB · Views: 180
  • Picture 242.jpg
    Picture 242.jpg
    97.7 KB · Views: 178
  • Picture 232.jpg
    Picture 232.jpg
    112.2 KB · Views: 177
  • Picture 234.jpg
    Picture 234.jpg
    128.7 KB · Views: 245
  • Picture 233.jpg
    Picture 233.jpg
    105 KB · Views: 198
Well here I am so far with it but couple of questions on the wings Should I glue the bottom first
then attach the tops or attach the tops then put the whole thing on.

Also should I putty now and clean up seams or after I get the wings on?.
 

Attachments

  • Picture 247.jpg
    Picture 247.jpg
    91.5 KB · Views: 173
  • Picture 252.jpg
    Picture 252.jpg
    85.6 KB · Views: 180
  • Picture 250.jpg
    Picture 250.jpg
    87.7 KB · Views: 170
  • Picture 248.jpg
    Picture 248.jpg
    82.4 KB · Views: 168
  • Picture 253.jpg
    Picture 253.jpg
    95.1 KB · Views: 177
  • Picture 251.jpg
    Picture 251.jpg
    76.1 KB · Views: 193
  • Picture 254.jpg
    Picture 254.jpg
    91.2 KB · Views: 165
I personally would attach the wing halves together first, then attach them to the fueslage. I treat each section as a subject in itself, so would fill them seperately too before cementing - but at the end of the day, whatever works best for you is the way to go.
 
Not much to it 20 parts all together And I am trying to do better with this kit, But I have learned a lesson with my Fulmar leave well enough alone when it comes to trying to fix mistakes late in the build.

But here are the picts so far
 

Attachments

  • Picture 255.jpg
    Picture 255.jpg
    90 KB · Views: 157
  • Picture 259.jpg
    Picture 259.jpg
    98 KB · Views: 171
  • Picture 257.jpg
    Picture 257.jpg
    86.4 KB · Views: 169
  • Picture 256.jpg
    Picture 256.jpg
    83.2 KB · Views: 179
  • Picture 260.jpg
    Picture 260.jpg
    93.3 KB · Views: 160
  • Picture 258.jpg
    Picture 258.jpg
    96.6 KB · Views: 177
  • Picture 261.jpg
    Picture 261.jpg
    93.7 KB · Views: 164
Interesting looking bird alright!

Looking at your wings, they stand quite proud, a common problem I think with the thick mouldings of limited run kits. (A couple of LR kits I have certainly have this problem)
In future, it would be better to dry fit these first (a good idea for any type of kit), and sand down from the inside as required.
As these are glued already, you can still sand them down externally, but you will lose the engraved detail - this can be rescribed though.
 
What detail what you see is what you get, I think the way they did the wings was to show the lines, as what detail there is, is very soft and will be lost with painting.
 
Yep, you're right Tim about the detail, but what I meant was where the wing halves are glued together. The thickness of the moulds causes one half to stand proud of the surrounding area.

My Tasman and Jay's (ex Tasman) Spitfires to illustrate:

1 and 2. Tasman Spitfire Mk.VIIIc - rough (thick) moulding veins still present. Insides sanded down a little, but lower wing sections still stand proud (-were alot worse).
3 and 4. Jay's Spitfire PR.XIX, originally in same condition. Fit now almost perfect where completely sanded down (flap area still needs attention though).

STA52918.JPG
STA52919.JPG
STA52920.JPG
STA52921.JPG
 
Last edited:
Ah ok I see now. a sanding I will go a sanding I will HI HO a derrio a sanding I will go. And so on and so forth. :)
 
Sanding done Next up painting weeee!!!!
 

Attachments

  • Picture 268.jpg
    Picture 268.jpg
    86.3 KB · Views: 162
  • Picture 271.jpg
    Picture 271.jpg
    82.6 KB · Views: 164
  • Picture 269.jpg
    Picture 269.jpg
    85.7 KB · Views: 145
Well question on the SU-1 Would this Mr Surfacer I read about work on filling these seams? there not too bad other than at the wing root.

And which one would I need to get.
 

Attachments

  • Picture 273.jpg
    Picture 273.jpg
    83.9 KB · Views: 128
  • Picture 275.jpg
    Picture 275.jpg
    82.7 KB · Views: 136
  • Picture 274.jpg
    Picture 274.jpg
    82.7 KB · Views: 141
Some nice work on these kits here. But I agree with A4K ( Evan) some more of sanding and fitting is needed.
Concerning the Mr.Surfacer.... Tim, it's a primer rather and it is used for primming of surfaces in oreder to get them ready for applying of colours. It works with scratches rather than with a such gaps. I would suggest using of a putty. It can be the Tamiya White one. If it isn't available in a near hobby shop you can use a mix of talc powder and an oil grey enamel ( Humbrol for instance). It is a very good solution for that. When the putty is appled and solidified you can sand it ( what I prefer personally ) or , what is better , use a soft rag with a thinner for the enemel you used for removing the putty excess and making the seams smooth. The rag should be used when the filling ( the putty) isn't dry and harden fully.
 
OK here is where I am at with the SU-1. I hope much better looking with the puttying, but how to do the gaps at the wing roots without tearing them up kinda nervous about that part and on the bottom go ahead and putty the rear part or would painting cover the seam up?.
 

Attachments

  • Picture 294.jpg
    Picture 294.jpg
    83.7 KB · Views: 131
  • Picture 301.jpg
    Picture 301.jpg
    86.9 KB · Views: 141
  • Picture 300.jpg
    Picture 300.jpg
    87.4 KB · Views: 134
  • Picture 299.jpg
    Picture 299.jpg
    88.3 KB · Views: 145
  • Picture 298.jpg
    Picture 298.jpg
    95.6 KB · Views: 135
  • Picture 293.jpg
    Picture 293.jpg
    87 KB · Views: 141
Yep..Harry is right. You can use the Superglue , cyanoacrylate adhesive for filling these thin gaps at the rear undersides. Sanding wil be needed though. Concerning these gaps at wing roots.... just threat then as these seams of the fuselage. Fill them with a putty and remove its excesses ( depending on a putty or way you will use ) with either sanding or a soft rag soaked with a thinner.
 
Last edited:

Users who are viewing this thread

Back