Navigation
Install the app
How to install the app on iOS
Follow along with the video below to see how to install our site as a web app on your home screen.
Note: This feature may not be available in some browsers.
More options
You are using an out of date browser. It may not display this or other websites correctly.
You should upgrade or use an alternative browser.
You should upgrade or use an alternative browser.
What's on The Workbench (3 Viewers)
- Thread starter Heinz
- Start date
Ad: This forum contains affiliate links to products on Amazon and eBay. More information in Terms and rules
More options
Who Replied?trackend
Chief Master Sergeant
Well guys Ive start my first ever model and the info you lot gave me has helped bundles but I had all sorts of trouble trying to use the air brushes I was given so I went out today and bought a gravity fed one. What a difference it has made its really a pleasure to use and the control is fantastic.
I know you can pay mega bucks for guns, I went for something not too cheap and payed £40 but it was worth every penny soon as ive assembled something worth looking at I'll stick it on the thread but this new gun is so much fun to use Im just painting piles of white card to get the feel and flow before I point it at any kit.
I know you can pay mega bucks for guns, I went for something not too cheap and payed £40 but it was worth every penny soon as ive assembled something worth looking at I'll stick it on the thread but this new gun is so much fun to use Im just painting piles of white card to get the feel and flow before I point it at any kit.
Attachments

Sexay, that is a nice brush there. Gravity feeds is the best by far in my opinion.. Jars are a pain to fill and clean up, I like just pouring in some paint, spraying, then cleaning up easy. Then wipe out of feed and use a different color! ")
You buy an aircraft model yet? Wojtek has missles!
You buy an aircraft model yet? Wojtek has missles!
trackend
Chief Master Sergeant
Wojtek will get boot up the chuff piece if he trys nobbling my Wimpy when ive finished it
A4K
Brigadier General
Great score Lee!
Thanks Wayne, VB, and Wojtek! (I guess it was my Polish friend who resized the pics..? Dzieki !)
I'm on leave for 5 days, so have a good week guys, and HAPPY MODELLING!
Thanks Wayne, VB, and Wojtek! (I guess it was my Polish friend who resized the pics..? Dzieki !
)I'm on leave for 5 days, so have a good week guys, and HAPPY MODELLING!
Last edited:
Airframes
Benevolens Magister
Nice 'brush Lee, well done mate!
Lucky13
Forum Mascot
Nice one Lee! Looking forward to see it getting used!
Wojtek will get boot up the chuff piece if he trys nobbling my Wimpy when ive finished it
Why do you think in that way?
Good to see you've scored an airbrush Lee...well done.
trackend
Chief Master Sergeant
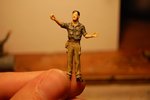
I made a start on the Bren carrier and its going ok but what ever way I try the RT is so small I cant get the dial painting to come out right. The detail is in the moulding but I cant seem to be able to highlight it with out splodging paint everywhere even using a single hair brush and bloody great magnifing glass it comes out looking a mess.
Airframes
Benevolens Magister
Looking great Mag, and the colours (Re PM) are fine.
Lee, either try using a cocktail stick to paint the dials, or dry-brush them. Another very effective way takes a bit more time, but looks good when done. First paint the dials in GLOSS white. Let this dry totally for at least 12 hours. Then, paint them in matt black, again letting the paint dry thoroughly. When you're satisfied that the paint is dry, using a magnifying glass, take a pin, needle, or the point of a scalpel blade, and gently scratch through the black paint to reveal the white, for the figures, needles etc of the instruments. These can then be given a coat of gloss varnish, or a couple of coats of Johnson's Klear, to simulate the glass.
Lee, either try using a cocktail stick to paint the dials, or dry-brush them. Another very effective way takes a bit more time, but looks good when done. First paint the dials in GLOSS white. Let this dry totally for at least 12 hours. Then, paint them in matt black, again letting the paint dry thoroughly. When you're satisfied that the paint is dry, using a magnifying glass, take a pin, needle, or the point of a scalpel blade, and gently scratch through the black paint to reveal the white, for the figures, needles etc of the instruments. These can then be given a coat of gloss varnish, or a couple of coats of Johnson's Klear, to simulate the glass.
trackend
Chief Master Sergeant
Looking great Mag, and the colours (Re PM) are fine.
Lee, either try using a cocktail stick to paint the dials, or dry-brush them. Another very effective way takes a bit more time, but looks good when done. First paint the dials in GLOSS white. Let this dry totally for at least 12 hours. Then, paint them in matt black, again letting the paint dry thoroughly. When you're satisfied that the paint is dry, using a magnifying glass, take a pin, needle, or the point of a scalpel blade, and gently scratch through the black paint to reveal the white, for the figures, needles etc of the instruments. These can then be given a coat of gloss varnish, or a couple of coats of Johnson's Klear, to simulate the glass.
Thanks AF I,ll give it a bash and then stick some images on how far ive got with my first build I am learning alot, mostly that Im a clumsy old git I succeeded yeasterday in picking up the Brens carriers tow hook with tweezers, squeezed too hard and pinged it across the room Im still looking for it but a green componant on a green carpet is going to be bloody hard to find
Lesson one be carefull what colour surfaces are around you when handling small parts.
Lesson two be gentle with tweezers
Lesson three hitting your head on the wall does not help locate lost items
Airframes
Benevolens Magister
Ah! Welcome to the world of 'ping' and the Carpet Monster! Believe me, it won't be the last time that happens, especially with tweezers. Depending on the shape of the part,and at what angle you have to twist your wrist to attach it (!), sometimes 'reverse action' tweezers can help. These have a small spring inside, keeping the tweezers closed until squeezed to open them , the opposite to 'standard' tweezers. Personally, I find them a little difficult to manipulate, due to this stupid arthritis thing, so I tend to use very small pliers instead, where possible. A little tip for cutting and/or picking up small parts, particularly those you feel might go 'ping' - place the tip of a finger gently over the part before cutting/moving/picking up, to steady it, and stop it from 'pinging', especially as the knife blade makes the final separation, as this is where inertia rules!
As for the Carpet Monster, well, carpets were the desire and creation of women, so we're already losers! It's a fact that, once finished with a part, after perhaps hours of preparation and painting, said part will, upon being moved, and at the last second, disappear into the furthest reaches of the darkest, most inaccessible, dustiest part of the thickest carpet pile in the room, or perhaps even the next room, if the inertia of the 'ping' was strong enough!
First thing to do, if noticed in time, is try to listen for the soft noise it might make upon landing. Second thing, do not move your feet until you have scoured the area around you visually - the law of Murphy states that you will surely stand on, and crush the part, if you move first! Having satisfied yourself that it is safe to move your feet/chair/beer bottle/coffee mug etc, then do a 'square search' of the areas immediately around you, working outwards. This can be to a quite sizeable area, as the small parts seem to have powers the equivalent to a flea on extra -strong Valium!
If all else fails, and if physically able to, then lie flat on the floor, and look across the carpet at floor level, with your eye as close asd possible to the surface. Hopefully, the part will show up as a different shape, or tone or shadow against the carpet's surface. A bright lamp or torch sometimes helps, and placing a piece of plastic, or other material, of a similar colour can also help to identify the difference in tone to the carpet, and how the missing part(s) may appear against the surface of the pile. Of course, it must be remembered that, once all hope is lost, and a new part has been obtained or scratch-built, and the model is totally finished, then the missing part will turn up, normally in the most unexpected place!
Lee, I keep a torch handy for such occasions too! ...happens to all modellers sooner or later....and sometimes more frequently than one would like!
...happens to all modellers sooner or later....and sometimes more frequently than one would like!Thanks BB.. stop talking bout the thing and post some pics! I recently finished miniarts 1/16 roman soldier and went to get the decal for the shield and the thing slid off and just warped into itself. I ripped it up and said piece of crap miniart! Talk about bad decaling..

Users who are viewing this thread
Total: 4 (members: 0, guests: 4)