- Thread starter
- #41
weetam
Airman
Good stuff so far. Just a note for any future cannon blisters - these were different shapes and sizes, and in differing positions, depending on the Mark of Spit.
On the MkVb, they were broader, and higher, than on the MkIX, for example, and located further aft, and with different access hatches. This was due to the earlier cannon of the MkV being drum fed, with the cannon on it's side and the drum magazine on top. Later versions used the later cannon, belt fed, with a BFM (Belt Feed Mechanism) requiring the smaller, though longer, blister further forward on the top of the wing, and a small, elongated blister below.
To make life easier when cutting apertures in wings (or other parts), it's best to do this before the wings have any other work done, and of course before joining the wing halves.
Mark the shape of the aperture to be cut, then drill a small hole at each corner, inside the area to be removed. Further holes can be drilled along the inside of the cut lines if required. Once this is done, cuts can be made between the holes, preferably using a razor saw, until the part is removed. The rough edges can then be trimmed with a scalpel, and then filed and sanded to the required dimensions, whilst at the same time providing a smooth, even edge all round.
All major modifications of this sort should be done before any other construction is undertaken, whenever possible.
Once apertures are cut and finished as above, a piece of suitable plastic card can then be cemented inside the open aperture, obviously larger than the hole itself, as a support for the surface filling. Once this is set, the outer surface can be plugged with more card and filler, before sanding smooth to blend-in with the surroundings, thereby eliminating any traces of the 'patch'.
Plan all the modifications before commencing work, and work out how they are going to be done, and completed. If necessary, make a written list of what's required, and the order in which they are required, and work from this list in conjunction with the relevant sections of the kit instructions.
The only paint work which needs to be addressed before the main assembly is completed is normally on internal or detail areas - all airfrmae painting is done after construction and any modifications, especially where areas have been filled and sanded.
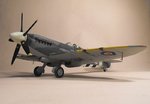
yup! all noted for the next aircraft build. But in so far as an exercise to re-familiarise myself with aircraft builds, im fairly happy with the way its going. The end result will undoubtedly be below standard as far as pro-modellers are concerned, but that was never the intention for this build. I do however feel that the next few will be straight out of the box (plus maybe a few after market products like harnesses and photo etched parts etc) until i feel that my aircraft building skills are of a sufficient standard.
I have to say, 1/16th figures are a LOT easier to modify!!!

