N4521U
Colonel
I know I now have 5 in the build stage...... I just wanted to get this thread started as I will be picking at this one as well. See I reallly do have more on my bench than anyone else!!!!!!!!!
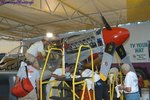
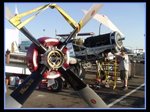
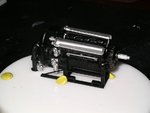
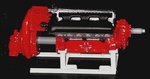
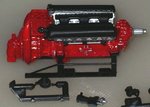
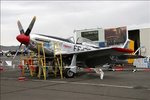
I posted the motor in the thread asking advice on the best kit in 1/32, and I did wait for the Tamiya kit which I now have, boyoboy am I glad I waited! Chook kindly turned over the motor from his Tamiya Spitty since he wasn't using it in his build. I wanted to have the blown Merlin engine on a stand in the dio. He blew a rod on the track at Reno, and changed engines there. A picture of the engine on a stand is included on his website, along with many of the in progress of changeover. My association with the plane as I stated before, is the nose art I created and painted on the plane too many years ago.
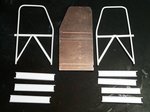
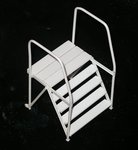
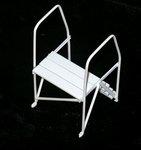
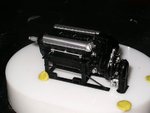
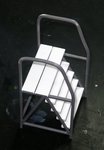
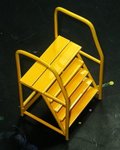
I have built the blown engine and a scratch built stand. This weekend I spent some time building the work platform to go in the dio. It's a little out of scale, but it's my first go. This week I will make some jig pieces on the router to make a more to scale version. I have to make 2, one for each side of the plane. I heated some sprue from the Yak with a hair dryer for the bending. I found holding a flame under the stuff was something less than desirable to be kind. The new jigging should work a treat where I will be using some PVC rod. Anyone want a 1/2nd work platform?????
I posted the motor in the thread asking advice on the best kit in 1/32, and I did wait for the Tamiya kit which I now have, boyoboy am I glad I waited! Chook kindly turned over the motor from his Tamiya Spitty since he wasn't using it in his build. I wanted to have the blown Merlin engine on a stand in the dio. He blew a rod on the track at Reno, and changed engines there. A picture of the engine on a stand is included on his website, along with many of the in progress of changeover. My association with the plane as I stated before, is the nose art I created and painted on the plane too many years ago.
I have built the blown engine and a scratch built stand. This weekend I spent some time building the work platform to go in the dio. It's a little out of scale, but it's my first go. This week I will make some jig pieces on the router to make a more to scale version. I have to make 2, one for each side of the plane. I heated some sprue from the Yak with a hair dryer for the bending. I found holding a flame under the stuff was something less than desirable to be kind. The new jigging should work a treat where I will be using some PVC rod. Anyone want a 1/2nd work platform?????
Attachments
-
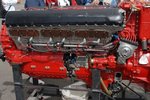 1a blown engine.jpg60.3 KB · Views: 376
 -
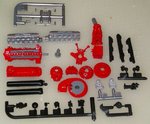 1b Enigine parts.jpg96.2 KB · Views: 401
 -
 1c engine on stand.jpg98.7 KB · Views: 391
 -
 1d engine on finished stand.jpg95.3 KB · Views: 395
 -
 2 work platform.jpg31 KB · Views: 378
 -
 2a work platform.jpg69.1 KB · Views: 390
 -
 2b work platform.jpg76.6 KB · Views: 355