A4K
Brigadier General
Yep, agree aswell.
Great start mate!
Great start mate!
Follow along with the video below to see how to install our site as a web app on your home screen.
Note: This feature may not be available in some browsers.
Ad: This forum contains affiliate links to products on Amazon and eBay. More information in Terms and rules
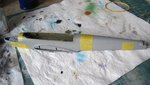
 As far as parts and sub-assemblies go...this is also confusing sometimes...way too much instructions crammed on one page and sometimes flat out stupid instructions as to where to glue these sub-assemblies in place. To compare the two, this Cyberhobby kit has the building instructions spread over 6 pages, whereas and Eduard Weekend Edition of the G4 nightfighter is spread over 12 pages. By now I've turned to to keeping the Eduard instructions (I downloaded them from their website) at hand for certain color call-outs that make some more sense, and also to get a better clue as to where certain parts and sub-assemblies should go.
[...]and yes the RLM02 loos very much like Vallejo Air 71.044.
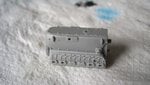
Just had another look, and I think the air bottles are for the guns, not part of the crew oxygen system. If they are, then they would be black, being CO2.
The oxygen system was filled from an exterior valve on the fuselage side, and fed via the circular regulators, which were blue.
Cannons were fired by an electro-pneumatic system, hence the CO2 bottles near the breech of each weapon.