1/48 F-35B VMFA-211 Wake Island Avengers

Ad: This forum contains affiliate links to products on Amazon and eBay. More information in Terms and rules

I think I would be drilling holes in these (providing they do match up) and sticking rods through. At least this way you're assured of secure hold. I note that you have a lot more of these 'lugs' dotted over the model.

You do have an alternative Bill, but this would involve the garbage collector and then you will have to work out if it's recycle or land fill. 😂
There's a Youtuber "FlyingSModels" has done 3 parts........ so far on the F-35B Kittyhawk kit.
He has confirmed it's all crap, not those words but it comes thru.
3 parts, and not to the finish, for time correcting faults.
I have put it inna drawer for now!

I have run into More!!!!!!!!!!!!!!!!!!!!!
 
I based this KH kit on my F9F Kittyhawk kit which was a great fitting kit.
All kits are Not alike I guess. If I had seen the videos mentioned above,
I doubt I would have even entertained the idea.
My suggestion is to fill the box with rocks and you have a good door stop!
 
Okay, the tip AIM Pylon!
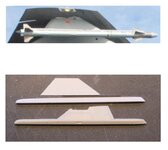
I've located a decent photo of the wing tip, with mounted AIM-9X.
I've taken this into my graphics program, scaled it by the width of the wing tip and AIM length.
I then measured the width of the pylon at the attachment under the wing, and at the missal.
I then found, not shown, a direct on partial picture, and measured the height of the pylon.
Now I had the dimensions needed to make an accurate shape pylon, mount location, and position of AIM.
The mounting rail, by the kit, is about 48 degrees tilt. the kit pylon is about 1.3mm thick.
The rail about 2mm x 2mm and shaped at both ends. Pointed front, rounded tail.
Cut some PVC shapes to my findings, as shown. But under the wing makes a sh!tload of diff!!!!!
I rest my case!
S2F F-35B 11.jpg
 
So after all my searching,
tracing.........................
hacking................ shaping
and gluuuuuuuing!!!!!
I've go two new pylons and rails.
Hoping it's all worth the effort...
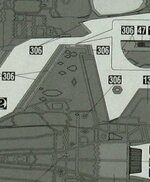
Showing my printed page of research
one of my tools and new parts compared to kit!
S2F F-35B 12.jpg
 
Sitting here, watching Dog House and had to slap myself. Why didn't I think of this before?????? So looked for 1/32nd F-35B instruction sheets. Italari ......! So i was about 99.9%! Here is Their hard mount layout!
20220626_083823.jpg
I'm set to go!
 
And I thought I was in the clear!!!!!!!!!!!!!!!!!! What rot.
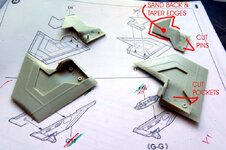
I tackled the vertical stabs, I shake my head!
Exhibit 1..................
First I had to sand of heaps of under surface area of the insert.
It was just too thick and sat proud of the other base piece.
I also cut the pins and post holes, they are really not needed.
The insert is captured all round, and they re too high and would
not allow the insert to sit flush!!!! WT??????
I tapered the edges, just because!
S2F F-35B 14.jpg
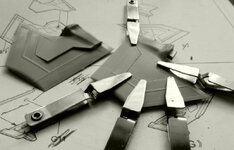
So after all that I used the metal clamps to keep the insert from dropping in.
After clamping I used Tamiya thin cement and used the brush from the bottle
to attach most all the way round. I removed the clamps and did the same where they were.
You can see the fit tht brought all this on!!!!! Now on to the next PROBLEM area, Where?
I do not know yet!
S2F F-35B 15.jpg
 

Users who are viewing this thread

Back