That's great Andy like your thinking! 
Navigation
Install the app
How to install the app on iOS
Follow along with the video below to see how to install our site as a web app on your home screen.
Note: This feature may not be available in some browsers.
More options
You are using an out of date browser. It may not display this or other websites correctly.
You should upgrade or use an alternative browser.
You should upgrade or use an alternative browser.
100th Anniversary Naval Aviation - Curtiss A-1 Triad 1/48th
- Thread starter hawkeye2an
- Start date
Ad: This forum contains affiliate links to products on Amazon and eBay. More information in Terms and rules
More options
Who Replied?- Thread starter
- #102
hawkeye2an
Staff Sergeant
Airframes
Benevolens Magister
Nicely done Andy.
Crimea_River
Marshal
Cool! Even without the A/C!
vikingBerserker
Lieutenant General
Very nice!
damn that weather.....lookin' forward to more...
- Thread starter
- #108
hawkeye2an
Staff Sergeant
Still struggling with the excessive heat here. I'm getting up real early tomorrow, hope to have some progress pic up sometime in the afternoon.
- Thread starter
- #109
hawkeye2an
Staff Sergeant
Back to work today, moved some stuff to the kitchen table until it cools off.
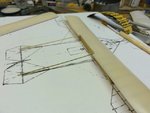
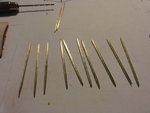
Pic 1 - Interplane struts made from brass rod tapered with a Dremel
Pic 2 - Holes drilled. Large holes are for struts, small ones for rigging
Pic 3 - Rigging started. For this plane I will be using 2# fishing line and gluing it to the top wing, holes have been drilled partway through the wing bottoms. The holes in the bottom wing are drilled all the way through. The line will be pulled through tight, glued and then the line will be trimmed off and a dab of paint finishes it up
Attachments
vikingBerserker
Lieutenant General
That is so impressive, well done!
Airframes
Benevolens Magister
Superb work Andy.
B-17engineer
Colonel
Sweet job!
Crimea_River
Marshal
Neat!
looks rather good, even better when it comes together.....
- Thread starter
- #117
hawkeye2an
Staff Sergeant
After taking my WIP to the local club meeting last week I have decided to completely remake the mold for the wing. It was pointed out (when I asked them what I could improve) that I will need to put a little raised rib detail in. I really respect the opinions of the guys in the club, several of which have won awards on the National IPMS level. This kind of mentoring from them along with the many great modelers on this forum have made me raise my expectations and challenged me to do even better. I've spent the last few days glueing stretched sprue to the wing molds and sanding, sanding, sanding. Should have some progress pics to post tomorrow.
It sounds very good Andy. For these raised rib details you might use "narrow" stripes made of a masking tape. To be honest , the fabric covering on old machines was stitched to these ribs and the thread was preserved with canvas strips glued to seams.
look forward to more Andy!
- Thread starter
- #120
hawkeye2an
Staff Sergeant
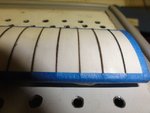
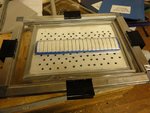
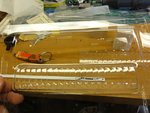
Work on the new wing.
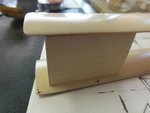
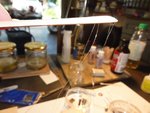
Pic 1 - added raised rib detail to the wing mold with stretched sprue. Rather tedious but worth it.
Pic 2 - vac forming
Pic 3 - very pleased with the results.
Pic 1 - added raised rib detail to the wing mold with stretched sprue. Rather tedious but worth it.
Pic 2 - vac forming
Pic 3 - very pleased with the results.
Attachments
Users who are viewing this thread
Total: 1 (members: 0, guests: 1)

