Vic Balshaw
Major General
Damn me T, that's a fine piece of work you've done thre.

Follow along with the video below to see how to install our site as a web app on your home screen.
Note: This feature may not be available in some browsers.
Ad: This forum contains affiliate links to products on Amazon and eBay. More information in Terms and rules
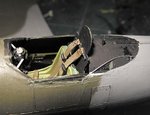
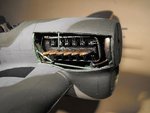
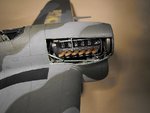
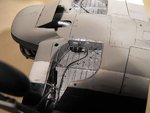
Interesting that those pics, which are of course of the Typhoon in the RAF Museum, the only known complete survivor, show a yellow line enclosing the 'Basic Six' blind-flying instruments. This can only have been applied during the aircraft's time in the U.S.A., where this 'system' is known to have been used on the P51 at least. Cockpit photos of Typhoons in RAF service don't show this line, and it was not a practice used or adopted by Britain. This raises the question, was it standard practice on all single - seat combat aircraft in U.S. service? I'm guessing the answer is yes, so maybe all models of not only the P51, but also the P47, P40, P39, and P38 should have the strip on the panel.