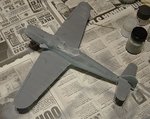
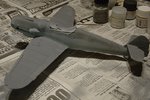
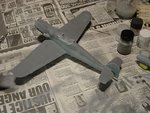
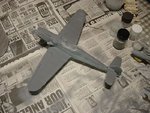
Budget Bf109G Build.

Ad: This forum contains affiliate links to products on Amazon and eBay. More information in Terms and rules

Nice work Terry!

couple of questions,Did you use the Acrylics? how'd you find them?

Also you know when you were sanding and it looked a little rough from the photos ,in the photos you just posted it looks really smooth where you did it.Did you simply sand them with real fine sandpaper or use another method?because from the photos it looks like you either did an Excellent job used another method

I just ask because when I've used fine sandpaper its still a little rough ,not fine enough paper ?
 
Thanks for the comments guys; just love that Guinness Muller!
Daniel, no, I haven't used the acrylics yet, the primer is thinned enamel, applied by airbrush. I'll be doing the camouflage in acrylics though.
I rubbed down the scratch marks with very fine wet and dry paper, used wet, then went over it again, using the BACK of the paper, wet, with a little hand soap. (like you would do on a full-size car body when prepping for paint.) After drying it, I then polished with a small amount of 'T-Cut, making sure any residue was fully cleaned off. Don't know if it's called 'T -Cut' in other parts of the world, but it's an auto body cutting liquid/colour restorer, basically a polishing compound, in thick liquid form.
Toothpaste works just as well, but to be honest, I was hurting so much, I just couldn't be a***d climbing the stairs to get it from the bathroom, and the 'T-Cut' was in a cupboard in the next room!
The trick is when sanding, don't apply too much pressure at first, then the scratches won't be as deep. Of course, the type/softness of the plastic has a bearing on this. Bear in mind also, the last pics were taken after priming.
Terry.
 
You're welcome, Daniel, anytime. The Airfix '109G6 was the first '109 I ever built, when it first came out in the '60's! Even though it was slightly inaccurate then, we didn't notice much, as it was ahead of its time. Of course, there weren't as many kit manufacturers then, and Airfix were one of the leaders, a household name. It would be nice if they can make a full comeback, and issue as many kits as they used to. But I doubt it, as there were literally hundreds!
Terry.
 
Forgot to say Airframes, lovely progress on the 109 so far. I never put so much effort in when filling and sanding my builds, but I might start doing so, following your tips. Varnish and talcum powder is a great one! So is the wet dry paper and the T-cut. I'm building a Mitsubishi T-2 next, my 1st modern build, so she can't be as rough and battered as my WW2 warbirds.

Nice paintjob on Rudi too! :thumbright:
 
Thanks Muller. 'Rudi' should look a lot better when finished; I plan to have him in the cockpit of a Hasegawa FW190 eventually. BTW, with the varnish and talc, always use gloss varnish, and 'baby powder', being finer, works better, just make sure you mix it in well. For joint-filling, you want to get the consistency about the same as very thin porridge, or batter. If you want a really fine version, use Johnson's 'Klear' (Future). It works well for very small joints and panel lines, and finds its own level well, but, it obviously isn't as thick as,say, Humbrol ClearCote. The process is great for sealing the grain on Balsa wood as well, for example, on a Balsa 'plug' in a conversion. With a couple of coats of gloss varnish on top, when it's dry and hard, the finish is like polished glass. That's where I got the idea; when making Balsa moulds for canopies.
Cheers,
Terry.
PS post some pics of the Mitsu build if you can.
 
Cheers Terry, I have a tin of humbrol gloss varnish, do you you mix the talcum powder with Klear too?

I'll post a WIP thread here for the T-2. I got an Eduard painted photoetch cockpit detail set for it too. Looks fiddly!! :lol:
 
Terry here is the Tall tail G-6 I was referring to from JG 54, 9 Staffel.

The only real change you would make is to remove the rudder tabs.

Camo RLM 74/75/76
Yellow Number, Vertical III Gruppe bar, Rudder and lower cowl.
Blue Reich defence band.
9 staffel emblem on the cowl (barely visible), Green heart with III Gruppe emblem.
R6 under wing cannon, Gondola just visible under port wing.
R3 Drop tank.

and a profile of a standard G-6 with all the same markings.....as a guide.

Reference : Jagdwaffe Vol 5 Section 1 Defending the Reich.Classic Colours.
 

Attachments

  • JG 54_Bf109G-6_Yellow 9_III Gr.JPG
    JG 54_Bf109G-6_Yellow 9_III Gr.JPG
    85.6 KB · Views: 93
  • Galland 59660090A.JPG
    Galland 59660090A.JPG
    52.2 KB · Views: 101
Thanks very much Wayne. I could do that one, or a 'representative' one from the same Staffel/Gruppe, with the 'Erla' hood. Great stuff! As it happens, I have the right size badge decals! I really appreciate your help mate!
Muller, you can mix the talc with gloss varnish (Humbrol) OR Klear, but not both together! The Humbrol will give a slightly 'heavier' mix, for gaps such as the bottom of fuselage joints and wing roots, the Klear you use for those tiny, 'can't get at the b*****d joints'! You know the type, tailplanes, canopies etc.
Looking forward to your T-2 build.
Cheers,
Terry.
 
Heres another one with the correct canopy! Sorry Terry i was looking more at the tail and colourful scheme,didn't even note the the Bl**dy canopy...

Erich Hartmann's G-6, although it has been mentioned as being a G-14...

Source : More Luftwaffe aircraft in Profile by Claes Sundin
 

Attachments

  • Hartmann.JPG
    Hartmann.JPG
    15.9 KB · Views: 102
Thanks again, Wayne! You're assistance seems endless!
I can never figure out why, but I can't seem to get into modelling Eastern Front, or Med or Italian Fronts! Always want to do Northern Europe, probably because I can associate with the area more. Sdame with the PTO - never touch it!
The way it's looking so far, it's either going to be the kit's JG4 scheme, or a representative late G6 or a G14 of JG54. I like the scheme, and I have the badge decals, in differing scales, in my decal file. I know a purist would scoff, but, as a 'representative', with perhaps a correct block WkNr, and a code number, although both spurious, would look 'right' and be,...representative of the unit/period., being an anonymous pilot's aircraft. The bugbear is the 'Erla' canopy which, although I could change by moulding a new one, I'd prefer to keep, mainly because every '109 I've ever modelled, and at the moment I still have three, not counting this project, has had the framed canopy!
There are a few pics in my references that purport to be G14's or late G6's with the Erla hood, but there's no identification of units and, in some cases, the operational area is unknown too!
Anyway, I have just been experimenting with the Tamiya acrylics, and I think I've got useable mixes worked out for 74/75/76 . I couldn't get some of the colours, so I've started with base colours and blended to suit. A blind man on a galloping horse shouldn't notice any inaccuracies!
Thanks again mate, and if you can find anything else, eg JG53, it's all very welcome!
Cheers,
Terry.
 
Wayne, Wojtek, or anyone else, can you confirm that 9/JG54 still had '109G's in late 1944, and thereby a possibility of one of them having the 'Erla' hood?
The reason I ask is, I have some info, (and a model in fact) that at least part of III Gruppe were equipped with FW190A8's.
From info gained in the late '70's, and a colour profile (which, alas, I no longer have) I built a 1/32nd scale Hasegawa FW190, 'Black 5', of III/JG54, supposedly late '44, IIRC.
I'd like to do the Gustav, with the kit's 'Erla' canopy, in a similar scheme to that supplied by Wayne in the pic and profile above. I'm not that concerned about the period in 1944, but I'd like it to be 'correct' with the 'Erla' canopy, even though it will be a representative aircraft.
Thanks in anticipation. If no info, then it'll probably be the kit JG4 scheme.
I'll be posting a couple of more progress shots a bit later tonight.
Terry.
 
Terry after some more research it seems that III/JG 54 converted to Fw190A-8's around May 44, and in the coming 3-4 months had such severe losses they were withdrawn to re-equip with the D-9 in Sept 44.

So I think the representative aircraft is out the door! The JG 4 is looking good. found some nice late G-6's for JG300 that would work too...
 
Wayne, I think you should change your siggy. It should read "Wayne das Wunderkind"! (think I got the German grammer right!)
That's brilliant mate, when you get a chance, AFTER the competition of course, some pics or details of the JG300 G6's would be most appreciated.
Shame about the JG54 one though, as I had that nice little devil's head badge, and could have made a composite of the Geschwader and Gruppe green heart combination. Still, it's an excuse to get anothe Gustav on the go...
Have a good one at the comp, mate. No doubt we'll see some pics, not just of the other models, but of the pantechnicon you'll be using to carry the cups and prizes in!
Cheers again, and good luck!
Terry.
 
PART FOUR.
With the primer dry it's time to start the first 'real' painting. Following the advice and notes from Wayne, Wojtek and Jan, and after buying those Tamiya acrylics I could get, I experimented with colour mixes. (It would have helped if this numpty had remembered to take the note of the colour numbers with him when he went to the model shop!!)
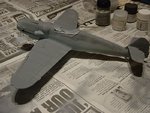
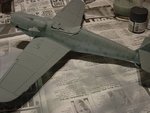
The first colour to go on, following normal procedures, was the lightest, RLM76, (Hellgrau/Weissblau) or as near as possible. With the available colours, white XF-2 was mixed with black XF-1, some medium blue XF-18, and a spot or two of X-4 blue, until a light, grey/blue shade was obtained. This was deliberately mixed lighter in shade than required, to form an undercoat over the light grey enamel primer.
As this is the very first time I have sprayed acrylics, I experimented with the thinning ratios, practicing on an old model kept for this very purpose. The thinners used were a mixture of Tamiya acrylic thinner, to give a smooth and even mix of the paints, then water, poured sparingly into the paint jar, until what seemed like the right consistency was achieved.
Once happy with the results, the first coat was applied to the model Gustav, with the entire fuselage, fin and rudder being painted, as well as the underside of the mainplane and tailplanes. This was a bit hit and miss at first as, the colour being very close to that of the primer, it was difficult to see where the first coat was going! After allowing some time for drying, a further two coats were applied, working around the panel lines, in order to achieve a form of pre-shading.
PICTURES 1 to 2 show the results.
This was left overnight to fully harden, mainly because, by this time, it was 03:00 hours!
The next step was to build up this base colour, and this was achieved by adding some dark grey XF-24 to the mix, with a touch more medium blue XF-18, and lightening the mix with the whiteXF-2.
PICTURES 3 to 4 show this, although the lighting used is not my normal set-up, and the colours still look similar. They appear lighter than required, and this is deliberate, in order to allow for the 'darkening' effect of the clear coats which will eventually follow. Depending on the resulting finish, I estimate up to five coats of clear will be sprayed on; probably two gloss coats, followed, after decalling, by two, or possibly three coats of semi-matt, all of which will be based on Johnson's 'Klear' (Future).
PICTURES 5 to 6 show the beginnings of the first top surface camouflage colour, RLM75 Grey. This was mixed following Wayne's reccommendations, but adjusted slightly due to my not getting all of the correct colours! Again, a little experimentation produced a slightly lighter grey than ultimately required, and this was ghosted onto the fuselage and upper wings and tailplanes, followed by two successive coats, the last one with a little more green XF-26 added. This produced a grey-with-a hint-of-green shade, which is just about discernible in the lighting used for the pics.
Once dry, a further thin coat was added, this time with more dark grey, medium blue and white added to the mix. Again, this is slightly lighter than usual, and allows the greenish tint to just 'show through'. Notice some slight streaking, which will be rectified during the next spraying session; that's my fault, as I had the airbrush at the wrong angle!
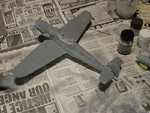
Finally, before finishing ready for the next, darker shade of grey, RLM 74, the existing mix was lightened slightly, and the first light mottle applied to the fuselage sides, blending into the upperdecking colour. This is shown in PICTURE 7.
Once the final topside colour is applied to the fuselage and wings, the fuselage sides will be lightly retouched around the base and the tailplane area, using the RLM76 mix, then the darker mottle will be sprayed on.
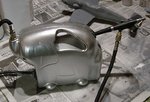
The final picture shows the little gem of a compressor used to do the work. It's the very cheap one I bought a few weeks ago, for £42 new ($73 U.S.), and has proven to be brilliant!
Over the weekend, I hope to bring you the next part, showing the final main painting stages, together with the work on some of the detail items, including the scratch-built shoulder harness.
There's still a fair way to go on the painting, varnishing and finishing but, up to now, this kit has been a joy to work with. I have to keep reminding myself that it's a less than £10 cheapo kit, cheaper than some smaller-scale kits, and I think it's going to turn out rather nice (barring my making a right b***s of it somewhere along the line!).
Terry.
 

Attachments

  • 21 Gustav 068.jpg
    21 Gustav 068.jpg
    122.3 KB · Views: 83
  • 21 Gustav 069.jpg
    21 Gustav 069.jpg
    123.2 KB · Views: 80
  • 21 Gustav 070.jpg
    21 Gustav 070.jpg
    101.1 KB · Views: 77
  • 21 Gustav 073.jpg
    21 Gustav 073.jpg
    565.4 KB · Views: 77
  • 21 Gustav 074.jpg
    21 Gustav 074.jpg
    573 KB · Views: 82
  • 21 Gustav 071.jpg
    21 Gustav 071.jpg
    87.1 KB · Views: 80
  • 21 Gustav 072.jpg
    21 Gustav 072.jpg
    505.8 KB · Views: 83
OOPS!
It would seem I made a b***s up and selected the wrong pics!
I also seem to have lost the ones showing the first coats of RLM76, and, I can't figure out how to delete the pics from the immediateley previous post. (If Admin/ mods can do so, thank you!)
So, here's what I have got, in the rough order listed in the previous post.
PICTURES 1 to 6 show the first build up of the RLM75 Grey over the base colour of RLM 76 as described.
PICTURE 7 shows the first light mottle of the 'lightened' RLM75.
PICTURE 8 is the tiny compressor, with the airbrush in the integral holder.
Sincere apologies for my blunder!
Terry.
 

Attachments

  • 21 Gustav 068.jpg
    21 Gustav 068.jpg
    122.3 KB · Views: 76
  • 21 Gustav 069.jpg
    21 Gustav 069.jpg
    123.2 KB · Views: 78
  • 21 Gustav 070.jpg
    21 Gustav 070.jpg
    101.1 KB · Views: 78
  • 21 Gustav 073.jpg
    21 Gustav 073.jpg
    126.6 KB · Views: 72
  • 21 Gustav 074.jpg
    21 Gustav 074.jpg
    131.7 KB · Views: 75
  • 21 Gustav 075.jpg
    21 Gustav 075.jpg
    117 KB · Views: 78
  • 21 Gustav 072.jpg
    21 Gustav 072.jpg
    105.2 KB · Views: 76
  • 21 Gustav 071.jpg
    21 Gustav 071.jpg
    87.1 KB · Views: 72

Users who are viewing this thread

Back