**** DONE: 1/48 Bf109E-4 Kommandeur Hauptmann Hans von Hahn 1./JG3 Aug 1940 BoB GB (1 Viewer)

Ad: This forum contains affiliate links to products on Amazon and eBay. More information in Terms and rules

ozhawk40

Master Sergeant
Username: Ozhawk40
First name: Peter
Category: Intermediate
Scale: 1:48
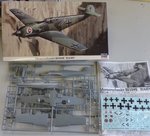
Manufacturer: Hasegawa
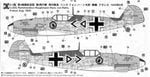
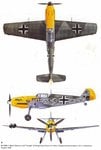
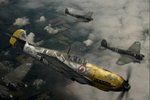
Model Type: Bf109E-4
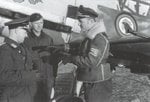
Details: 1./JG3 France August 1940
Aircraft Assignment: Kommandeur Hauptmann Hans von Hahn
Accessories: None
Decals: Hasegawa​

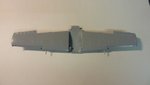
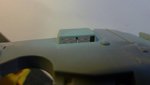
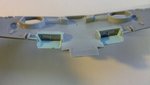
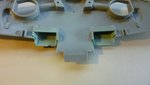
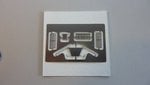
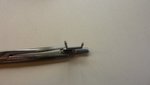
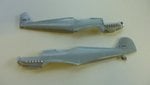
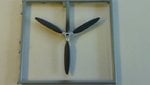
Here we go again, again! Second build for this GB. This just has to be a '109. Well why not - everyone has one.:lol: This one is being built straight from the box with markings provided in the kit. I won't start until the Hurri is done, but that's not too far away.

Cheers

Peter
 

Attachments

  • start 001 - resized.jpg
    start 001 - resized.jpg
    92.7 KB · Views: 416
  • hasegawa paint instruct.jpg
    hasegawa paint instruct.jpg
    60.1 KB · Views: 759
  • Hans von Hahn pic.jpg
    Hans von Hahn pic.jpg
    60.4 KB · Views: 705
  • osprey profile.jpg
    osprey profile.jpg
    75.1 KB · Views: 510
  • OleoBf109E-4JG3HansvonHahn.jpg
    OleoBf109E-4JG3HansvonHahn.jpg
    55.5 KB · Views: 456
Last edited:
Nice one Peter. If you mess up on the decals (not that you will of course!), I still have the spare ones from my kit. I seem to remember it was a nice kit to build, but looking at it now, I notice the instrument panel has the small bomb selector/ arming panel on the bottom, which I forgot to remove at the time!
 
Cheers guys, I'm looking forward to it too.

Nice one Peter. If you mess up on the decals (not that you will of course!), I still have the spare ones from my kit. I seem to remember it was a nice kit to build, but looking at it now, I notice the instrument panel has the small bomb selector/ arming panel on the bottom, which I forgot to remove at the time!

Thanks for the offer T, it has been known to happen...err... more than once!8)

Cheers

Peter
 
Okay....


Progress at last.

Pic 1
Hasegawa prodie this photo-etch standard with the kit. It includes the radiator and oil cooler grills and the armour plate for the canopy.

Pic 2
I pre painted the inside of the radiator exits RLM65. I used Humbrol 65 which went on okay :rolleyes: surprise.

Pic 3
Grills installed with CA glue.

Pic 4
The view from the front of the installed grills. The fit was very good and they look the part.

Pic 5
Once the grills are installed you can assemble the wings. Fit is great - no problems thus far.

Pic 6
Interior parts laid out. Reasonable level of detail, if a bit plain. I added dimples to the outer surface of the oxygen regulator.

Pic 7
Interior is painted mostly RLM02 which I made up using a mixture of tamiya paints. A 50/50 mix of XF22 and XF49. Instrument panel was painted and decal from Hasegawa added. I had designs of drilling out the hole pattern on the rudder pedals, but realised that is just would not be seen when assembled. I was not crazy about the detail for the seat belts moulded onto the seat, but left this also and I painted them Khaki with grey metal details.

Pic 8
Cockpit interior assembled and ready to fit to the fuselage.
 

Attachments

  • wings assembled - resized.jpg
    wings assembled - resized.jpg
    21.9 KB · Views: 270
  • radiator exits  3- resized.jpg
    radiator exits 3- resized.jpg
    23.6 KB · Views: 265
  • radiator exits  2- resized.jpg
    radiator exits 2- resized.jpg
    29.9 KB · Views: 271
  • radiator exits - resized.jpg
    radiator exits - resized.jpg
    35.5 KB · Views: 252
  • photo etch 001 - resized.jpg
    photo etch 001 - resized.jpg
    30.7 KB · Views: 291
  • interior 001 - resized.jpg
    interior 001 - resized.jpg
    24.4 KB · Views: 247
  • interior 002 - resized.jpg
    interior 002 - resized.jpg
    22.8 KB · Views: 276
  • interior 004 - resized.jpg
    interior 004 - resized.jpg
    22.3 KB · Views: 242
I missed this announcement somehow. Nice start Peter.

I guess we're close to operational status now. We have enough 109's for 3 Schwarmen and a few spares to boot!
 
Thanks guys.

Moving right along...

Pic 1
Fuselage halves ready to go. Fit is good, but I'm not wild about the tail wheel as it strangely comes pre-attached to one half. Unusual. Weird.

Pic 2
Fuselage together with cockpit pod, wings and tail feathers added. I've painted the leading edge slat area RLM02.

Pic 3
I took a leaf out of Wayne's book and added the panel line top and bottom. Even used Wayne's method but it failed - too much glue!:| Still, a bit of a run with the scribing tool sorted it out nicely.:)

Pic 4
Drilled out the cannon and machine gun barrels. Trickiest bit so far. I'm glad that's over with.

Pic 5
Progress with the prop. Blades are black/green, but look darker in the photos

End of update.8)

Cheers

Peter
 

Attachments

  • barrel drilled - resized.jpg
    barrel drilled - resized.jpg
    22.9 KB · Views: 249
  • fuselage 003 - resized.jpg
    fuselage 003 - resized.jpg
    33.3 KB · Views: 203
  • fuselage 002 - resized.jpg
    fuselage 002 - resized.jpg
    45.3 KB · Views: 210
  • fuselage 001 - resized.jpg
    fuselage 001 - resized.jpg
    26.2 KB · Views: 199
  • prop 001 resized.jpg
    prop 001 resized.jpg
    36.7 KB · Views: 240
Last edited:
Nice work Peter. It's a 'fingers crossed' exercise drilling those small barrels - one slip and it's curtains (Not pink ones either !)
 

Users who are viewing this thread

Back