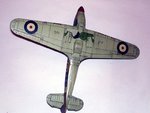
**** DONE: 1/48 Hurricane Mk1 V6555 S/L RR Stanford Tuck BoB GB

Ad: This forum contains affiliate links to products on Amazon and eBay. More information in Terms and rules

The 'old' original 'real' Humbrol will have the address shown as Humbrol, Marfleet, Hull. The current paint, marketed under the Humbrol name by Hornby, who now own the Humbrol name, and Airfix, will have their address on the tin, which is Hornby Products, Margate, Kent.
 
Good deai Terry for I have some old tins and this stuff just does not go bad and I still use on some of the ships and Luft planes occassionally.Cheers ;)

Hey Pete my son still has the plane he's probably had it for 12yrs now he just will not let go of them and he can not tell me why??Now this was the very first plane I ever did this too but it sure made it look like she had been fliying so try it on an old kit first.
 

Attachments

  • Spee 005_edited (800 x 599).jpg
    Spee 005_edited (800 x 599).jpg
    62.3 KB · Views: 186
Last edited:
Oh yeah, that's one dirty bird!:lol: I like it.

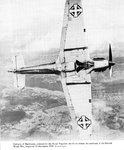
The old Hurries did seem to have a problem with leaking oil over their undersides. Here's a pic of a rag wing Hurri on/before (?) delivery to the Yugoslav air force. See the oil mess just in front of the carb intake that streams back over the wheel covers. I gather this is typical. Note the mess behind the radiator also. I'm not sure what this could be - coolant overflow? Anyway classic shot and shows just how messy even a new one can be.

Cheers

Peter
 

Attachments

  • hurricane underneath.jpg
    hurricane underneath.jpg
    123.8 KB · Views: 154
Last edited:
Update for this week. I have just been concentrating on all the fiddly details. Straight to the pics.8)

Pic 1
The underneath I added streaks, oil and dirt using Tamiya 'smoke'. I did this before applying the final coat of future because the 'smoke' is semi-gloss.

Pic 2
Wider view of underneath. I highlighted the flap and aileron hinges, elevators and some streaks behind the radiator.

Pic 3
I added the exhaust, and applied a wash to most of the panel lines and followed this with exhaust stains very subtly. Next I did only a small amount of paint chipping on the cowl fasteners.

Pic 4
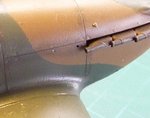
Wing leading edges received a light coat of smoke, gun ports with faint gun smoke stains, some paint chipping but not much.

Pic 5
Front leading edge of the undercarriage doors get oil stains also.

Pic 6
Paint chipping to wing root, exhaust stains and small chips around the gun bay doors and walkways.

Pic 7
Overall view after the last coat of future. I left a very low sheen on it, much less than semi gloss and not quite full matt.

Pic 8
Refit the prop and I thinks it's about time to call it finished.

Thanks for the encouragement and advice on this entry. The Hasegawa Hurricane is a great kit, it's got a couple of 'funnies' but an enjoyable build for sure. 8)

Cheers

Peter
 

Attachments

  • final details 006 resized.jpg
    final details 006 resized.jpg
    53.2 KB · Views: 155
  • final details 005 resized.jpg
    final details 005 resized.jpg
    58.5 KB · Views: 146
  • final details 007 resized.jpg
    final details 007 resized.jpg
    76.3 KB · Views: 159
  • final details 010 resized.jpg
    final details 010 resized.jpg
    58.6 KB · Views: 150
  • final details 011 resized.jpg
    final details 011 resized.jpg
    62.6 KB · Views: 143
  • final details 004 resized.jpg
    final details 004 resized.jpg
    76.7 KB · Views: 149
  • final details 008 resized.jpg
    final details 008 resized.jpg
    64.2 KB · Views: 160
  • final details 009 resized.jpg
    final details 009 resized.jpg
    60.5 KB · Views: 154

Users who are viewing this thread

Back