- Thread starter
- #21
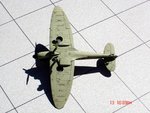
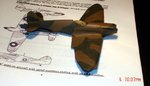
Now I do not know what all you goons  have been doing out there but I have been hard at work here.
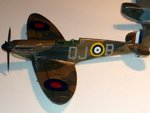
I tried something a little different tonight I hand painted the outline of the camo using the guidelines and pics Terry through out there.The paint has to go down flat and what I did was paint the line then stroke it back to the center of the color;the camo section.Now once the pattern was laid out I went to the air brush dual action @15psi and thin lines filled it in.Some areas I might of had to do them up 3X times to a point I was satisfied.I would usually make mask for a 1/72 scale for I believe that in this small of scale the demarcation lines should be hard.
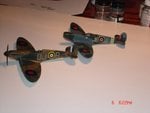
Oh ya see how in the 23 pic no tape what did I tell you I cannot wait to get that stuff off and look at the results probably was not even 10mins.
have been doing out there but I have been hard at work here.I tried something a little different tonight I hand painted the outline of the camo using the guidelines and pics Terry through out there.The paint has to go down flat and what I did was paint the line then stroke it back to the center of the color;the camo section.Now once the pattern was laid out I went to the air brush dual action @15psi and thin lines filled it in.Some areas I might of had to do them up 3X times to a point I was satisfied.I would usually make mask for a 1/72 scale for I believe that in this small of scale the demarcation lines should be hard.
Oh ya see how in the 23 pic no tape what did I tell you I cannot wait to get that stuff off and look at the results probably was not even 10mins.
Attachments


Last edited: