**** DONE: 1/48 Messerschmitt Bf 110 G-2 - Me/ Fw Group Build. (1 Viewer)

Ad: This forum contains affiliate links to products on Amazon and eBay. More information in Terms and rules

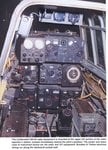
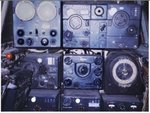
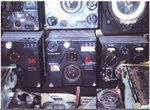
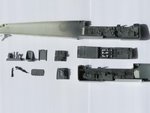
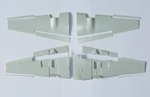
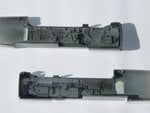
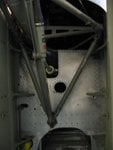
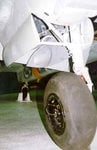
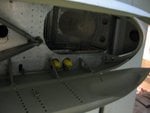
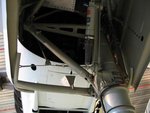
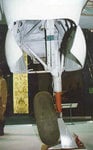
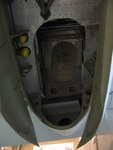
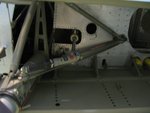
You're right regarding the radios and the flaps. The top section on the radio fit is the radar monitor (shown without the rubber shroud) and it's tuning controls. And yes, the rear of the nacelle hinged into the main nacelle when the flaps were deployed.
 
Hopefully these are what you are looking for? From Squadron's Walk Around Series - Bf 110G, pages 20 21

BTW, that's an awesome set of resin parts!
 

Attachments

  • Bf 110 a.jpg
    Bf 110 a.jpg
    85.1 KB · Views: 386
  • Bf 110 b.jpg
    Bf 110 b.jpg
    36.2 KB · Views: 279
  • Bf 110 c.jpg
    Bf 110 c.jpg
    36.7 KB · Views: 255
Last edited:
Thanks, Terry, Andy and Vic. Excellent references Andy, they should be a real help. Hope you had a good trip to Toronto, I'm assuming you're back home now?

Yup, I'm back. Took 1182 pictures at the airshow and will need to weed thru the lot and post some of the better ones.

Great refrence shots David. Looks like the makers of Il-2 used them for their pit modeling!
 
Thanks, Wayne, Andy and Jerry. Terry, thanks for that confirmation. David, thank you for those great shots of the rear cockpit and Radio/Radar installation That should really help me with my detailing.
 
So here's the first pictures from this build. They're pretty basic, but that's as far as I've got at the moment.

Picture 1. All of the resin elements for the cockpit have been cut and given some paint. First, everything was given a coat of Halford's plastic primer to make sure the Tamiya acrylics took. Then I mixed some Tamiya XF 63 German Grey and XF 54 Dark Sea Grey in a ratio of 3:1, for a scale version of RLM 66 which was then airbrushed. The radar units have been removed from the top of the radio stack and the excess resin has been removed from the floor section, leaving the gun bay see-through. I'm still dry-fitting and testing, so nothing has been cemented yet, but it all seems to fit snugly.

Picture 2. Close ups of the cockpit walls. I sprayed some straight Tamiya XF 63 into the recesses to shade. Some darker greys still to be used for shadows, before I start the colouring and highlighting. As yet, none of the PE levers have been added.

Picture 3. Just thought I'd put this in for interest. It's the cross section of the cockpit floor. The red indicates the amount of resin plug that had to be removed from the bottom. As you can see, if you cut straight across, the gun bay would have been destroyed. As it is, to get this part to fit in the fuselage, it has to be thinned to about 1.5mm. So when it's done, there's very little strength left in the piece.

Picture 4. The work I did on the wings, showing the flaps and slats cut. The tricky bits were the angles on the bottom flaps and the thin bottom slats, which you can see, are just slivers of plastic. The trick now is to get them back together again!

That's it for the moment. I want to finish the cockpit then get the flaps and slats together then take it from there.

If anyone has references for the wheelwells and undercarriage, I'd be really grateful as I haven't managed to dig out anything myself for those parts.

Cheers, Gerry :D
 

Attachments

  • All cockpit pieces.jpg
    All cockpit pieces.jpg
    53.4 KB · Views: 307
  • Cut flaps and slats.jpg
    Cut flaps and slats.jpg
    35.9 KB · Views: 324
  • Cockpit floor section.jpg
    Cockpit floor section.jpg
    20.9 KB · Views: 304
  • Cockpit walls RLM 66.jpg
    Cockpit walls RLM 66.jpg
    57.4 KB · Views: 320
Looks good Gerry. Here's what I have on the wheel wells.
 

Attachments

  • IMG_7620.JPG
    IMG_7620.JPG
    26.5 KB · Views: 230
  • detail_bf110g_08.jpg
    detail_bf110g_08.jpg
    11.4 KB · Views: 244
  • IMG_7618.JPG
    IMG_7618.JPG
    19.1 KB · Views: 229
  • IMG_7622.JPG
    IMG_7622.JPG
    34.5 KB · Views: 242
  • detail_bf110g_09.jpg
    detail_bf110g_09.jpg
    11.2 KB · Views: 253
  • IMG_7621.JPG
    IMG_7621.JPG
    26.5 KB · Views: 238
  • IMG_7619.JPG
    IMG_7619.JPG
    21.1 KB · Views: 229
Thanks, David, Cory, Jerry and Wayne. Andy, great photos, much better than I could have hoped for. I can see already some drilling will be required and I would never have foreseen the bare metal roofs to the wells. Thanks, mate.
 
Note that those bare metal panels might have been left like that during the restoration - just a thought. Not normal for Luftwaffe aircraft to not have at least a primer in areas subject to the effects of the elements.
 

Users who are viewing this thread

Back