Vic Balshaw
Major General
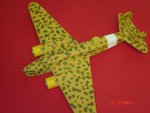
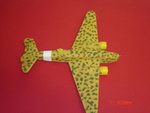
Good on you Kevin, it's looking very neat.
Follow along with the video below to see how to install our site as a web app on your home screen.
Note: This feature may not be available in some browsers.
Ad: This forum contains affiliate links to products on Amazon and eBay. More information in Terms and rules
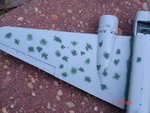
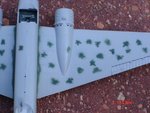
 I get to freehand this camo.I was thinking of making some stencils but started playing around with the adjustments,pressure and fluid consistency and actually got it to work quite well.I will try to post some pics of the demo tomorrow it's 11PM for me right now time for some CMist methinks.
")